Donkey Puppet Building Photos
صور بناء دمية الحمار
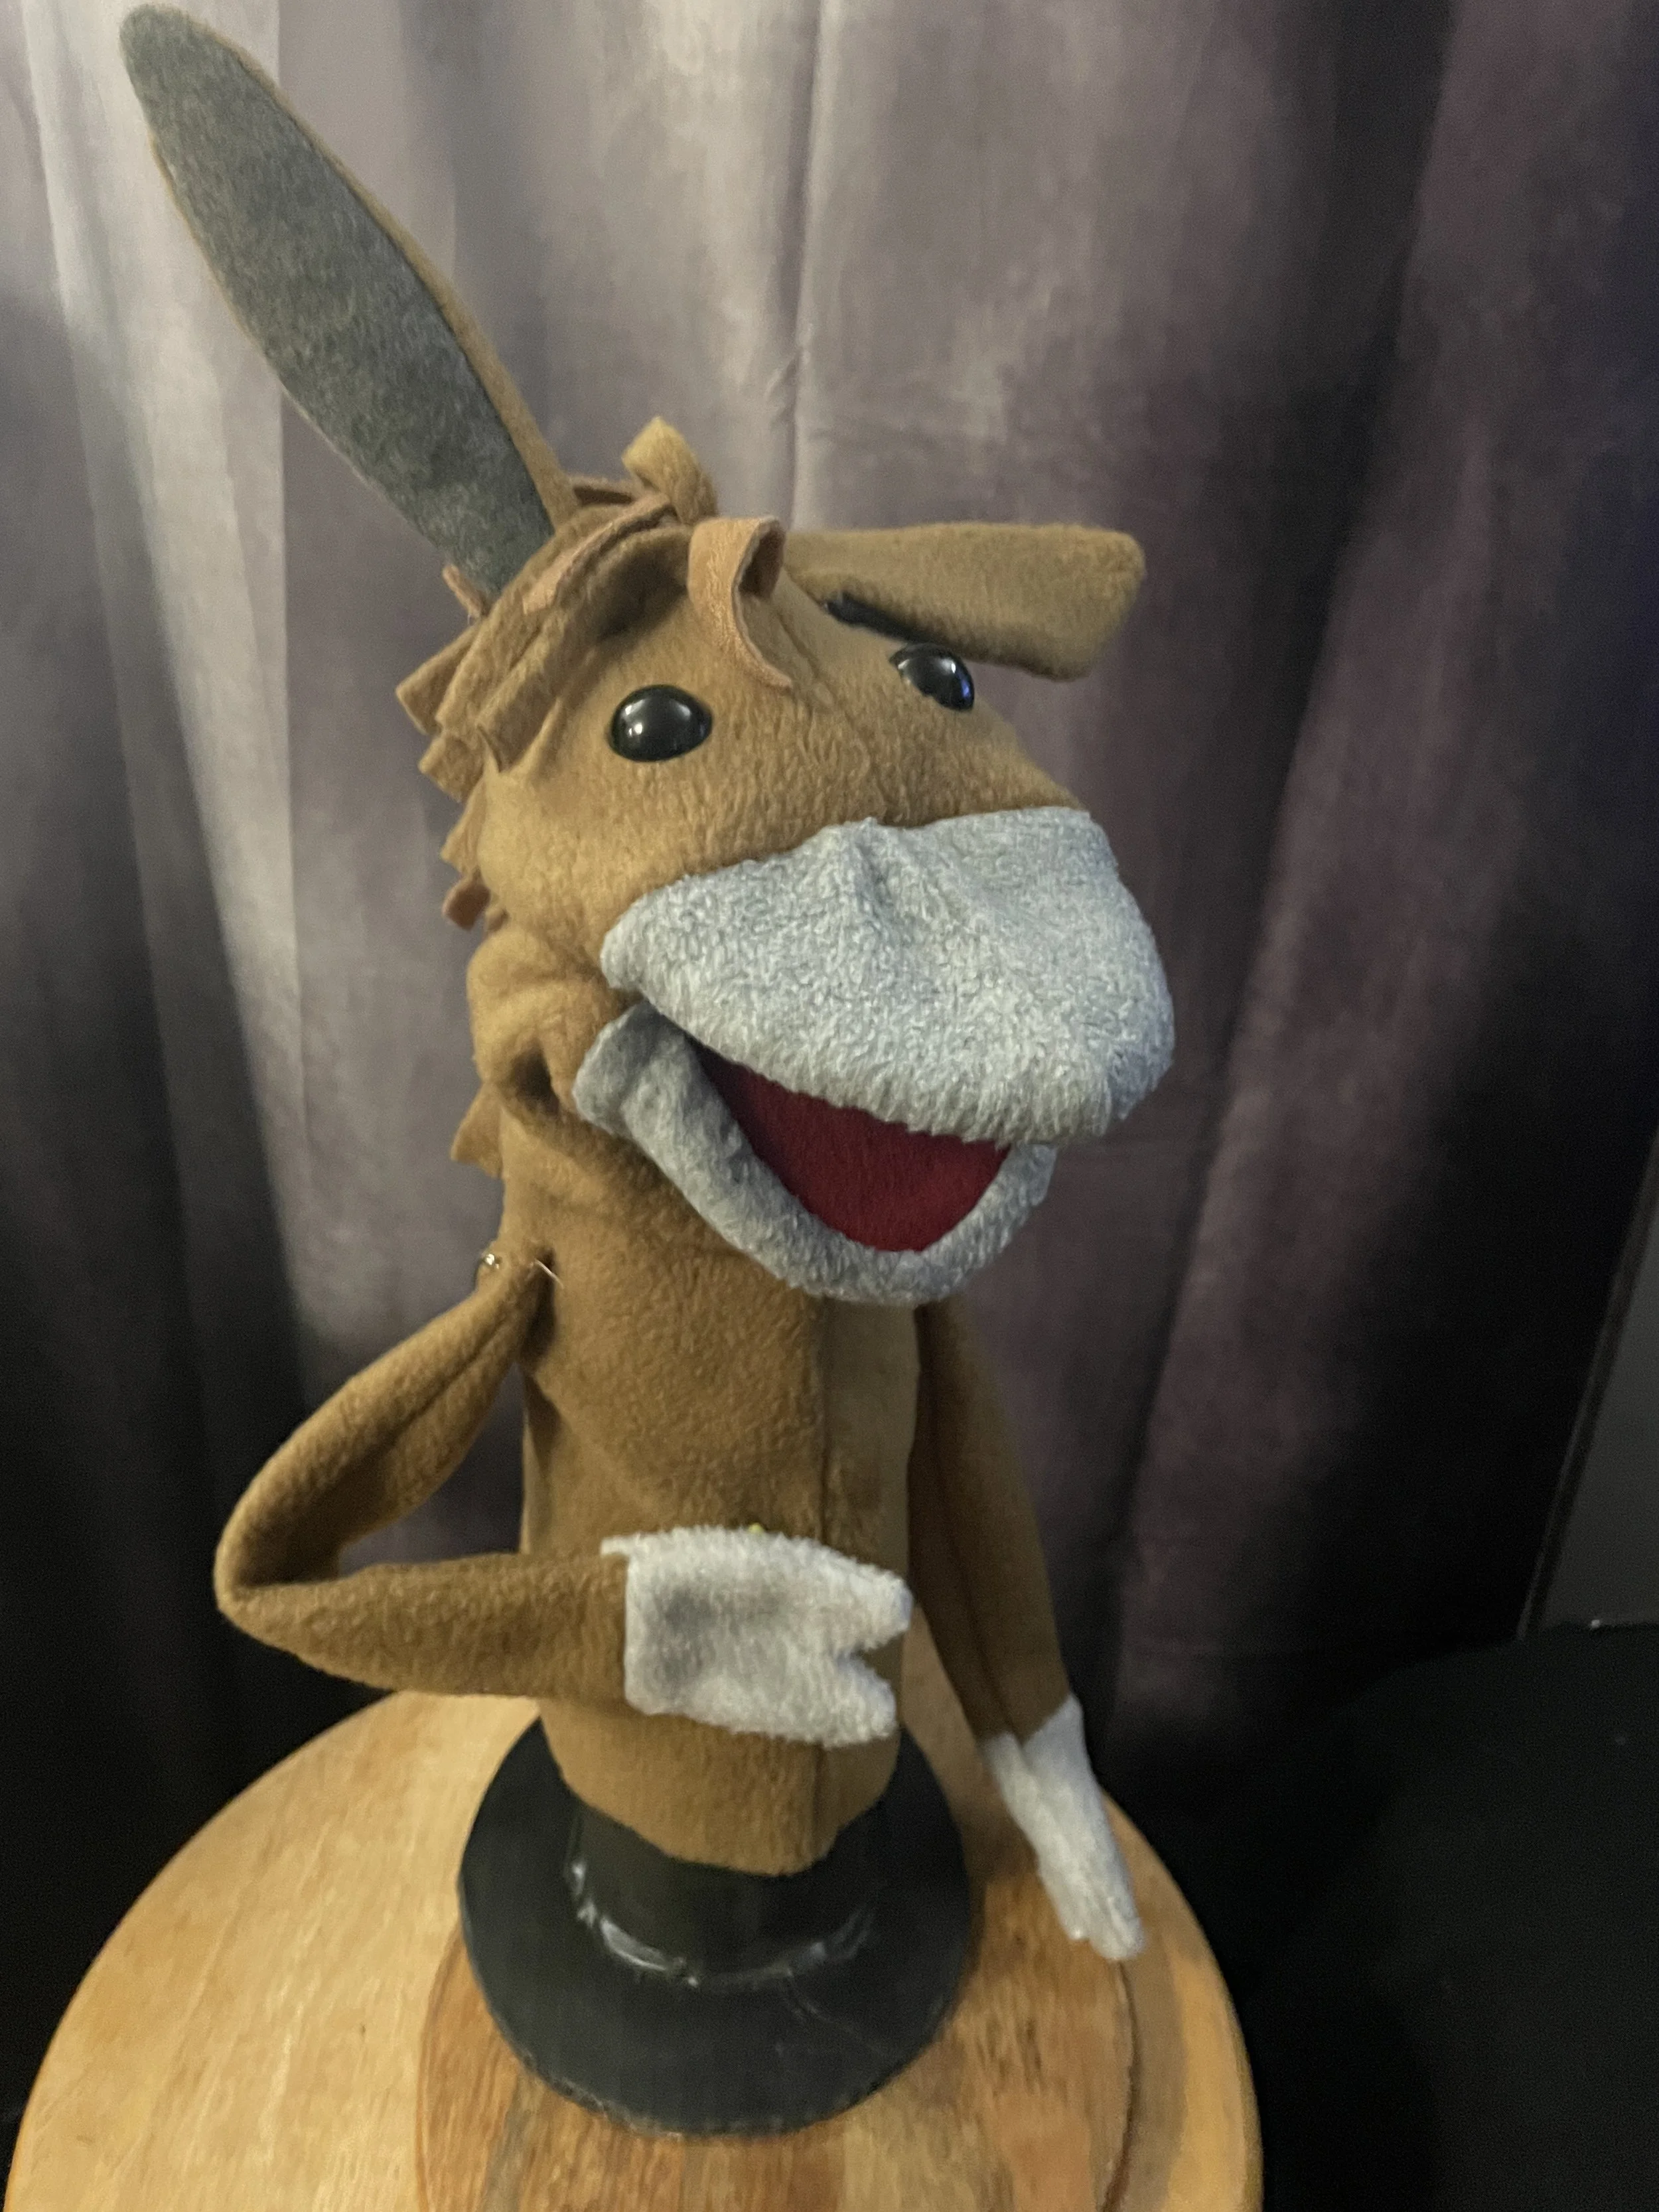
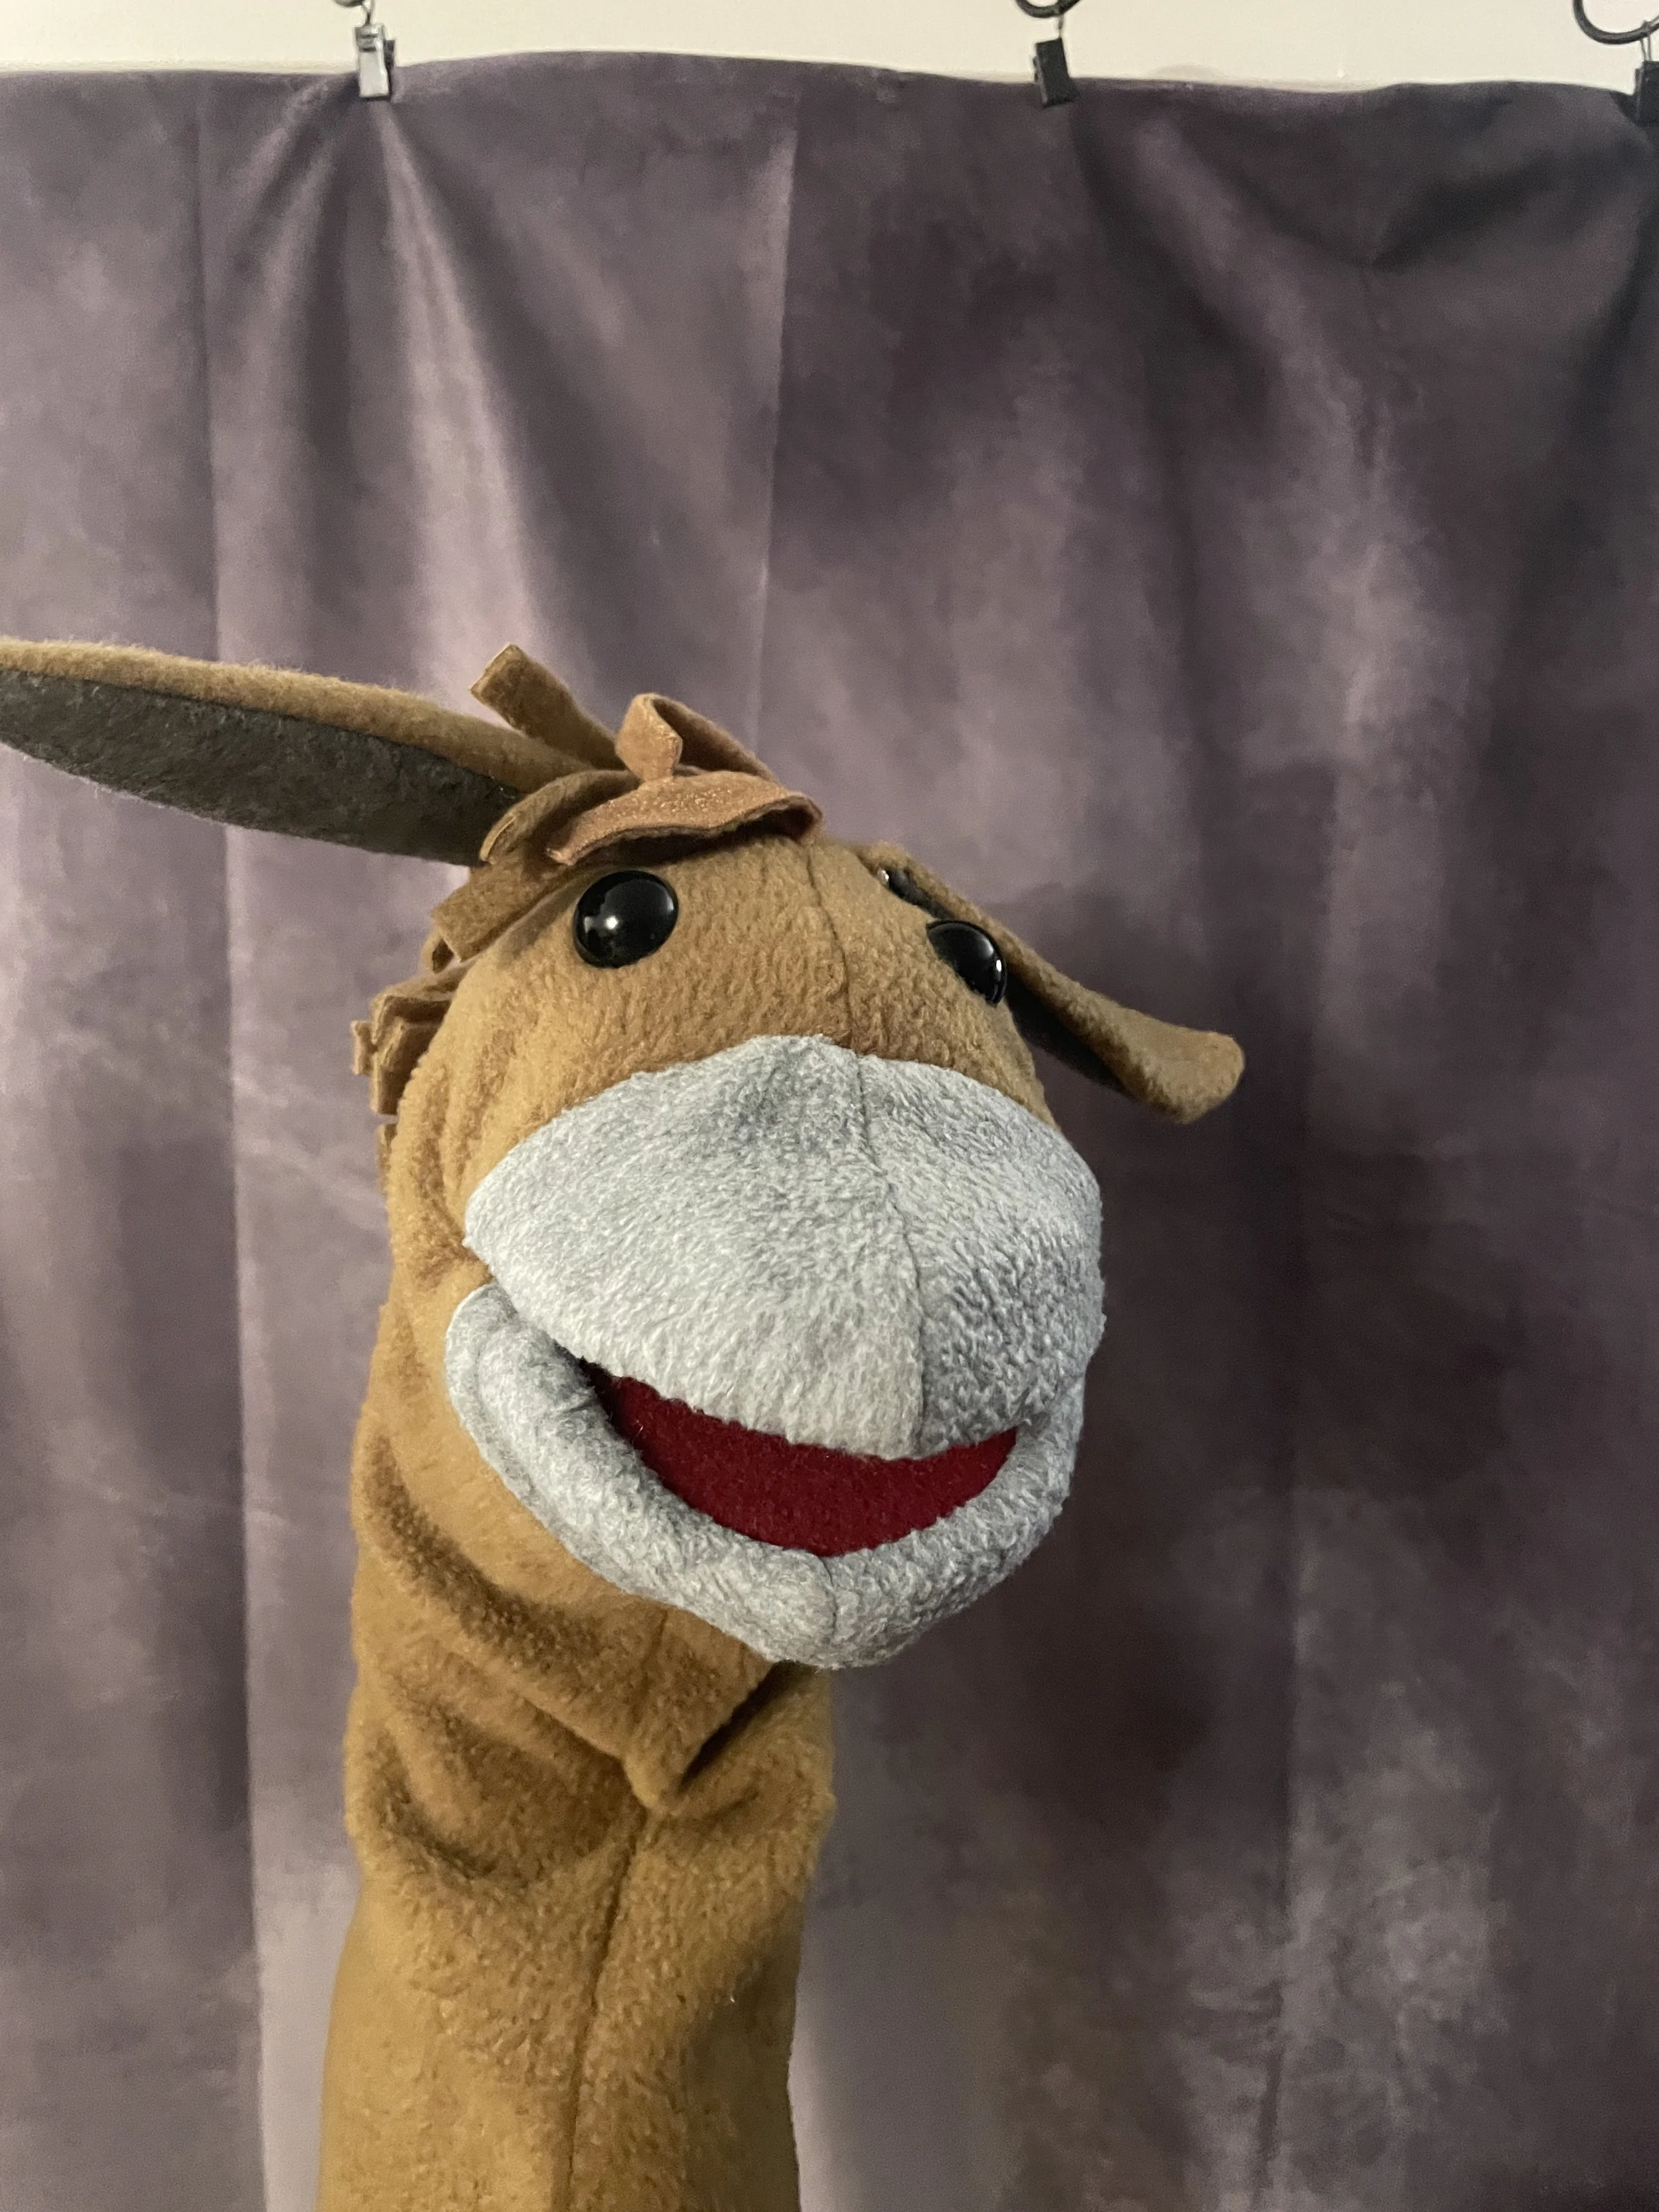
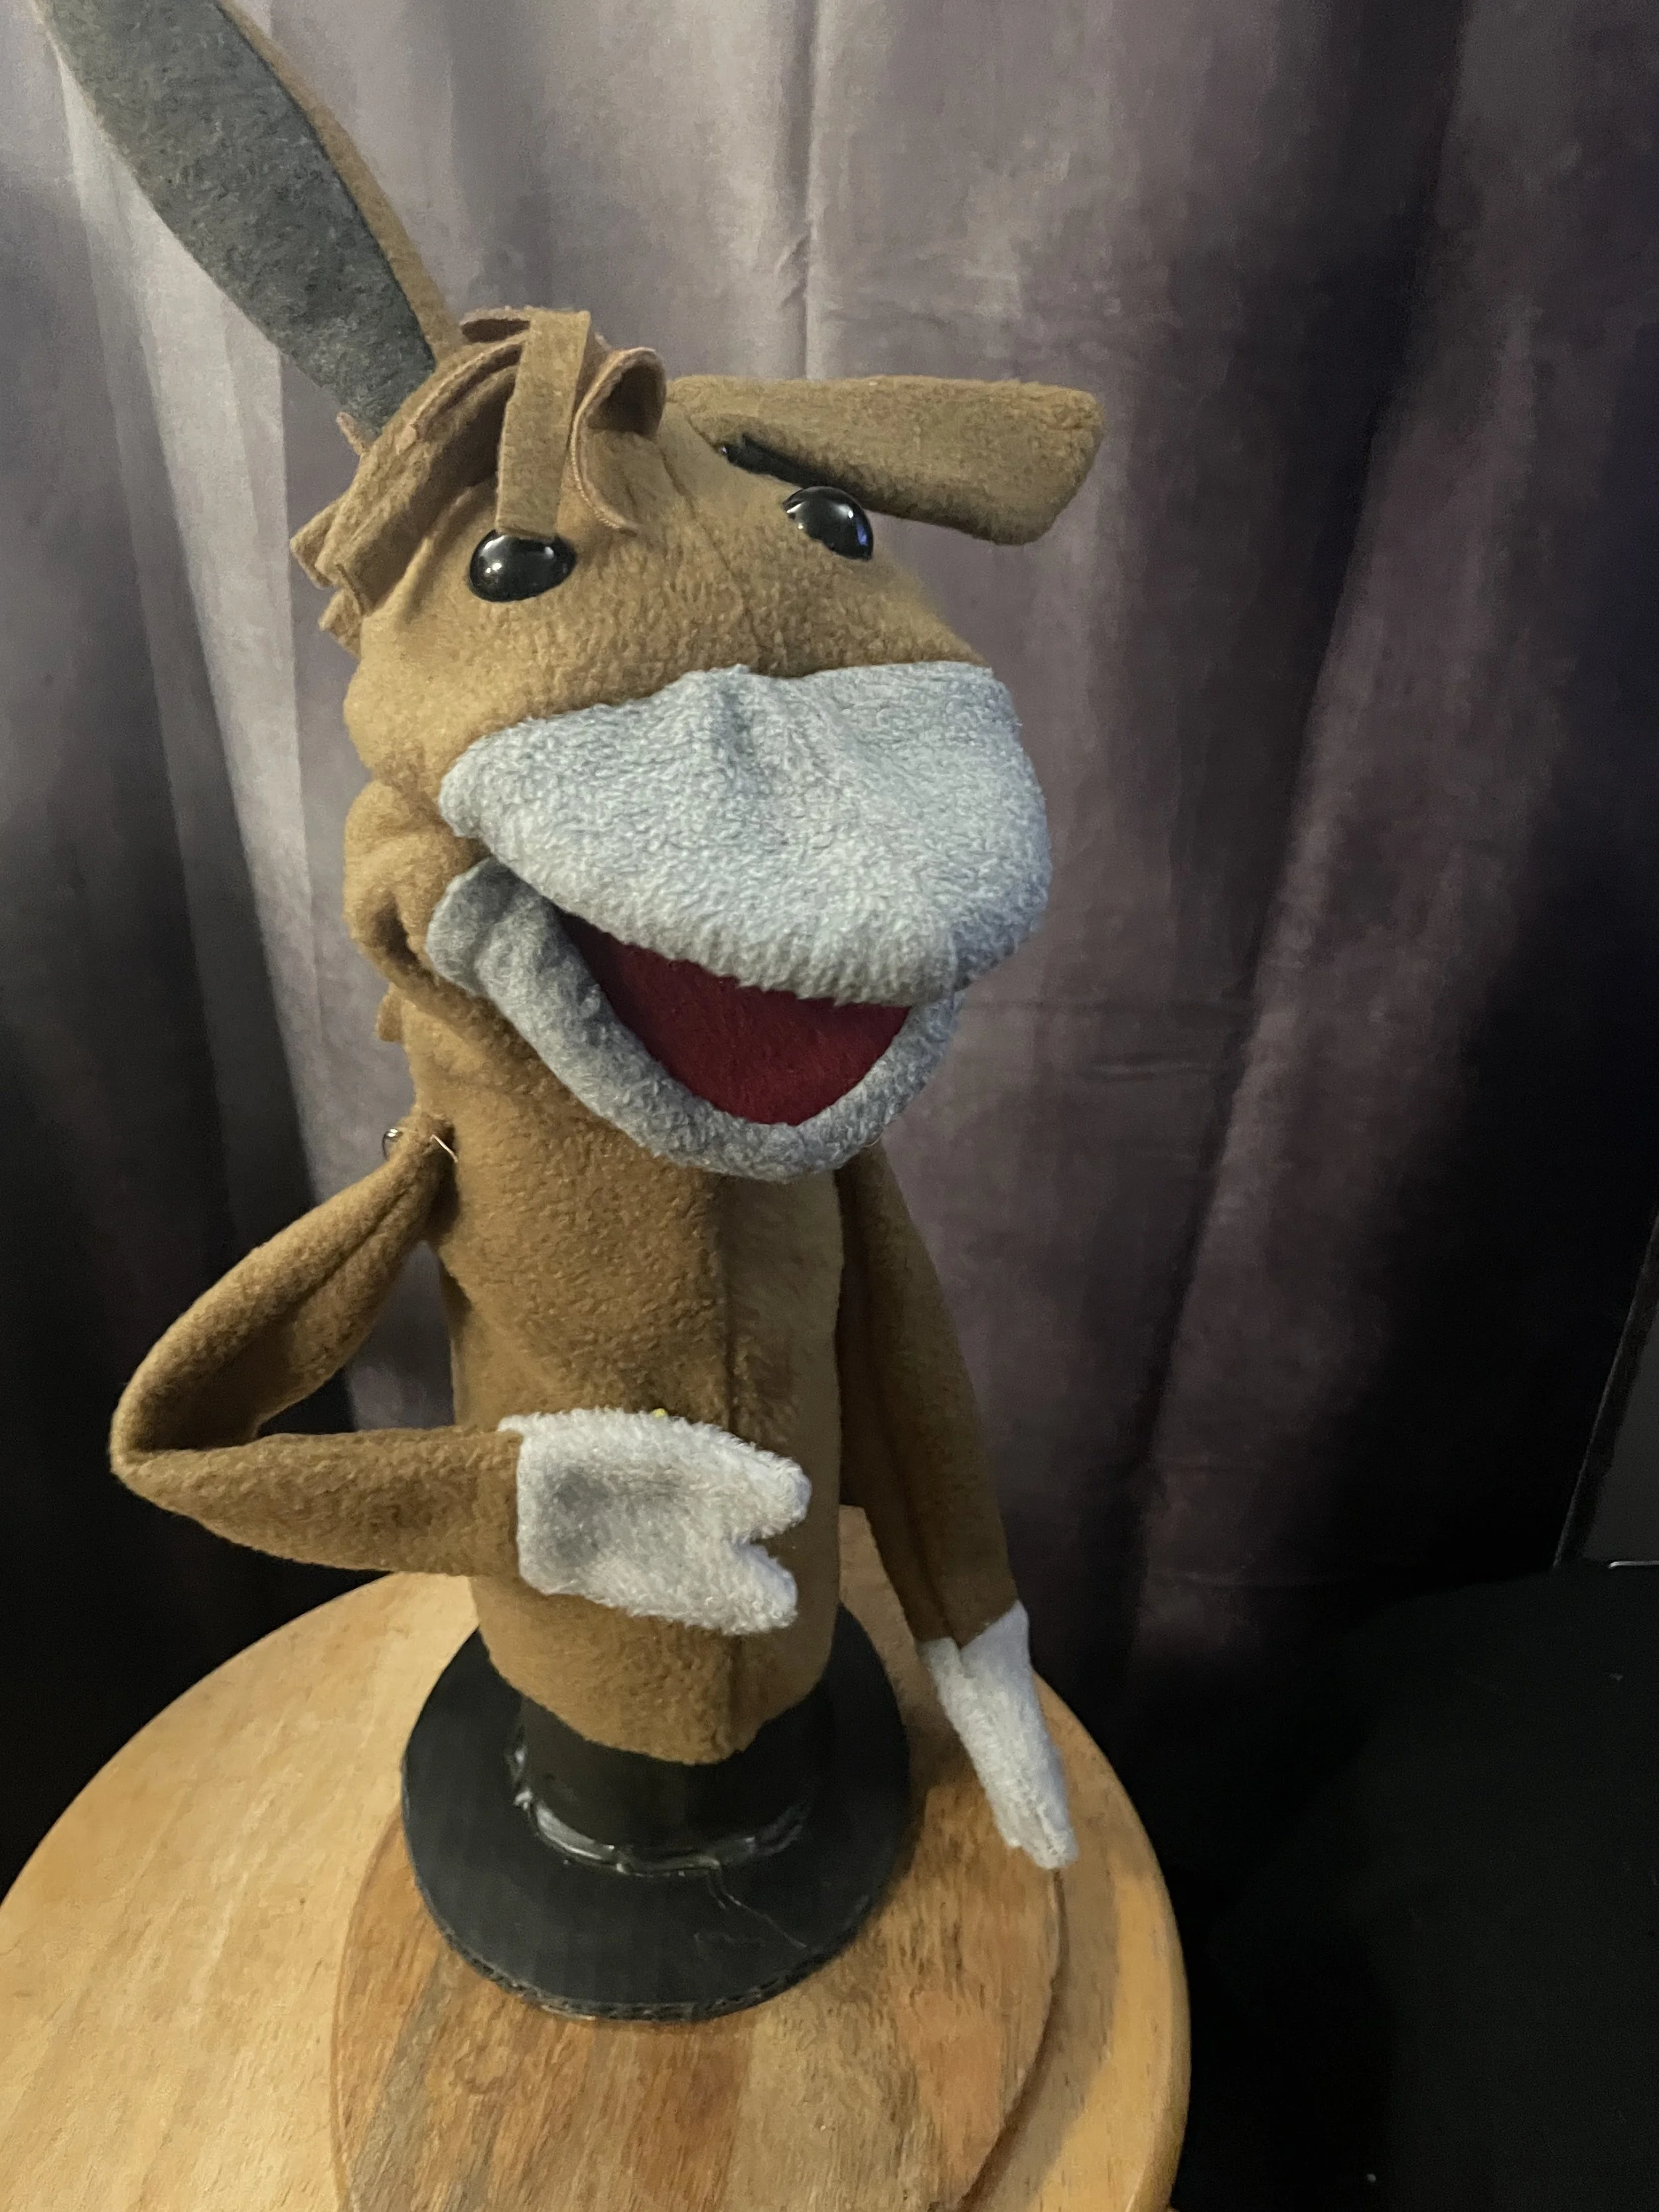
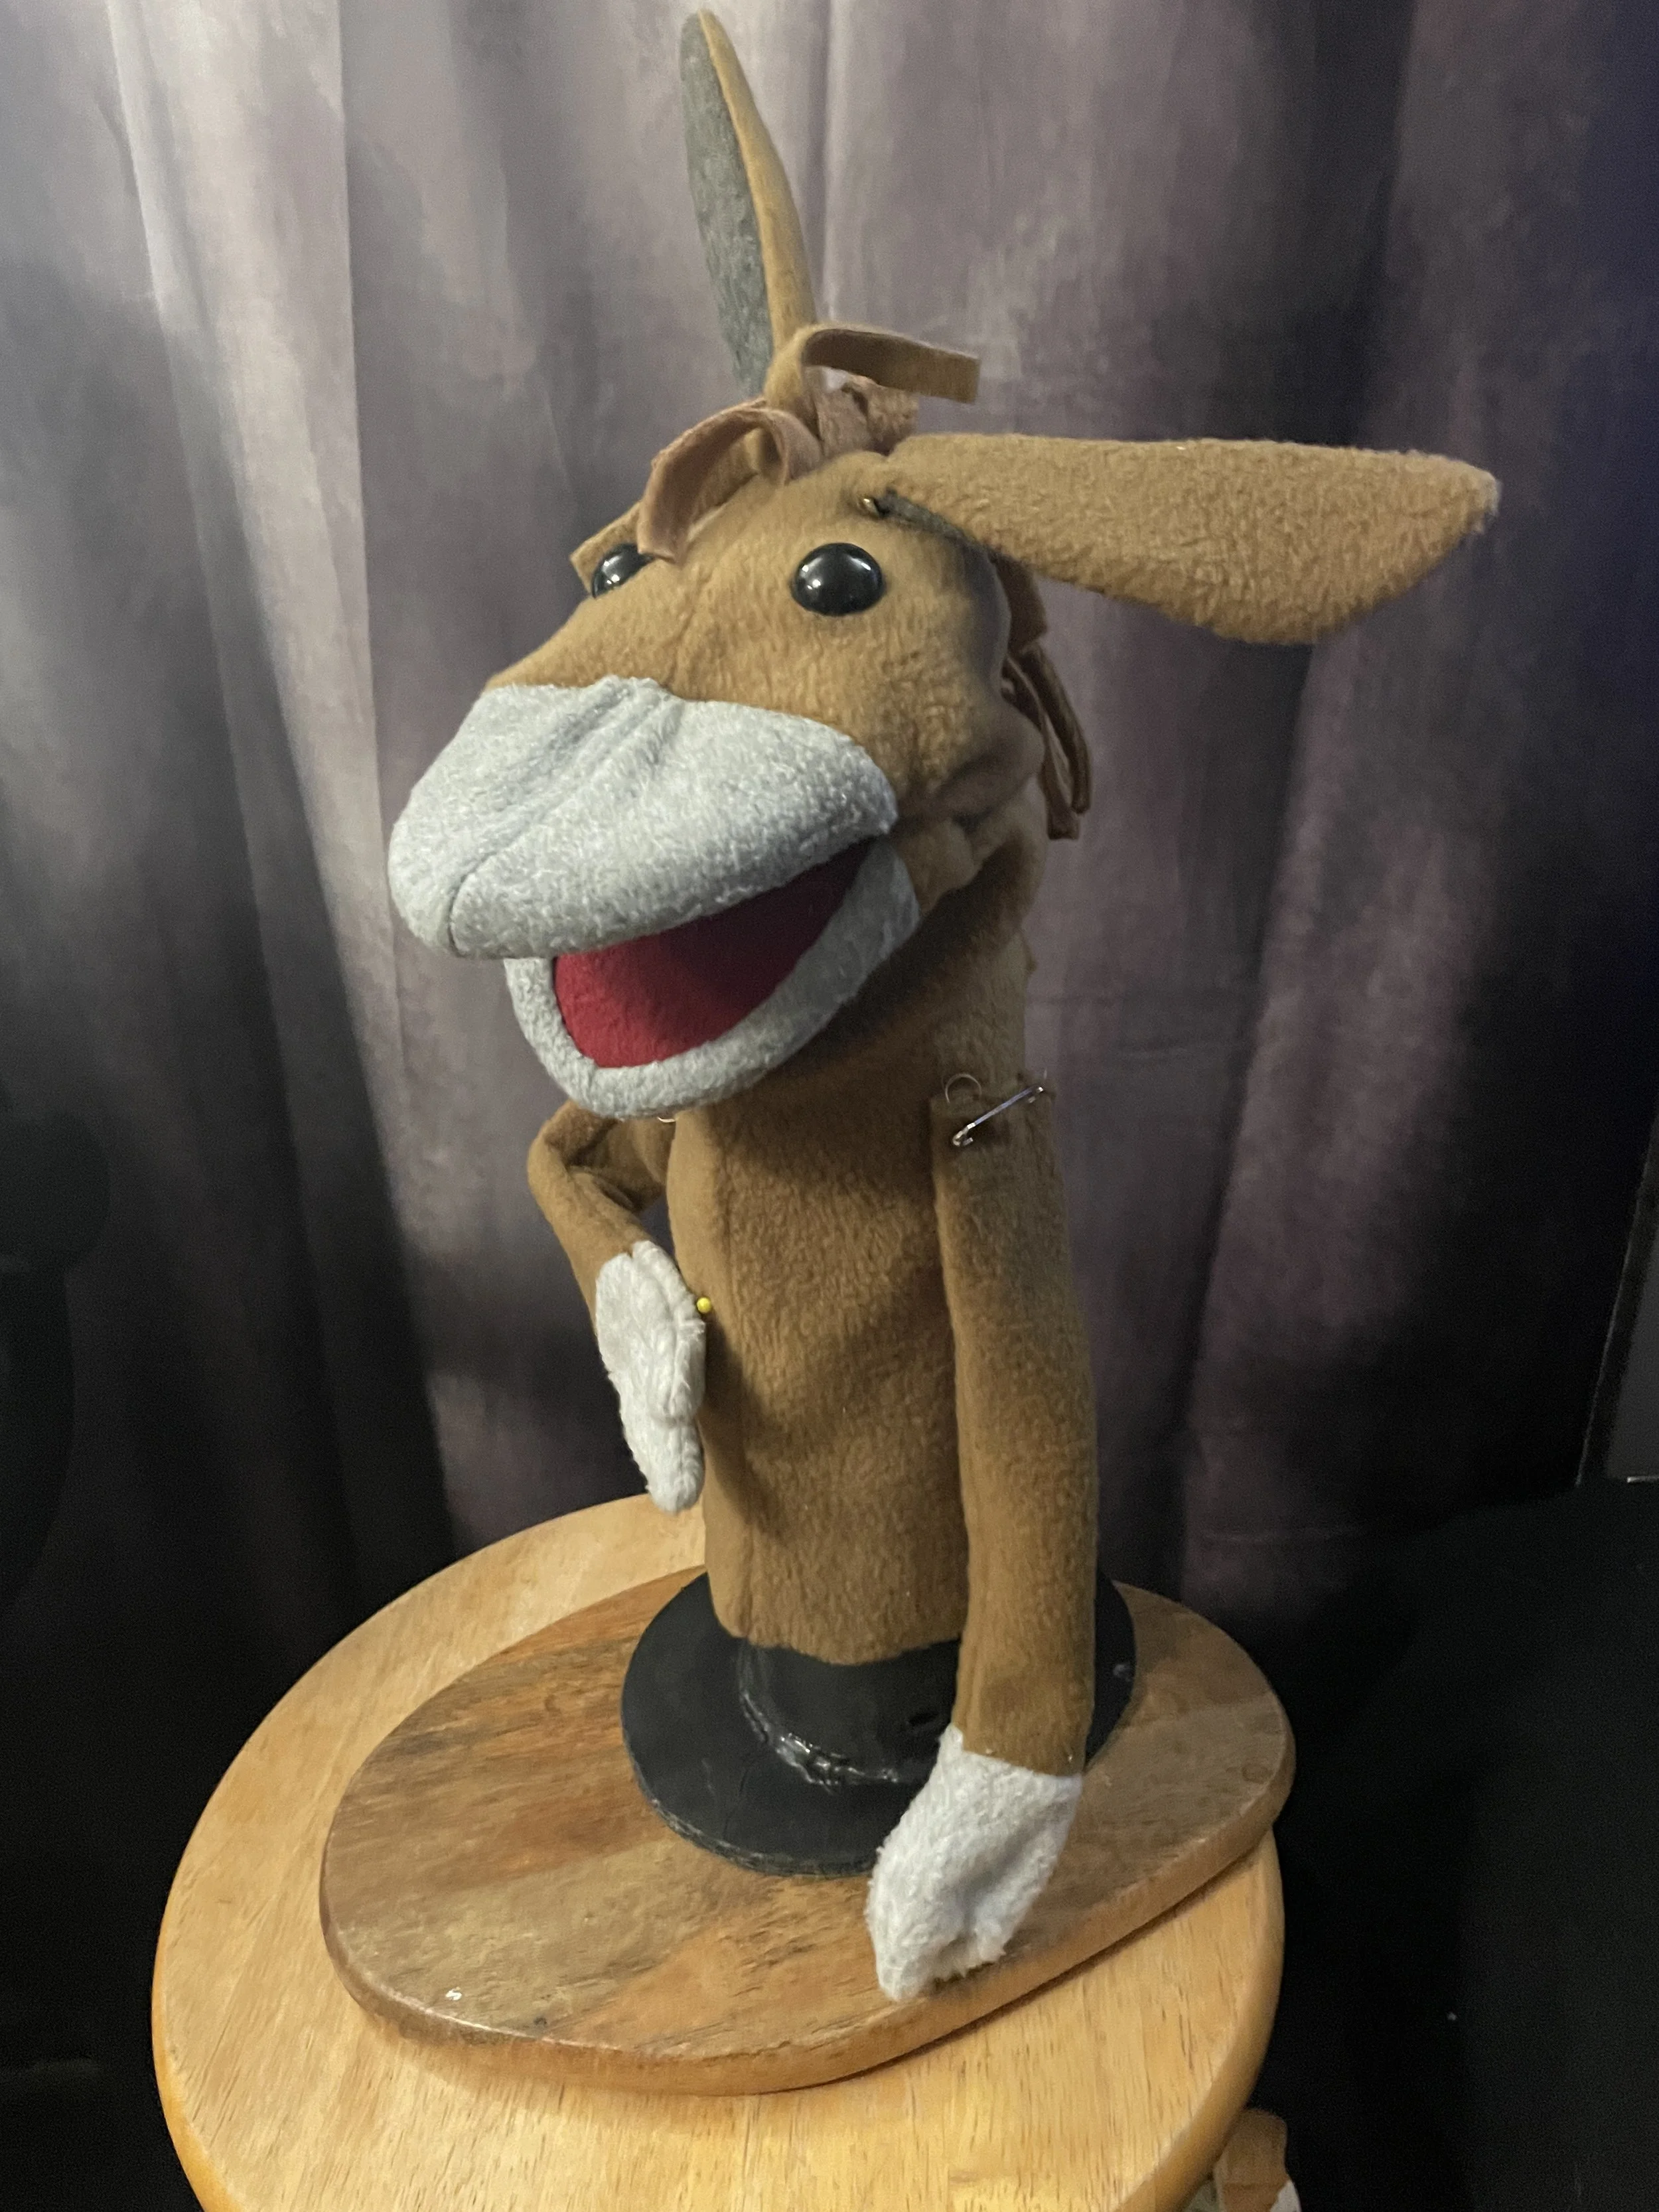
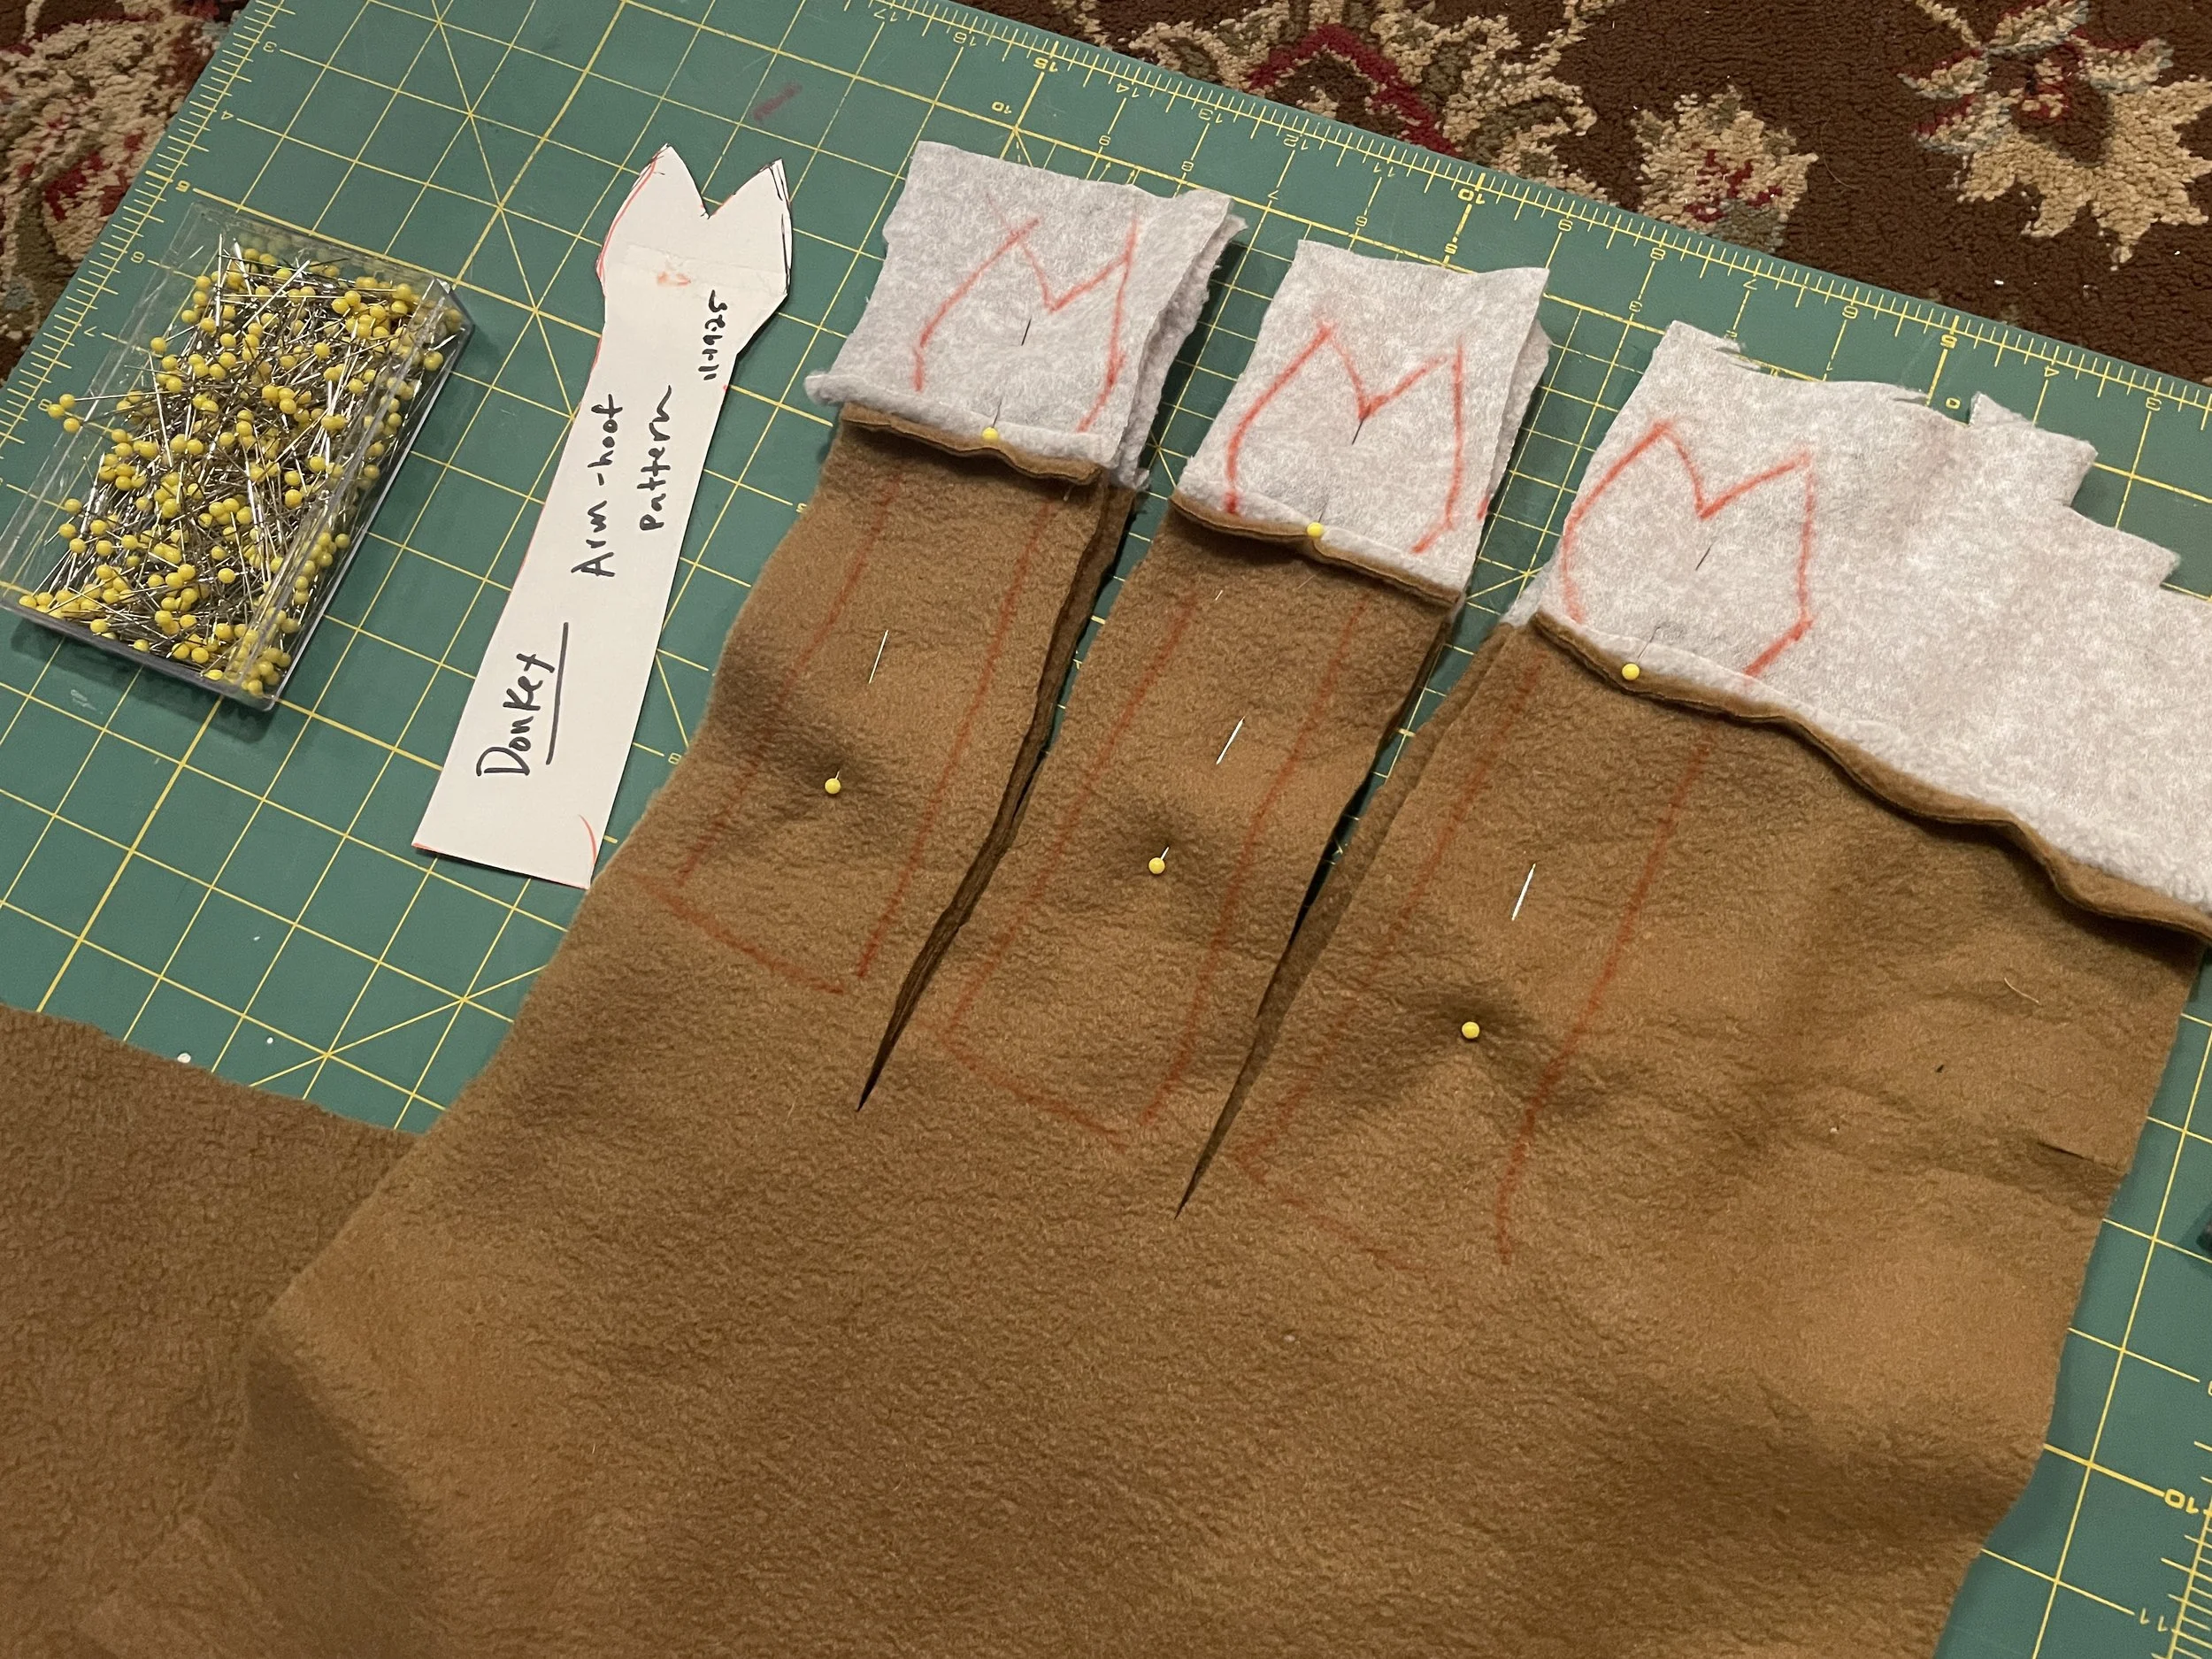
Here are photos of the making of the Donkey Puppet.
These are for reference to go with the patterns.
Below the Photos there is a step-by-step written guide include a materials list and tools needed.
إليكم صور صنع دمية الحمار.
هذه للمرجع وتُرفَق مع الباترونات.
أسفل الصور يوجد دليل مكتوب خطوة بخطوة يتضمن قائمة بالمواد والأدوات المطلوبة.


Donkey Puppet – Simple “How To” Steps
خطوات بسيطة لصنع دمية الحمار
Materials
Brown or gray fleece (main body)
Gray fleece (muzzle and ear lining)
Cardboard or coroplast (mouth plate)
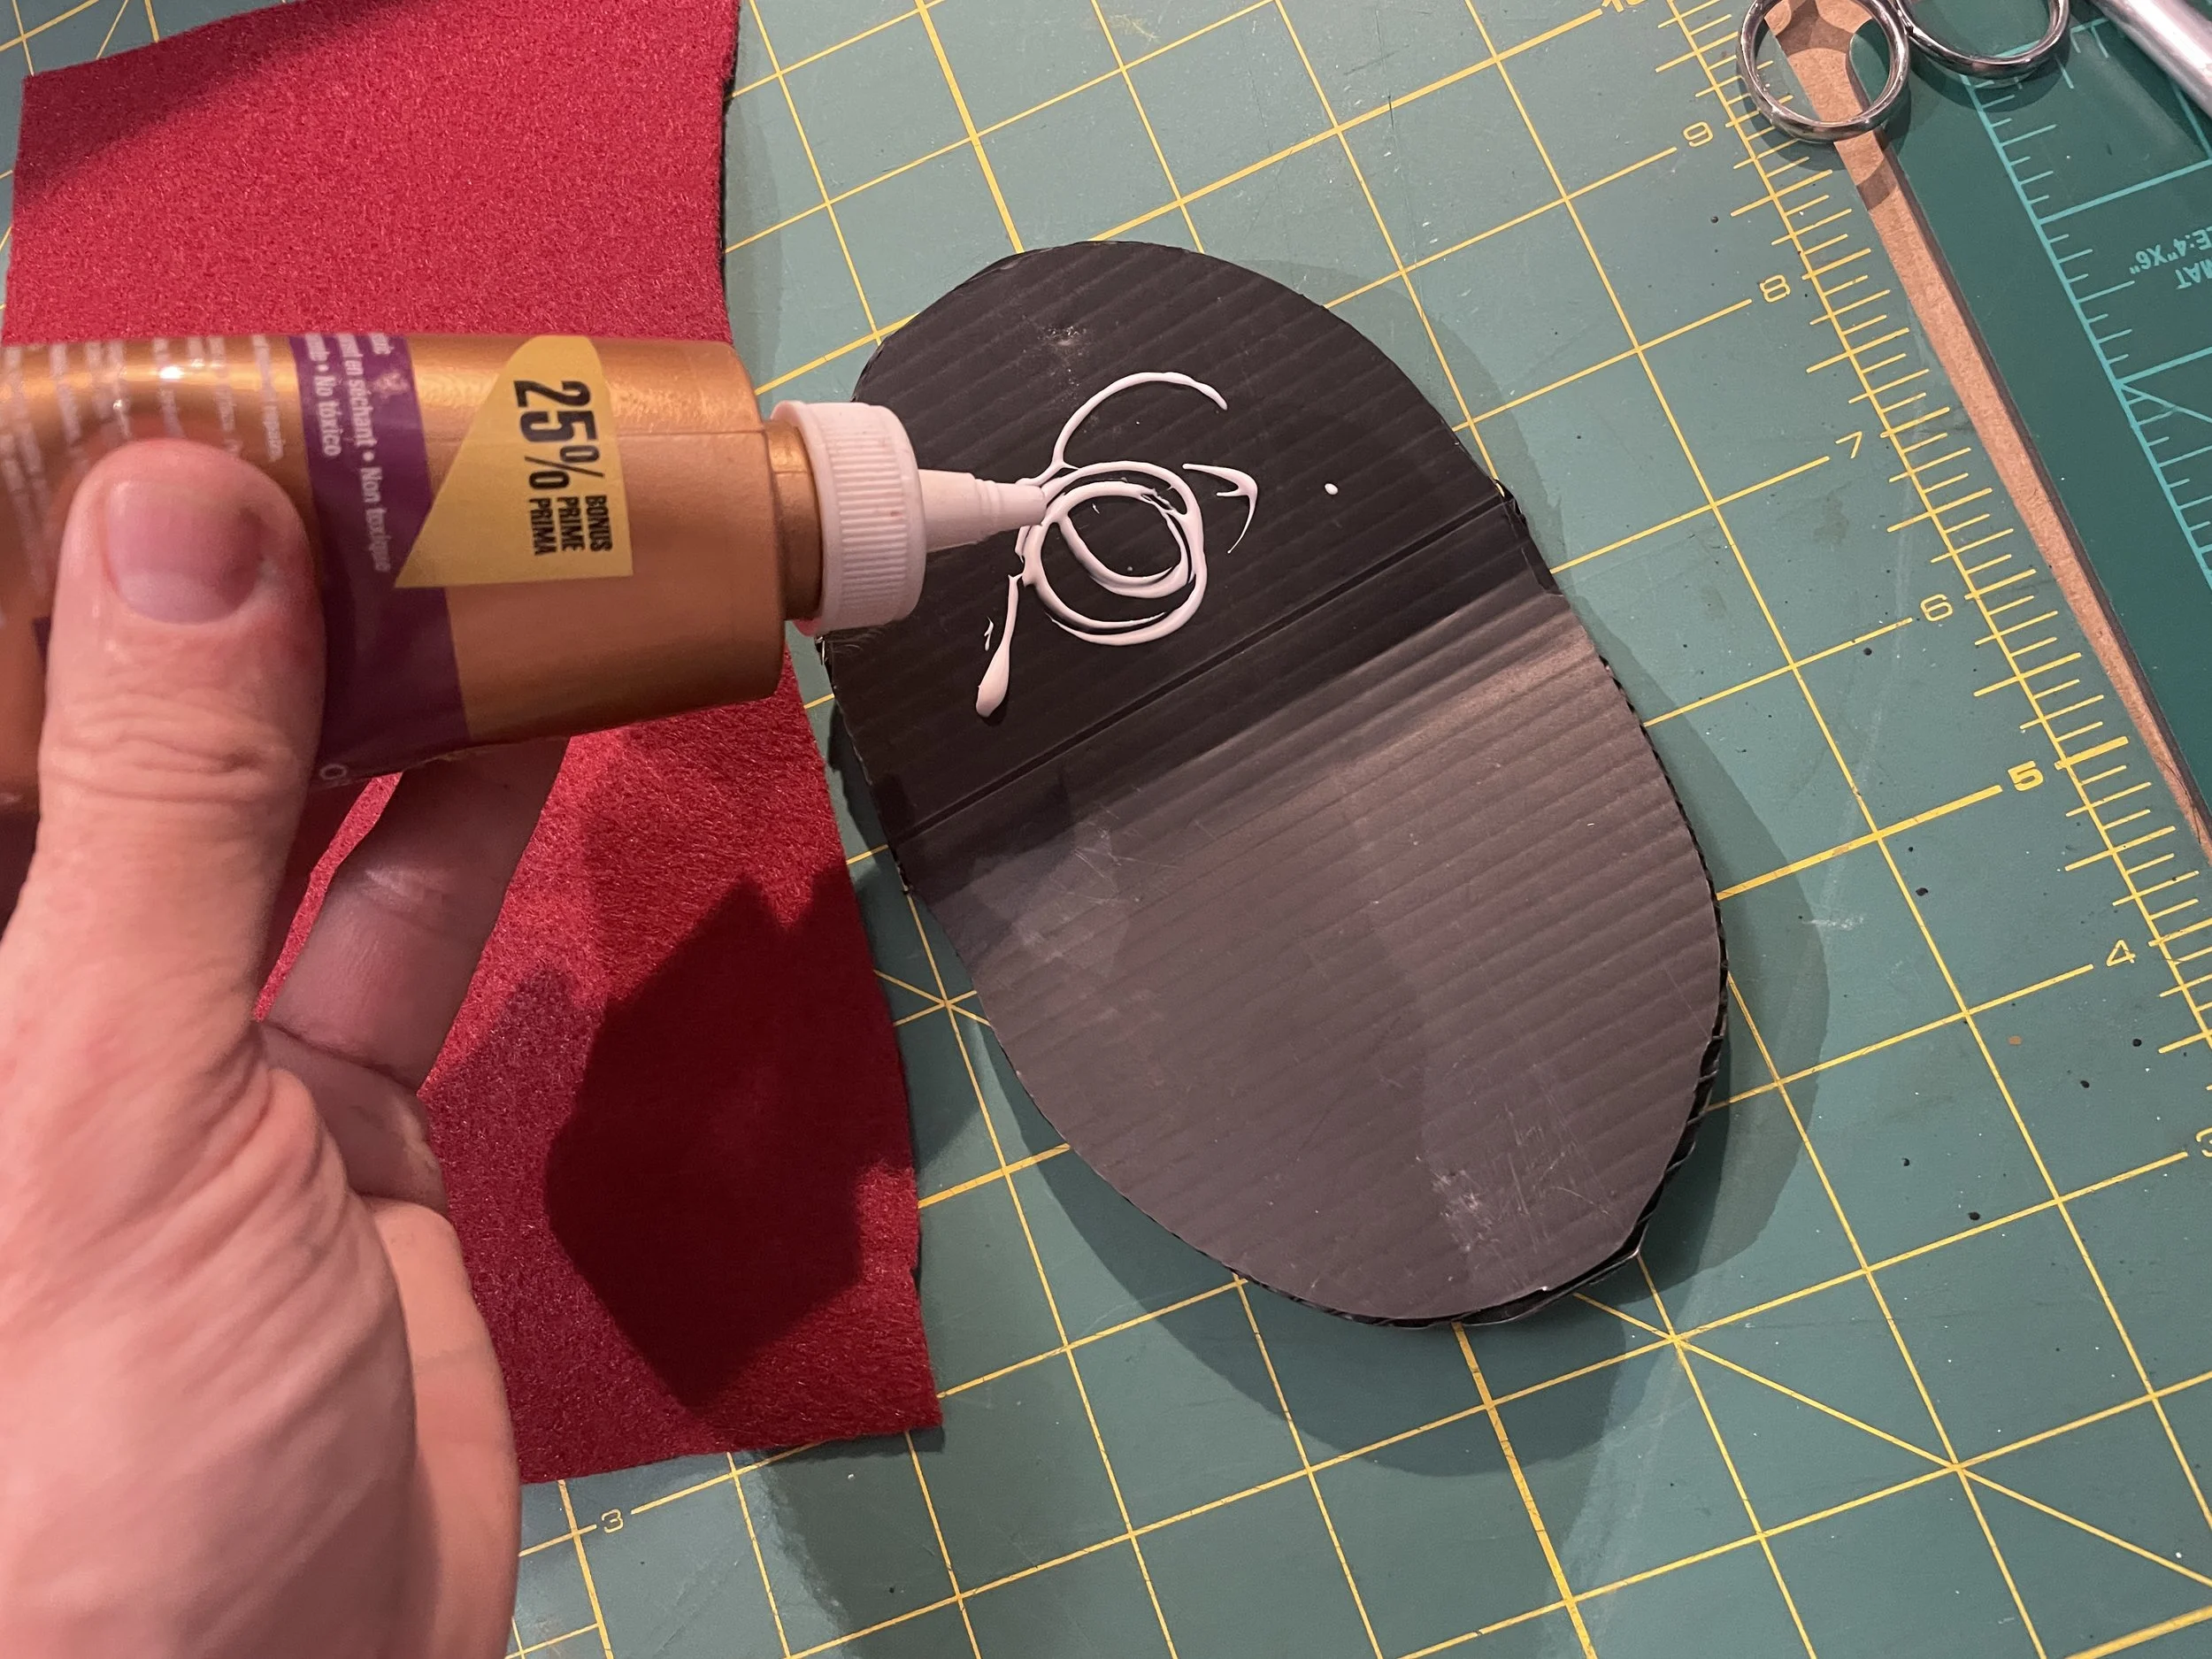
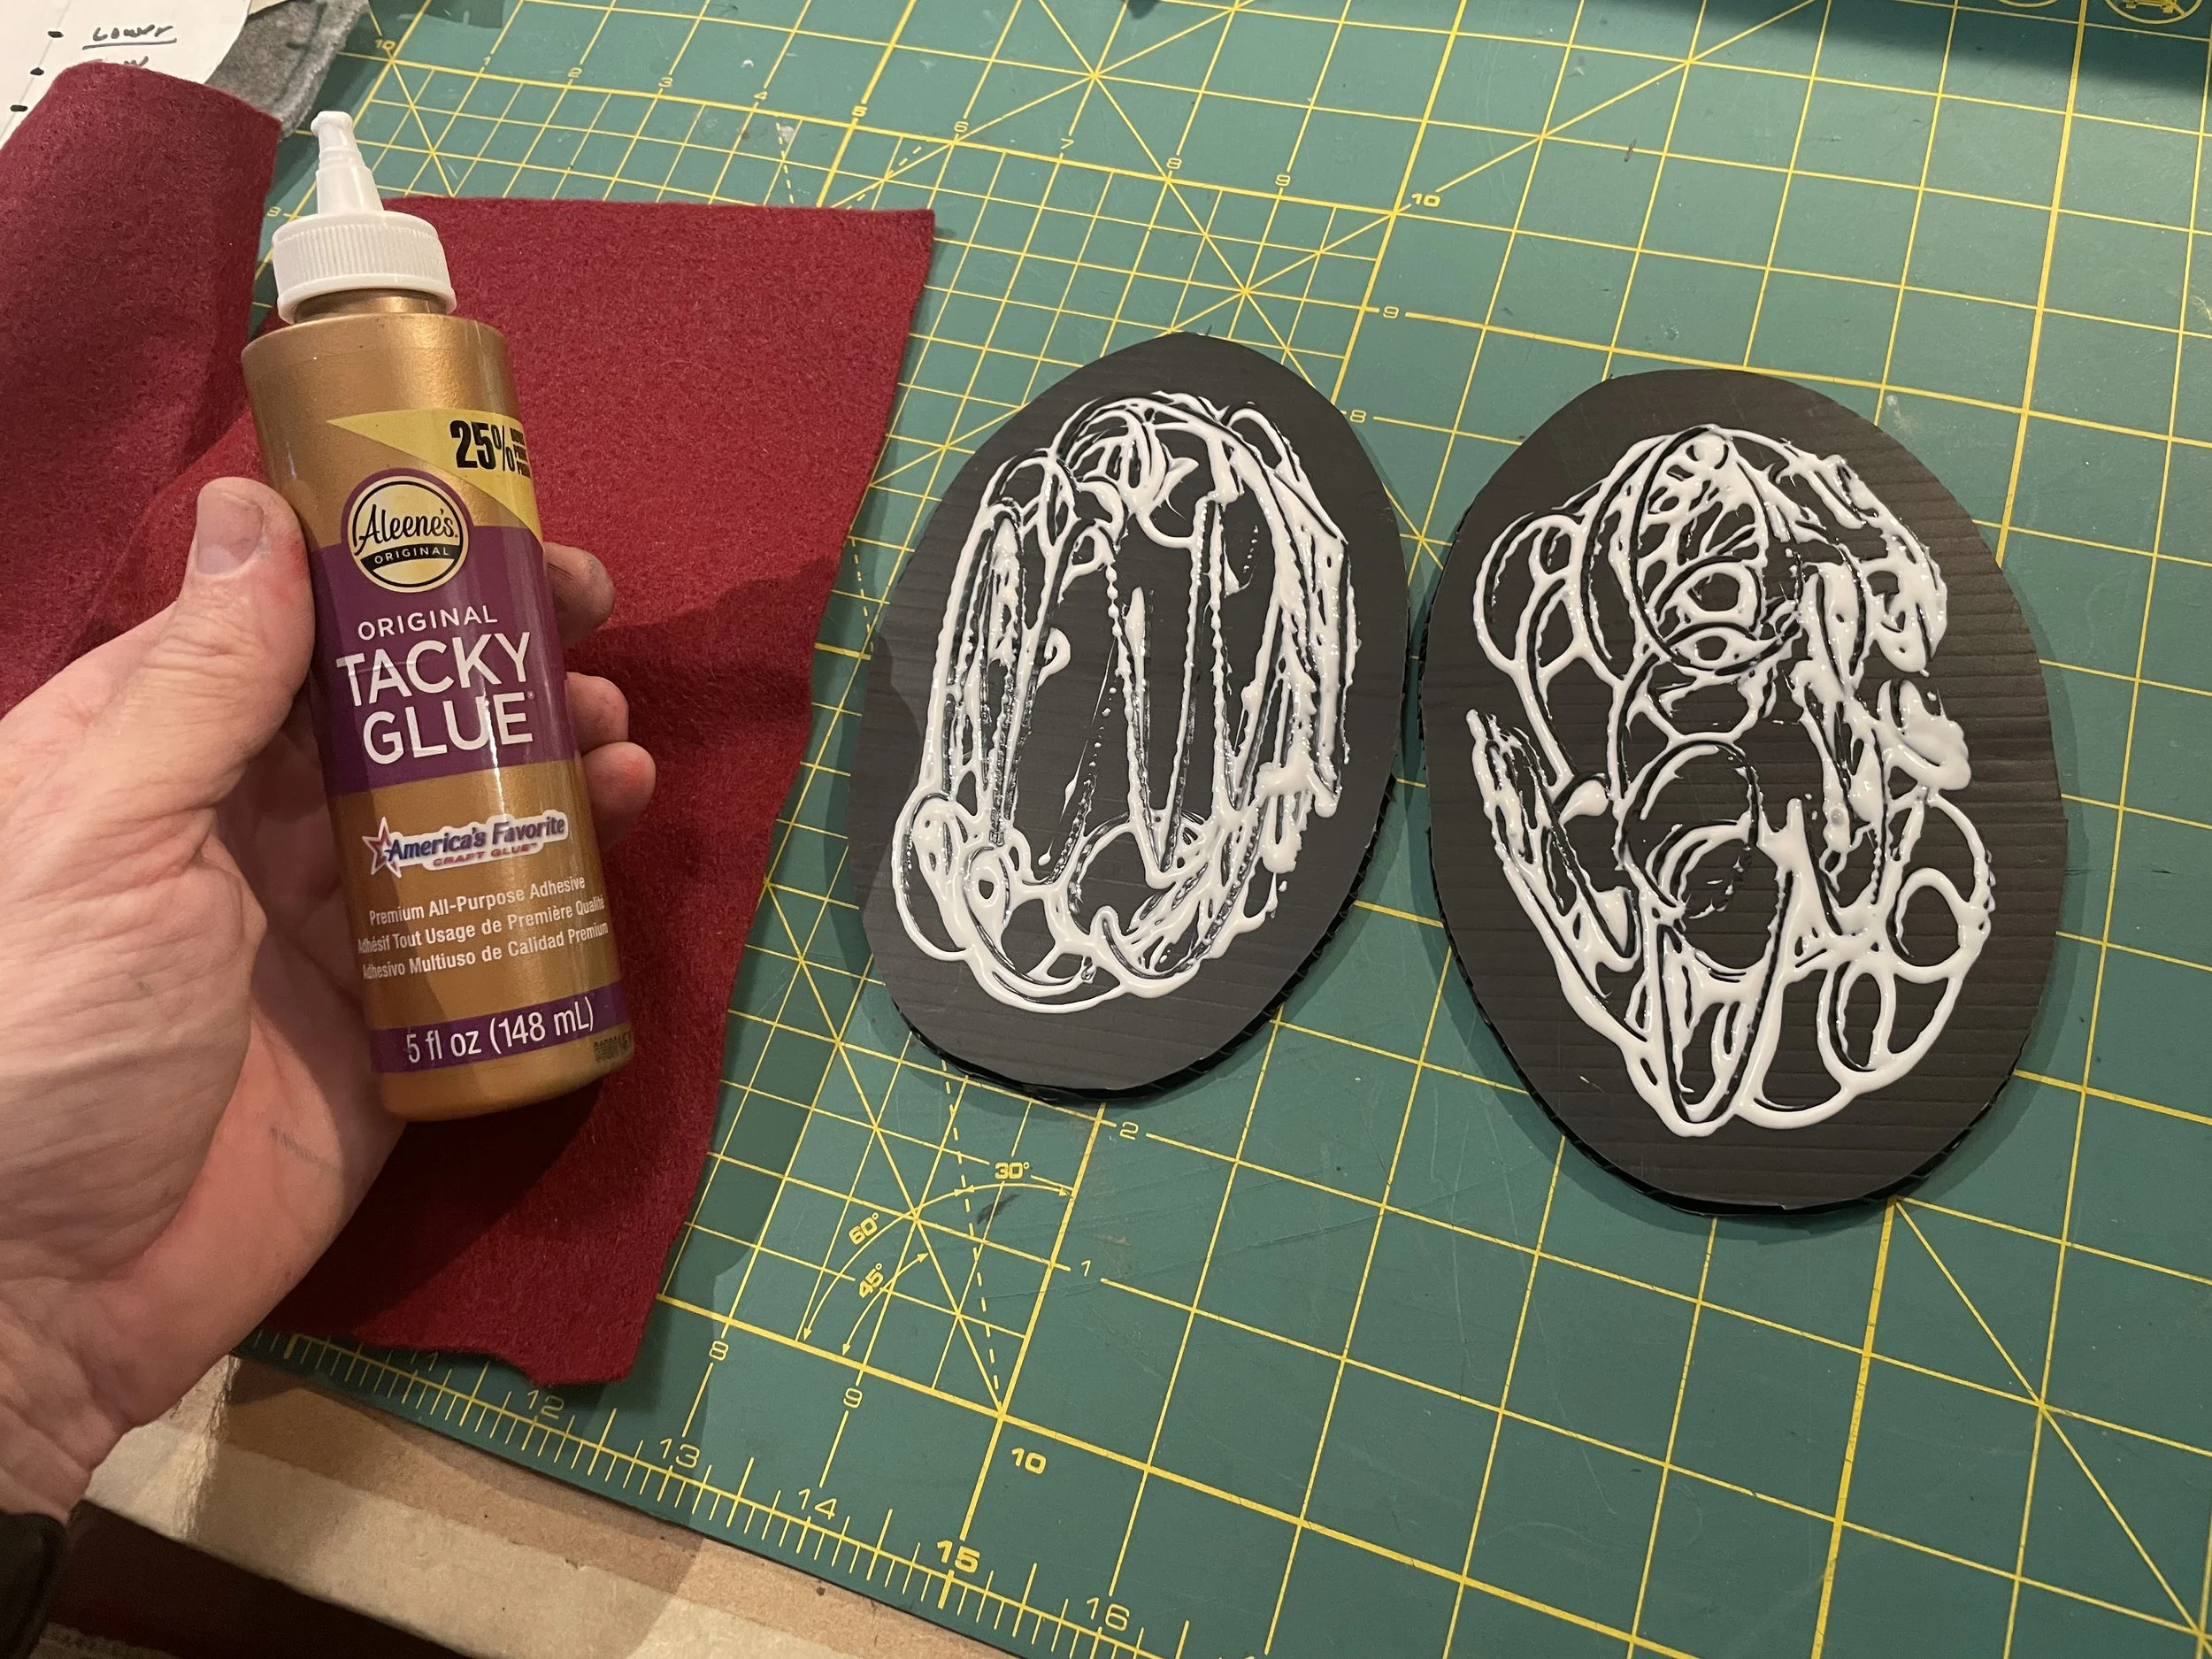
Craft glue (white glue, contact cement, or spray glue)
Masking tape
Sewing thread (match fleece colors)
Fiberfill stuffing
Muslin or cotton for head stuffer
Felt for mouth lining (red, dark red, or black)
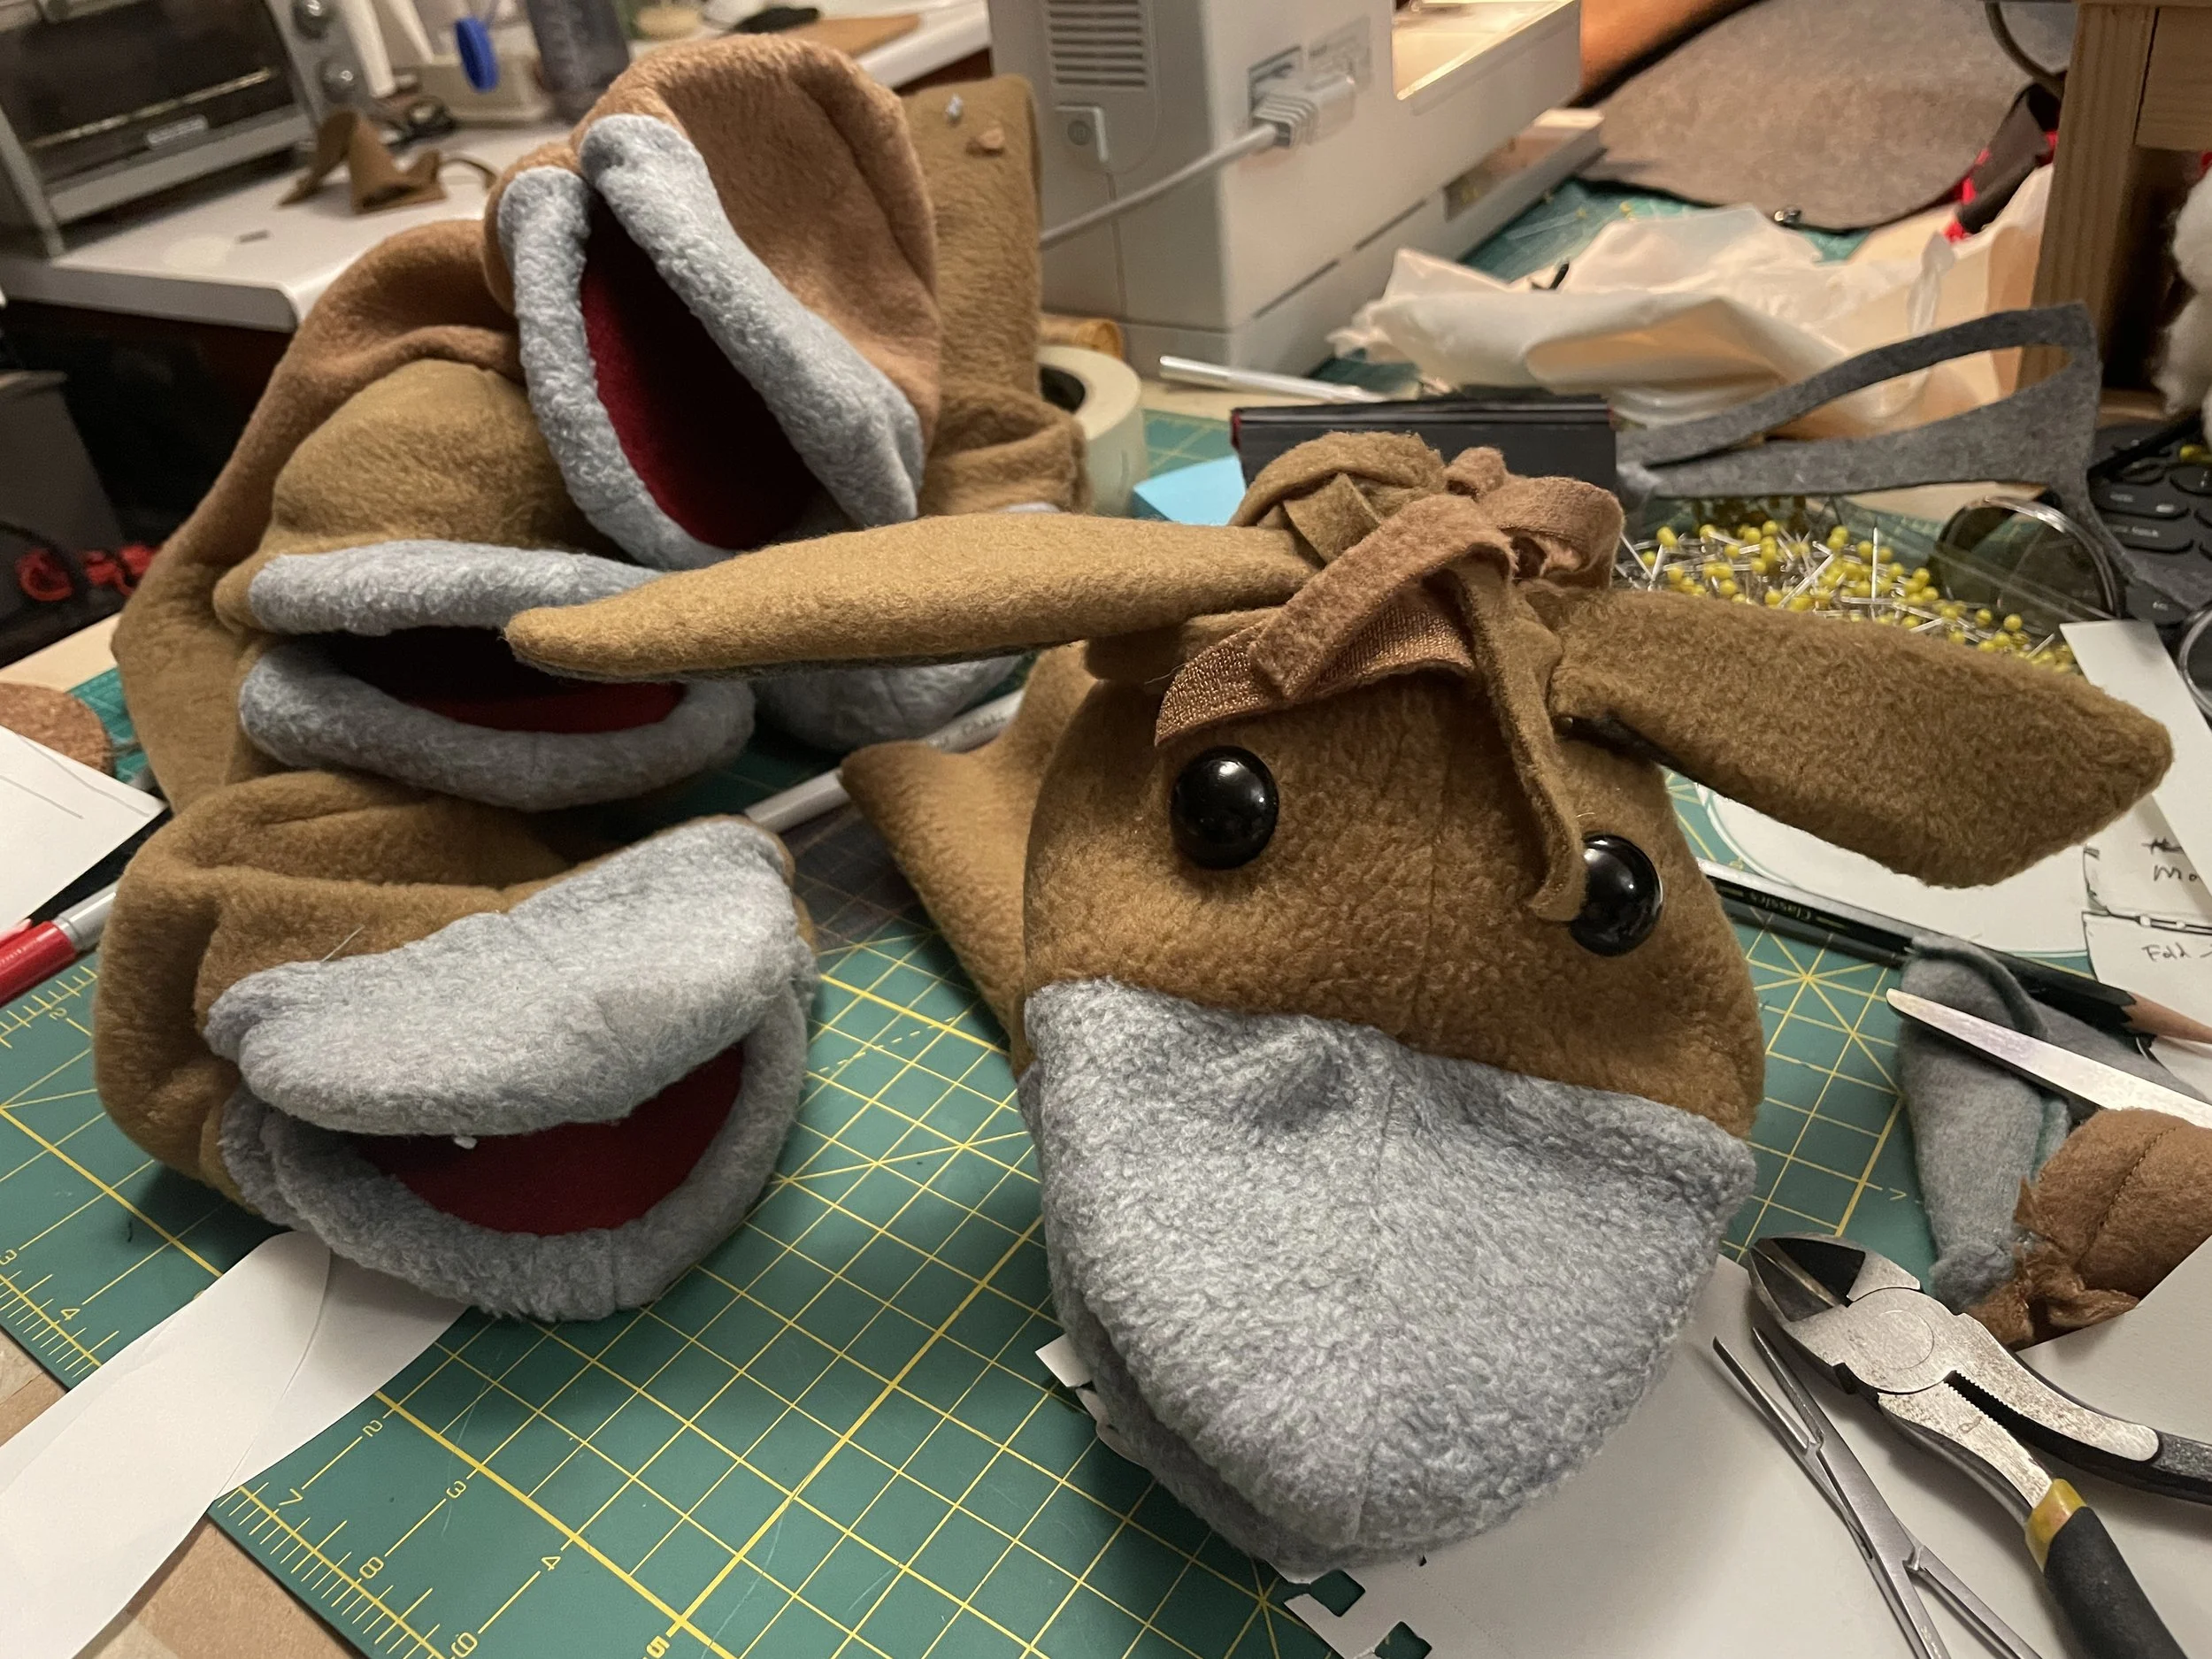
Eyes-Half-round doll eyes (about 20 mm), This can also be black buttons or round felt
Tools
Sewing machine
Pins
Fabric marker or light-color pen
Scissors for fabric and cardboard
Needles for hand sewing
Pointed stick for turning fabric right-side out
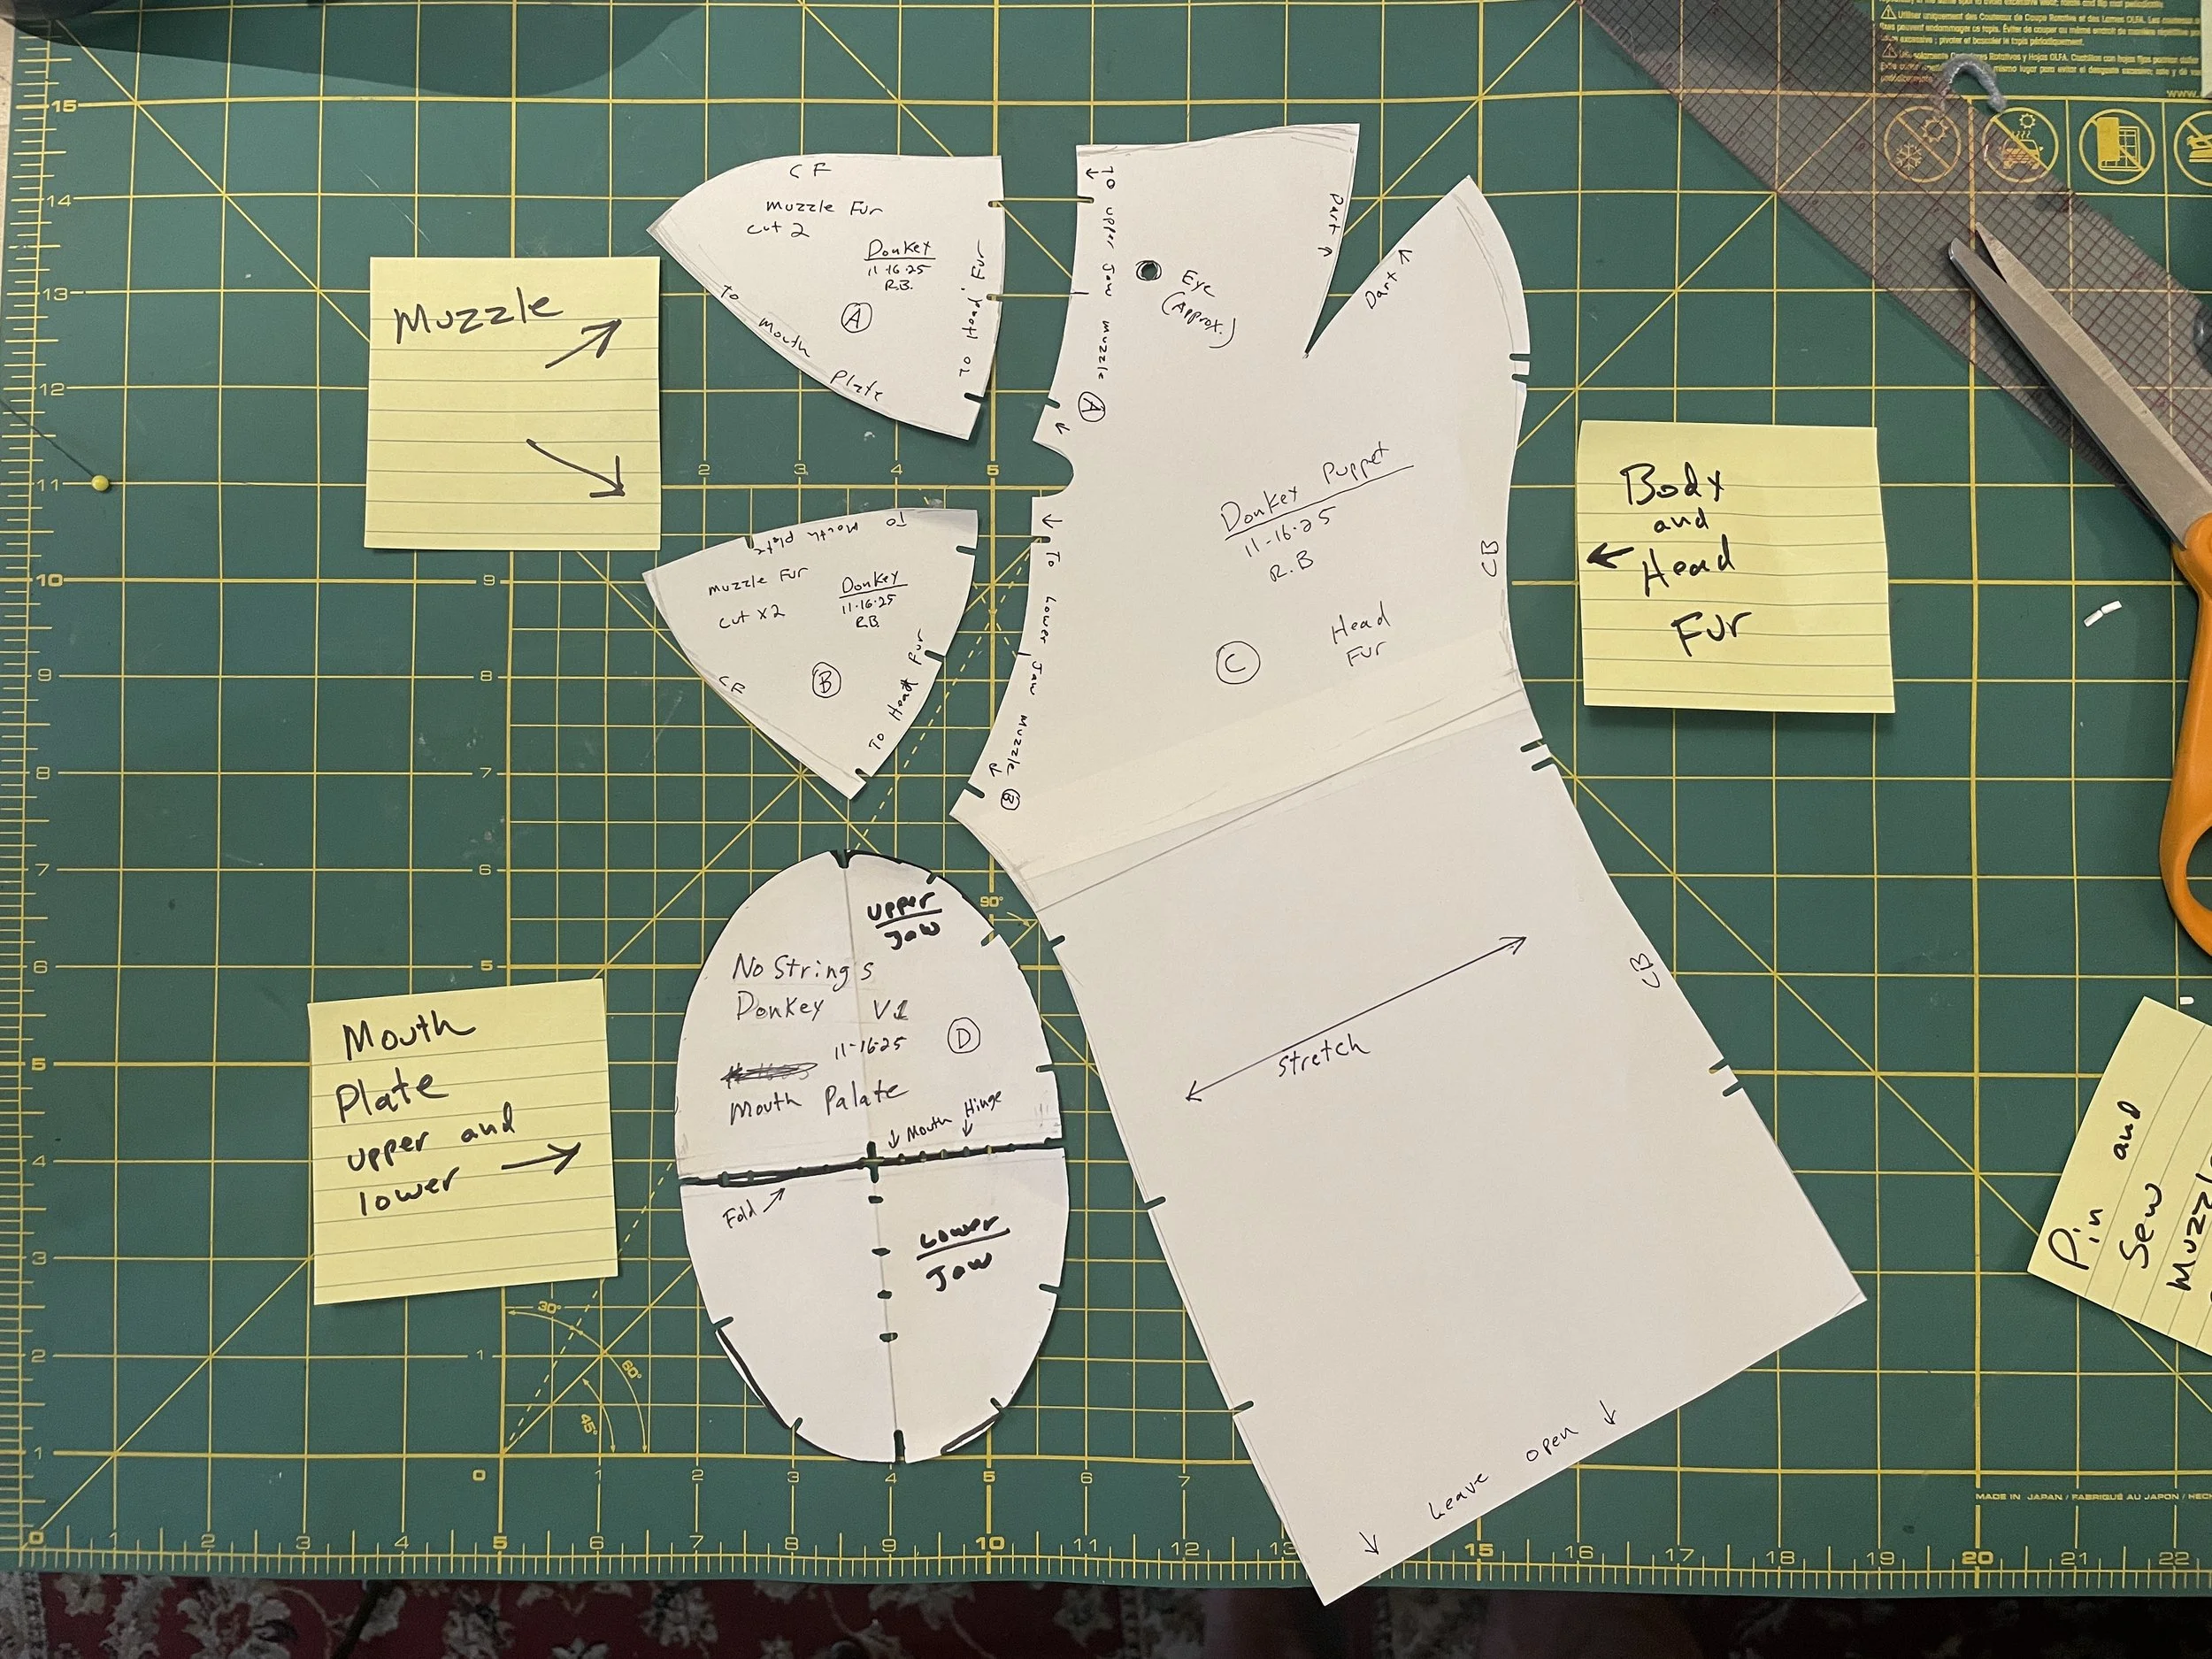
Pattern pieces
BUILDING STEPS
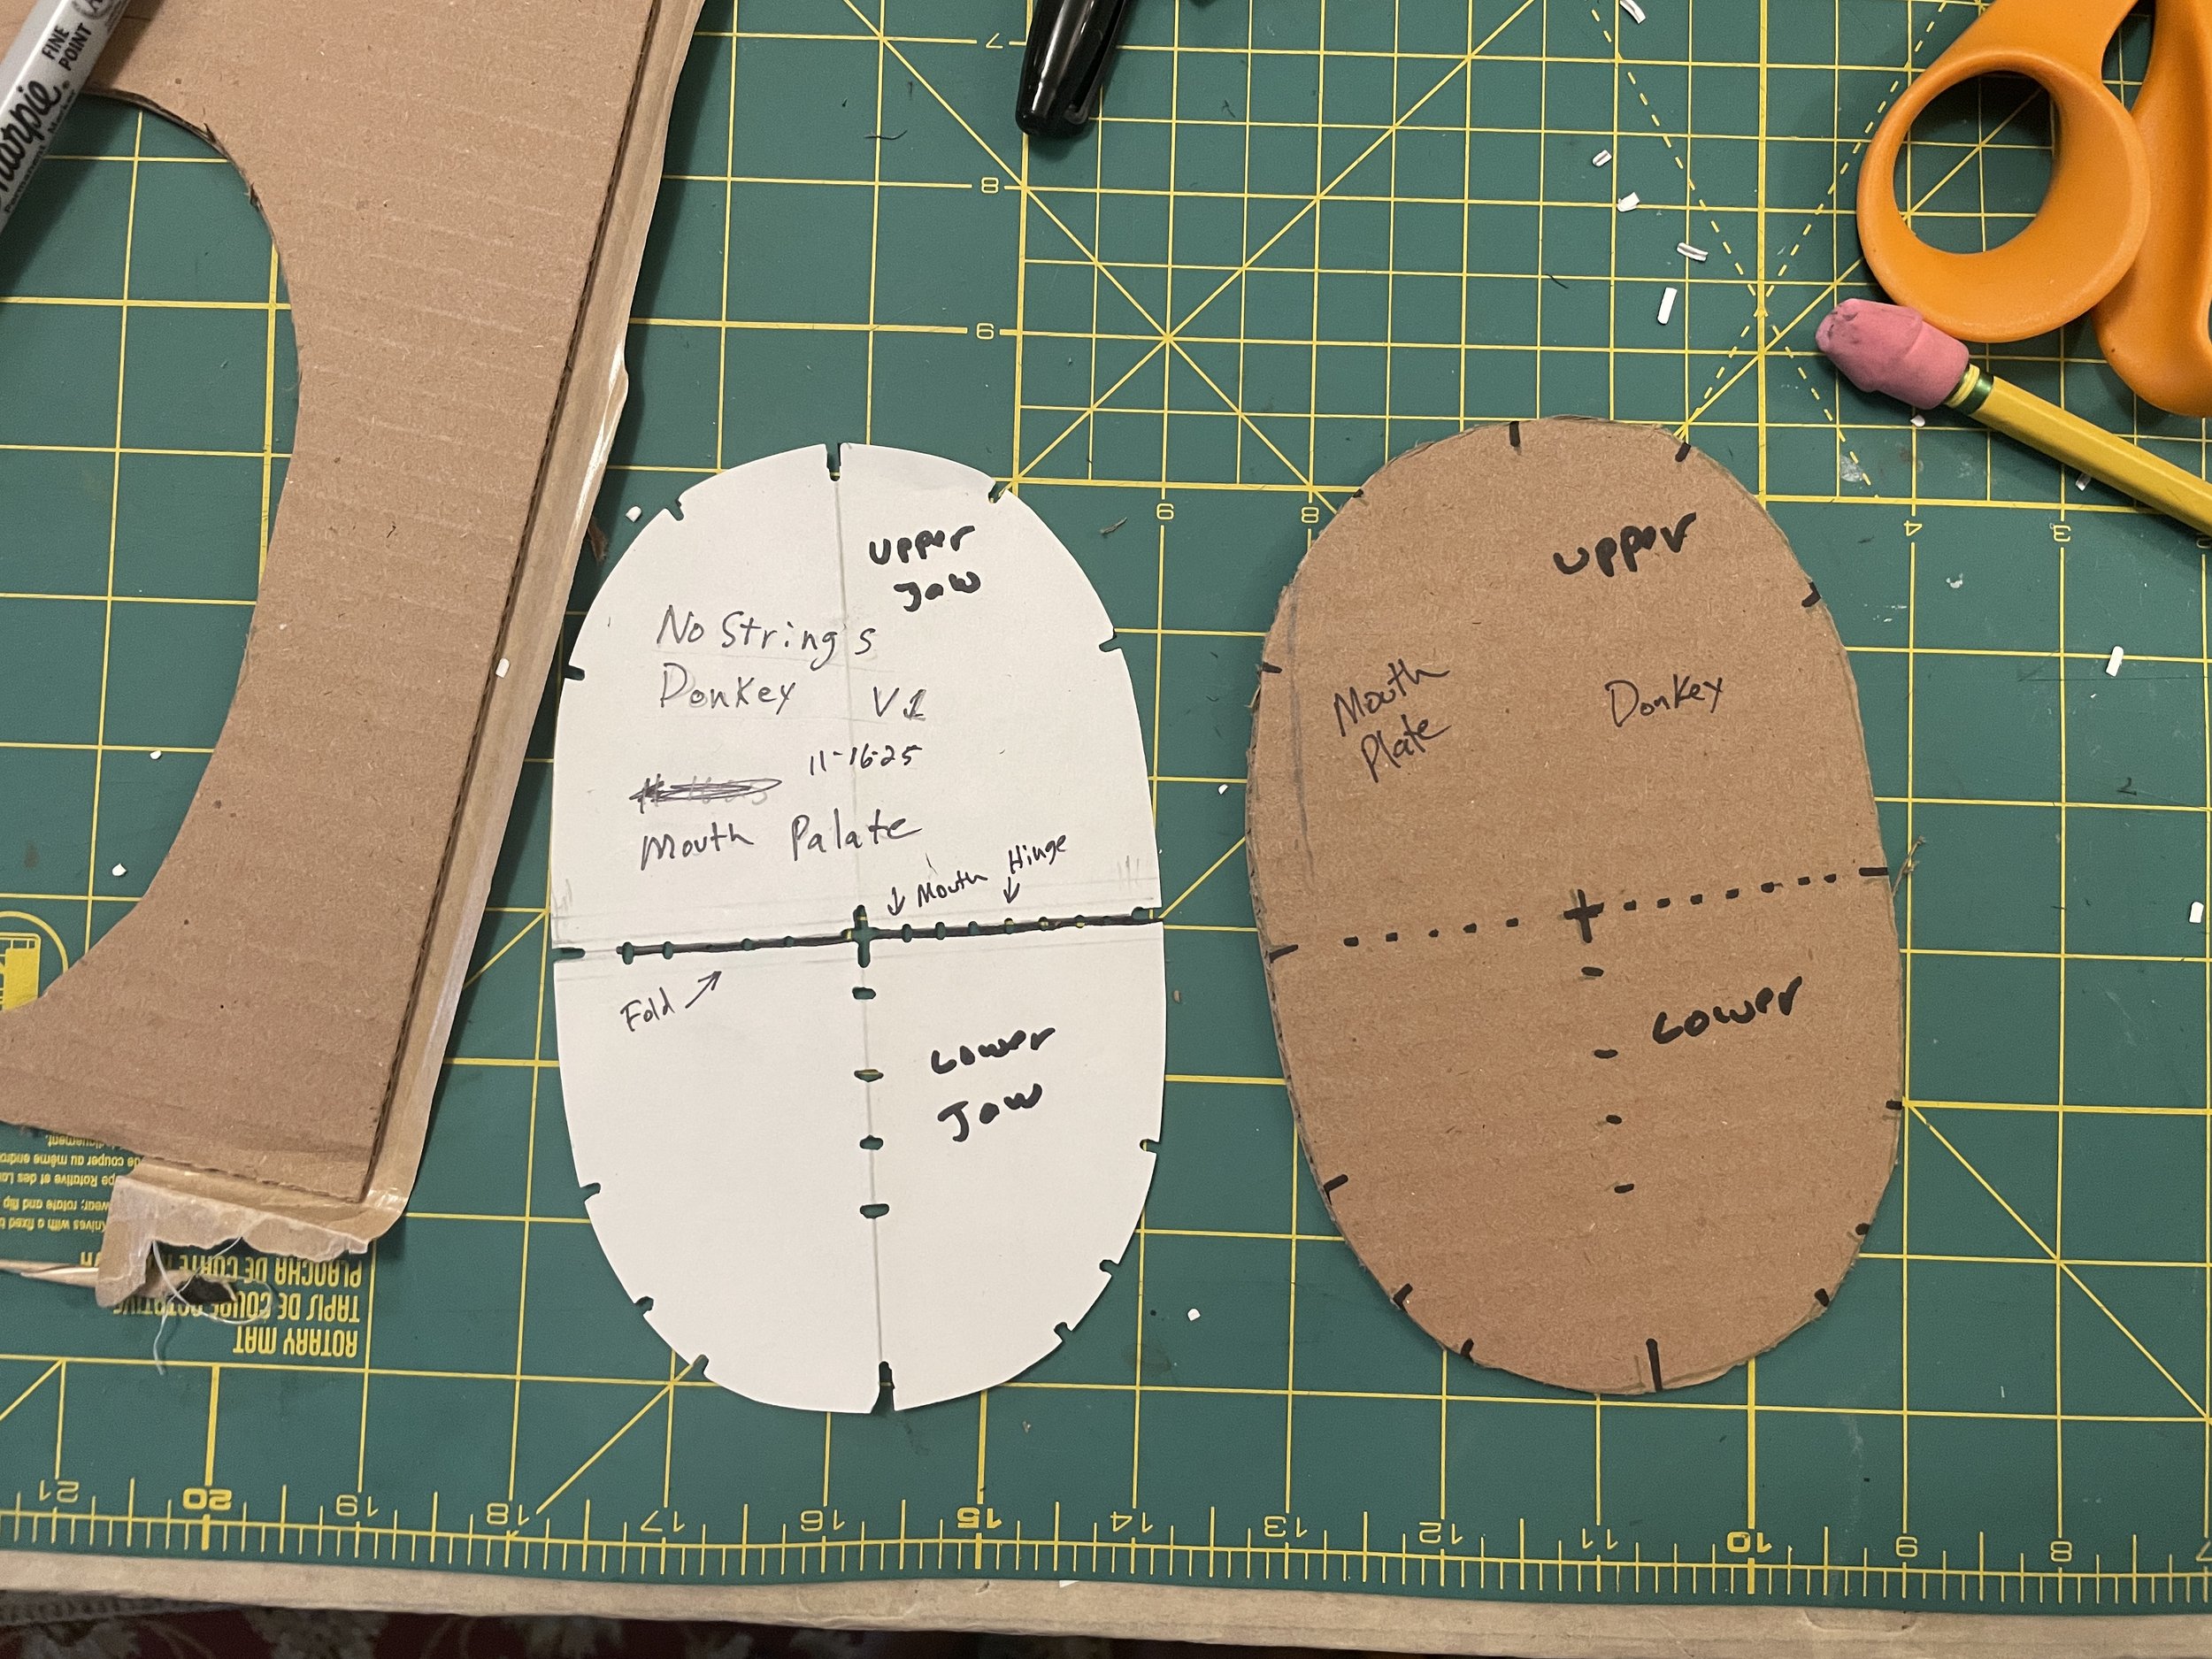
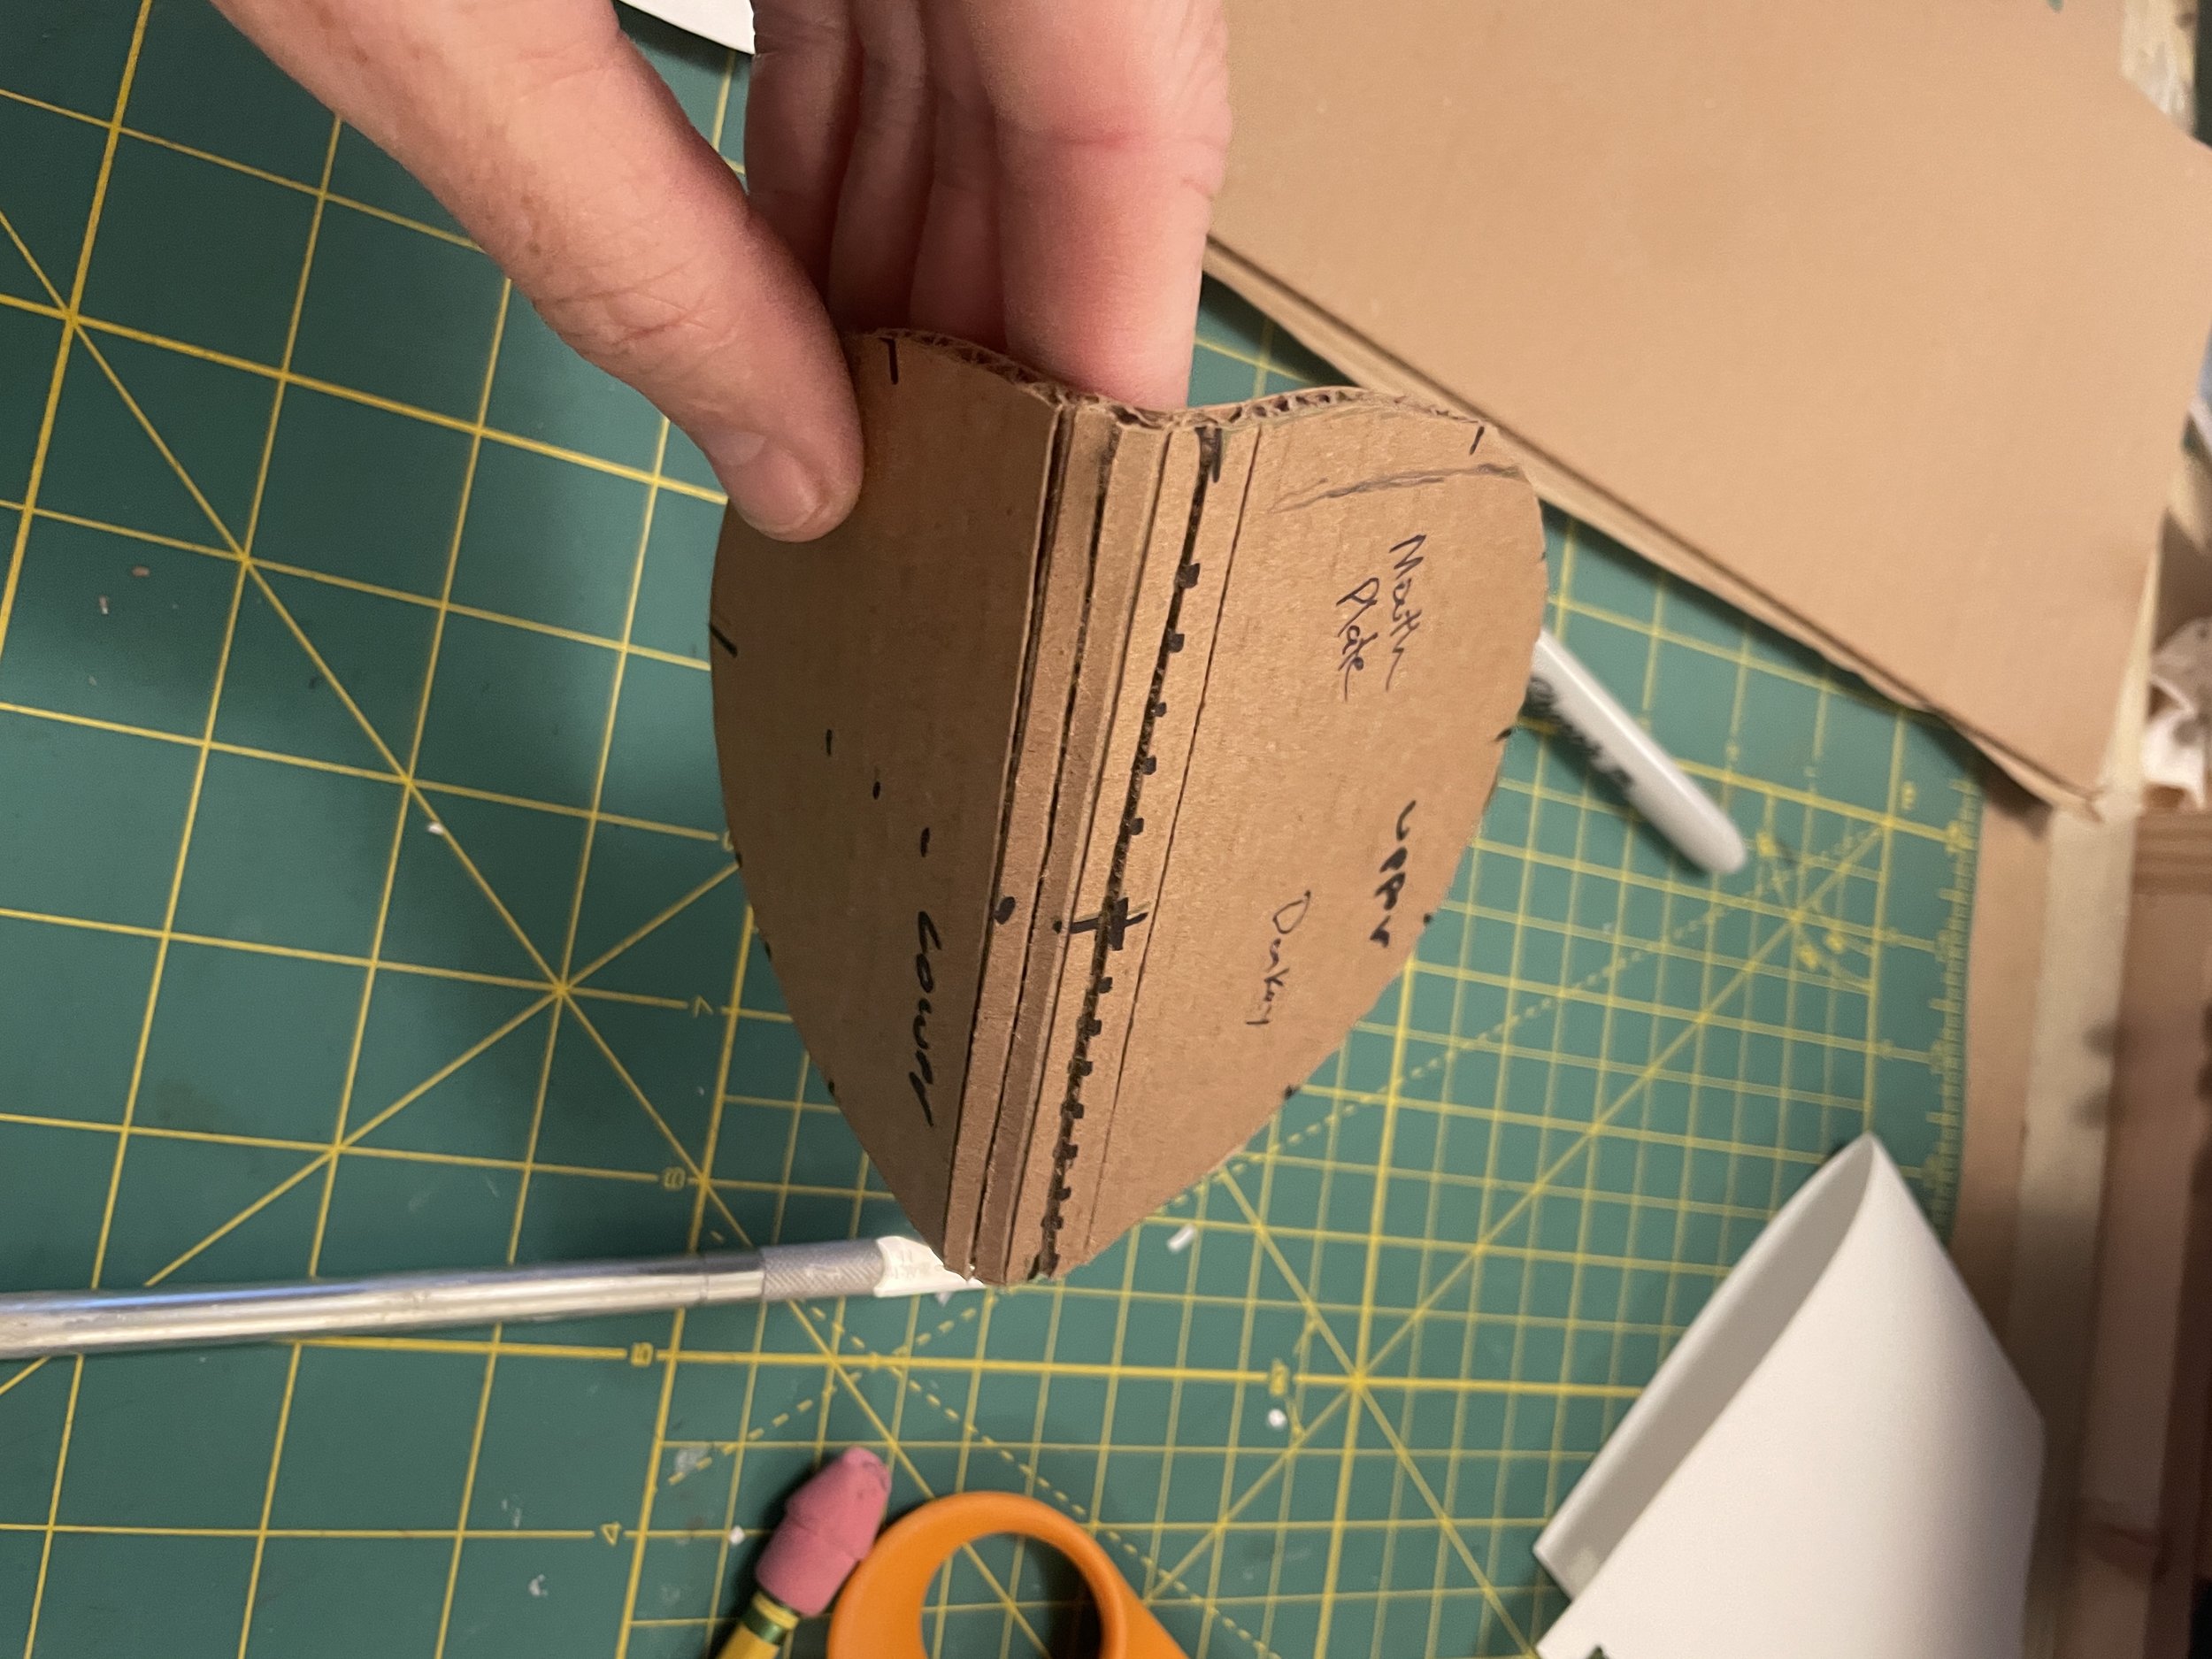
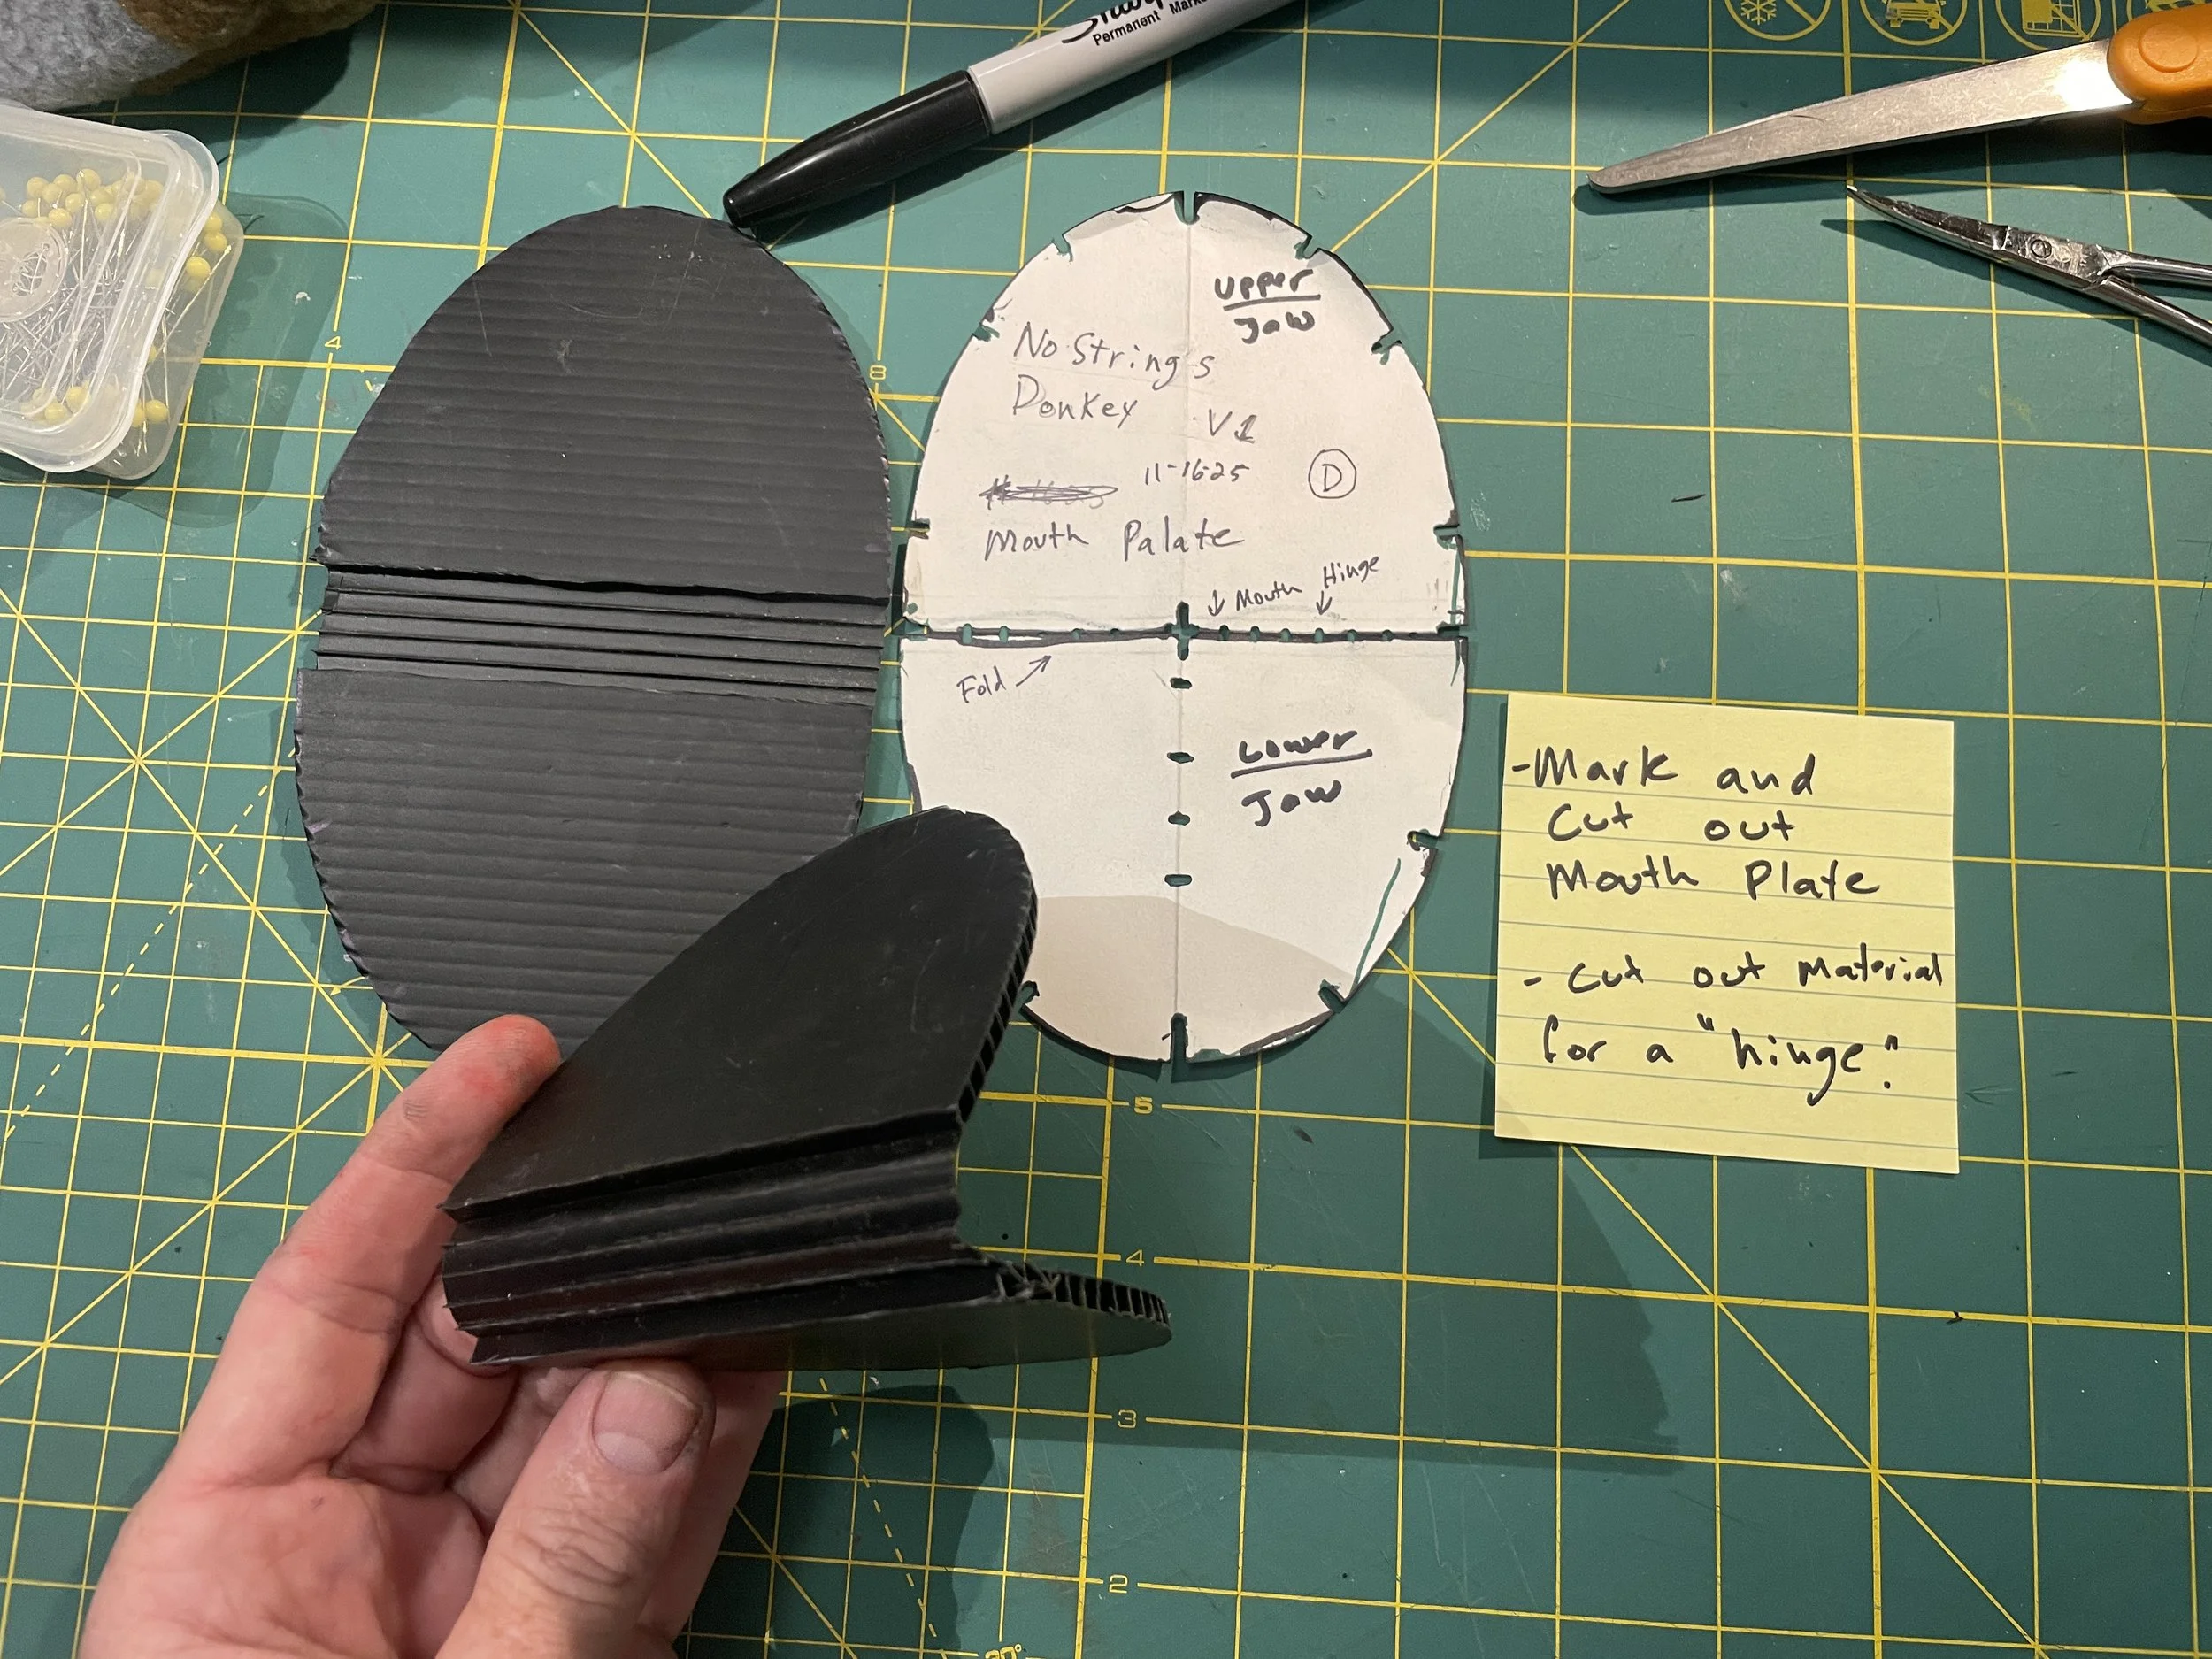
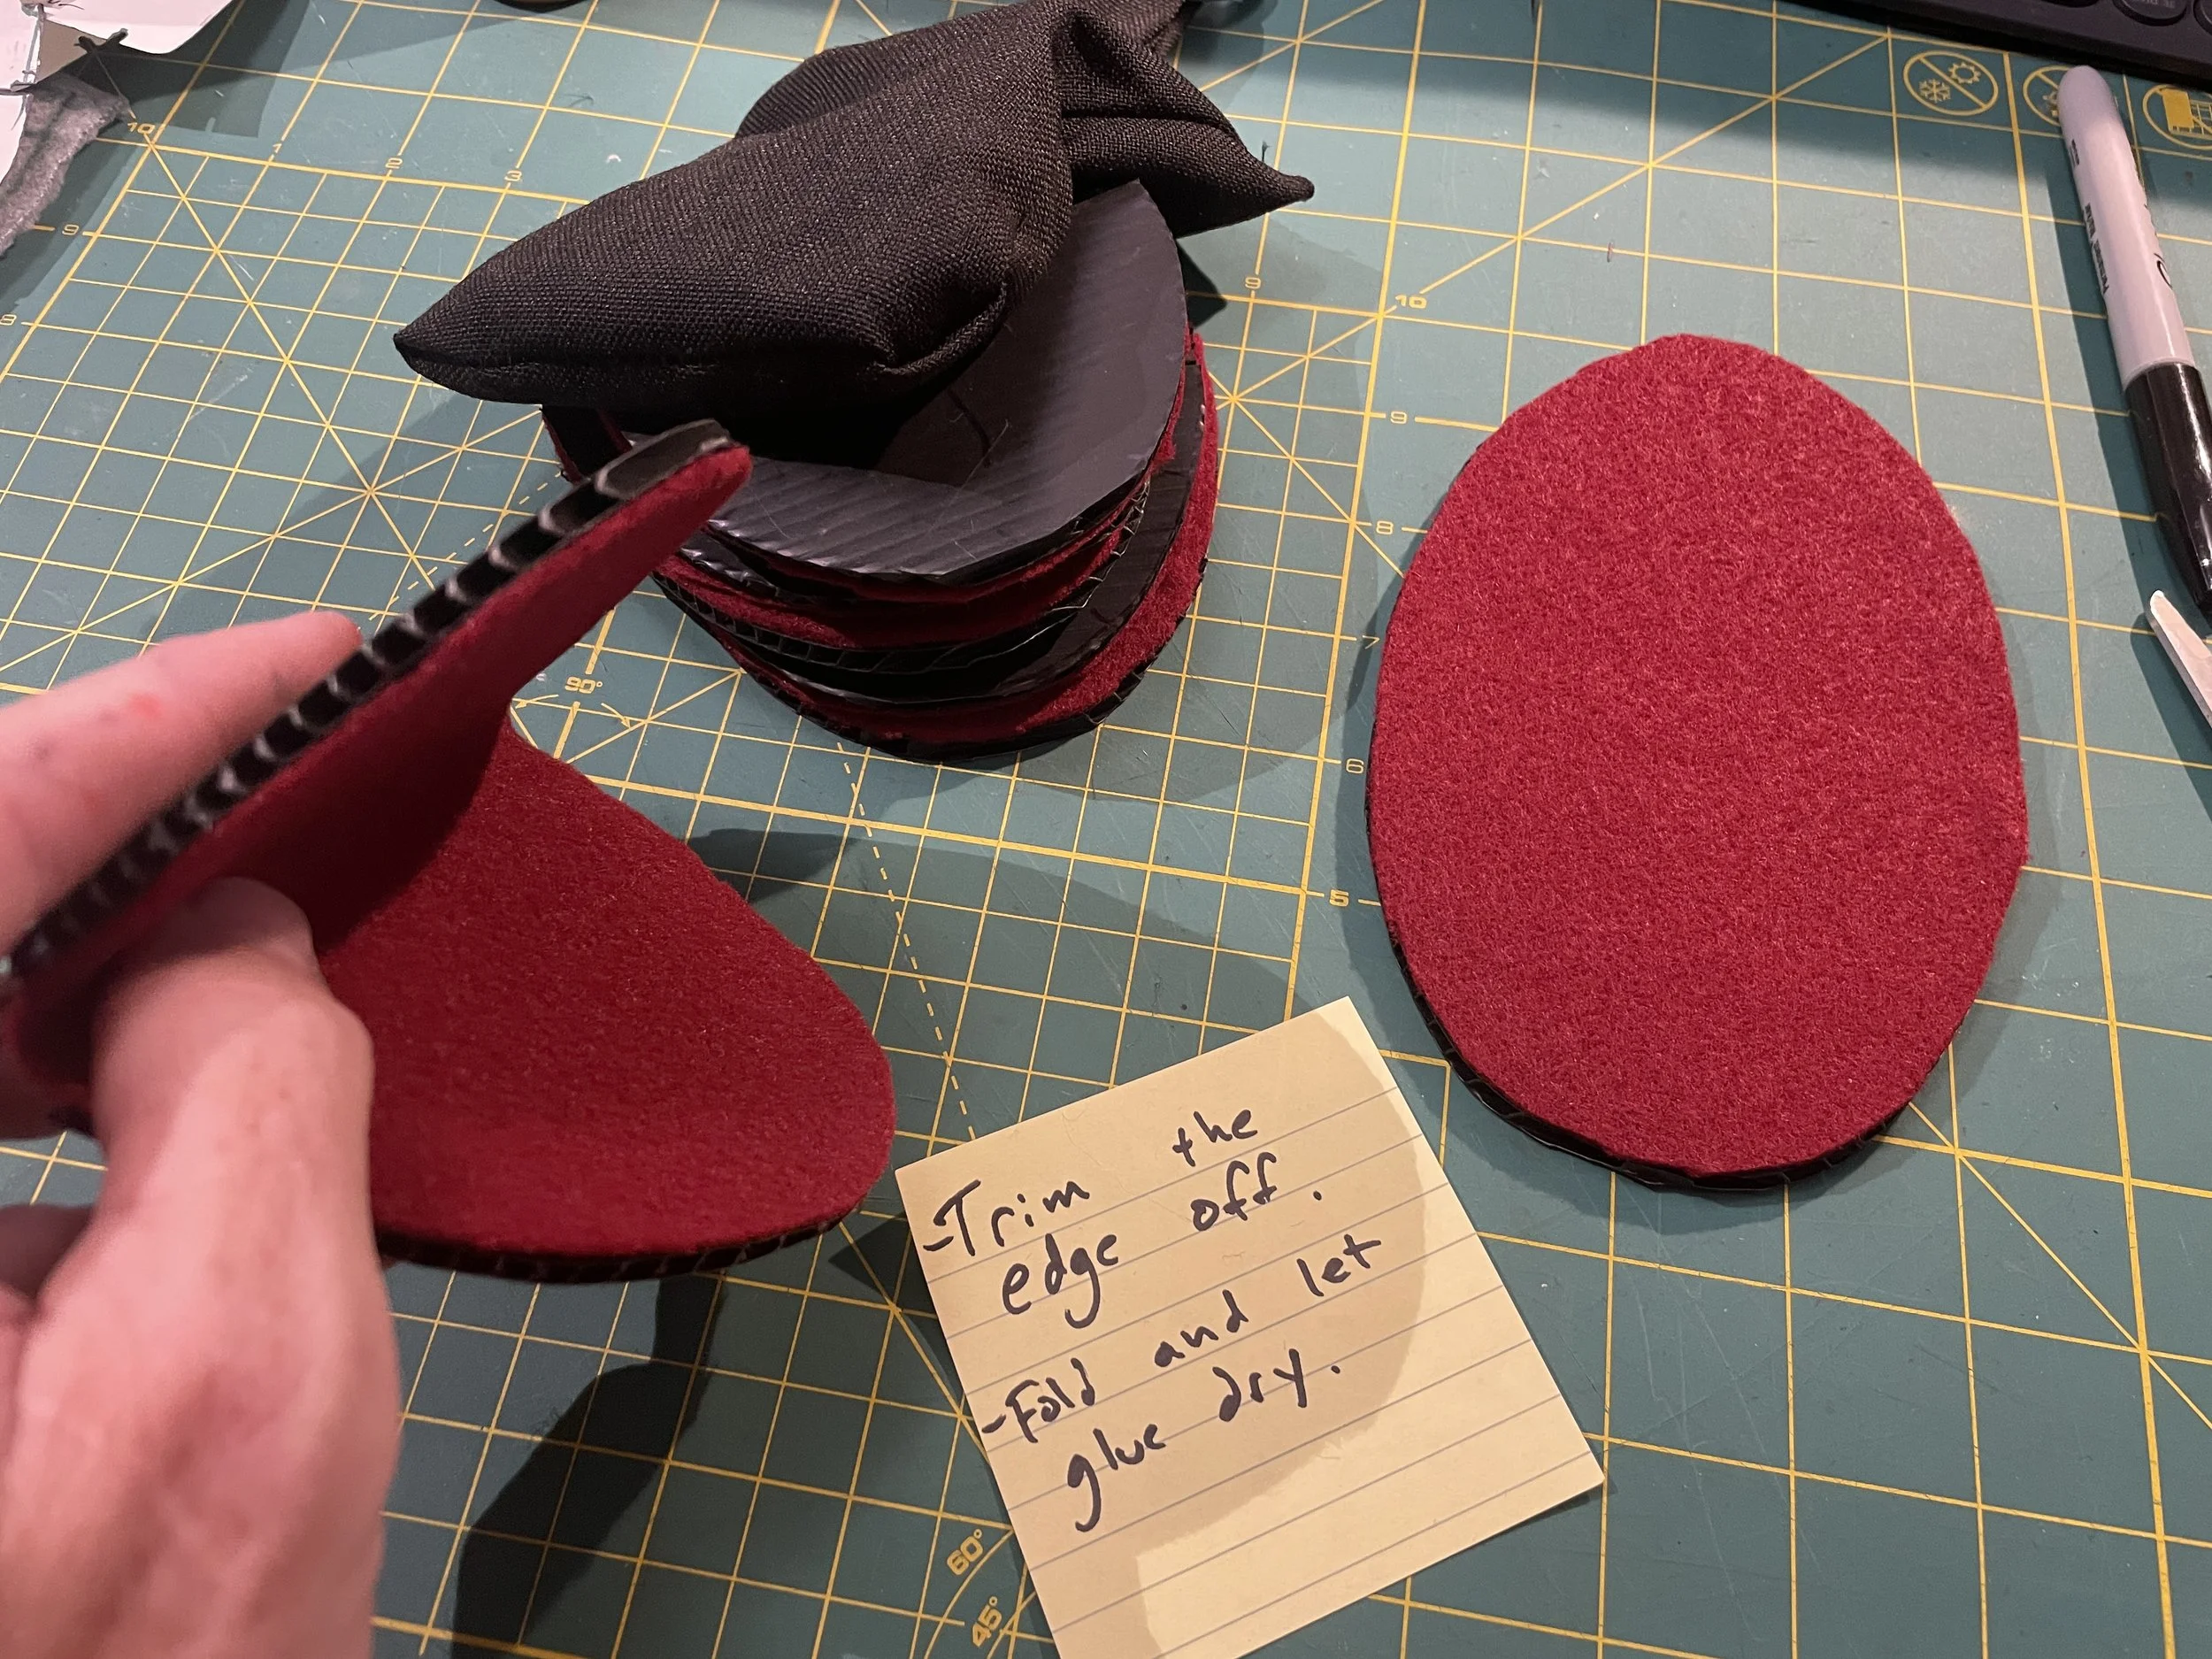
Step 1 – Make the Mouth Plate
Use the pattern to cut the mouth plate from cardboard or plastic.
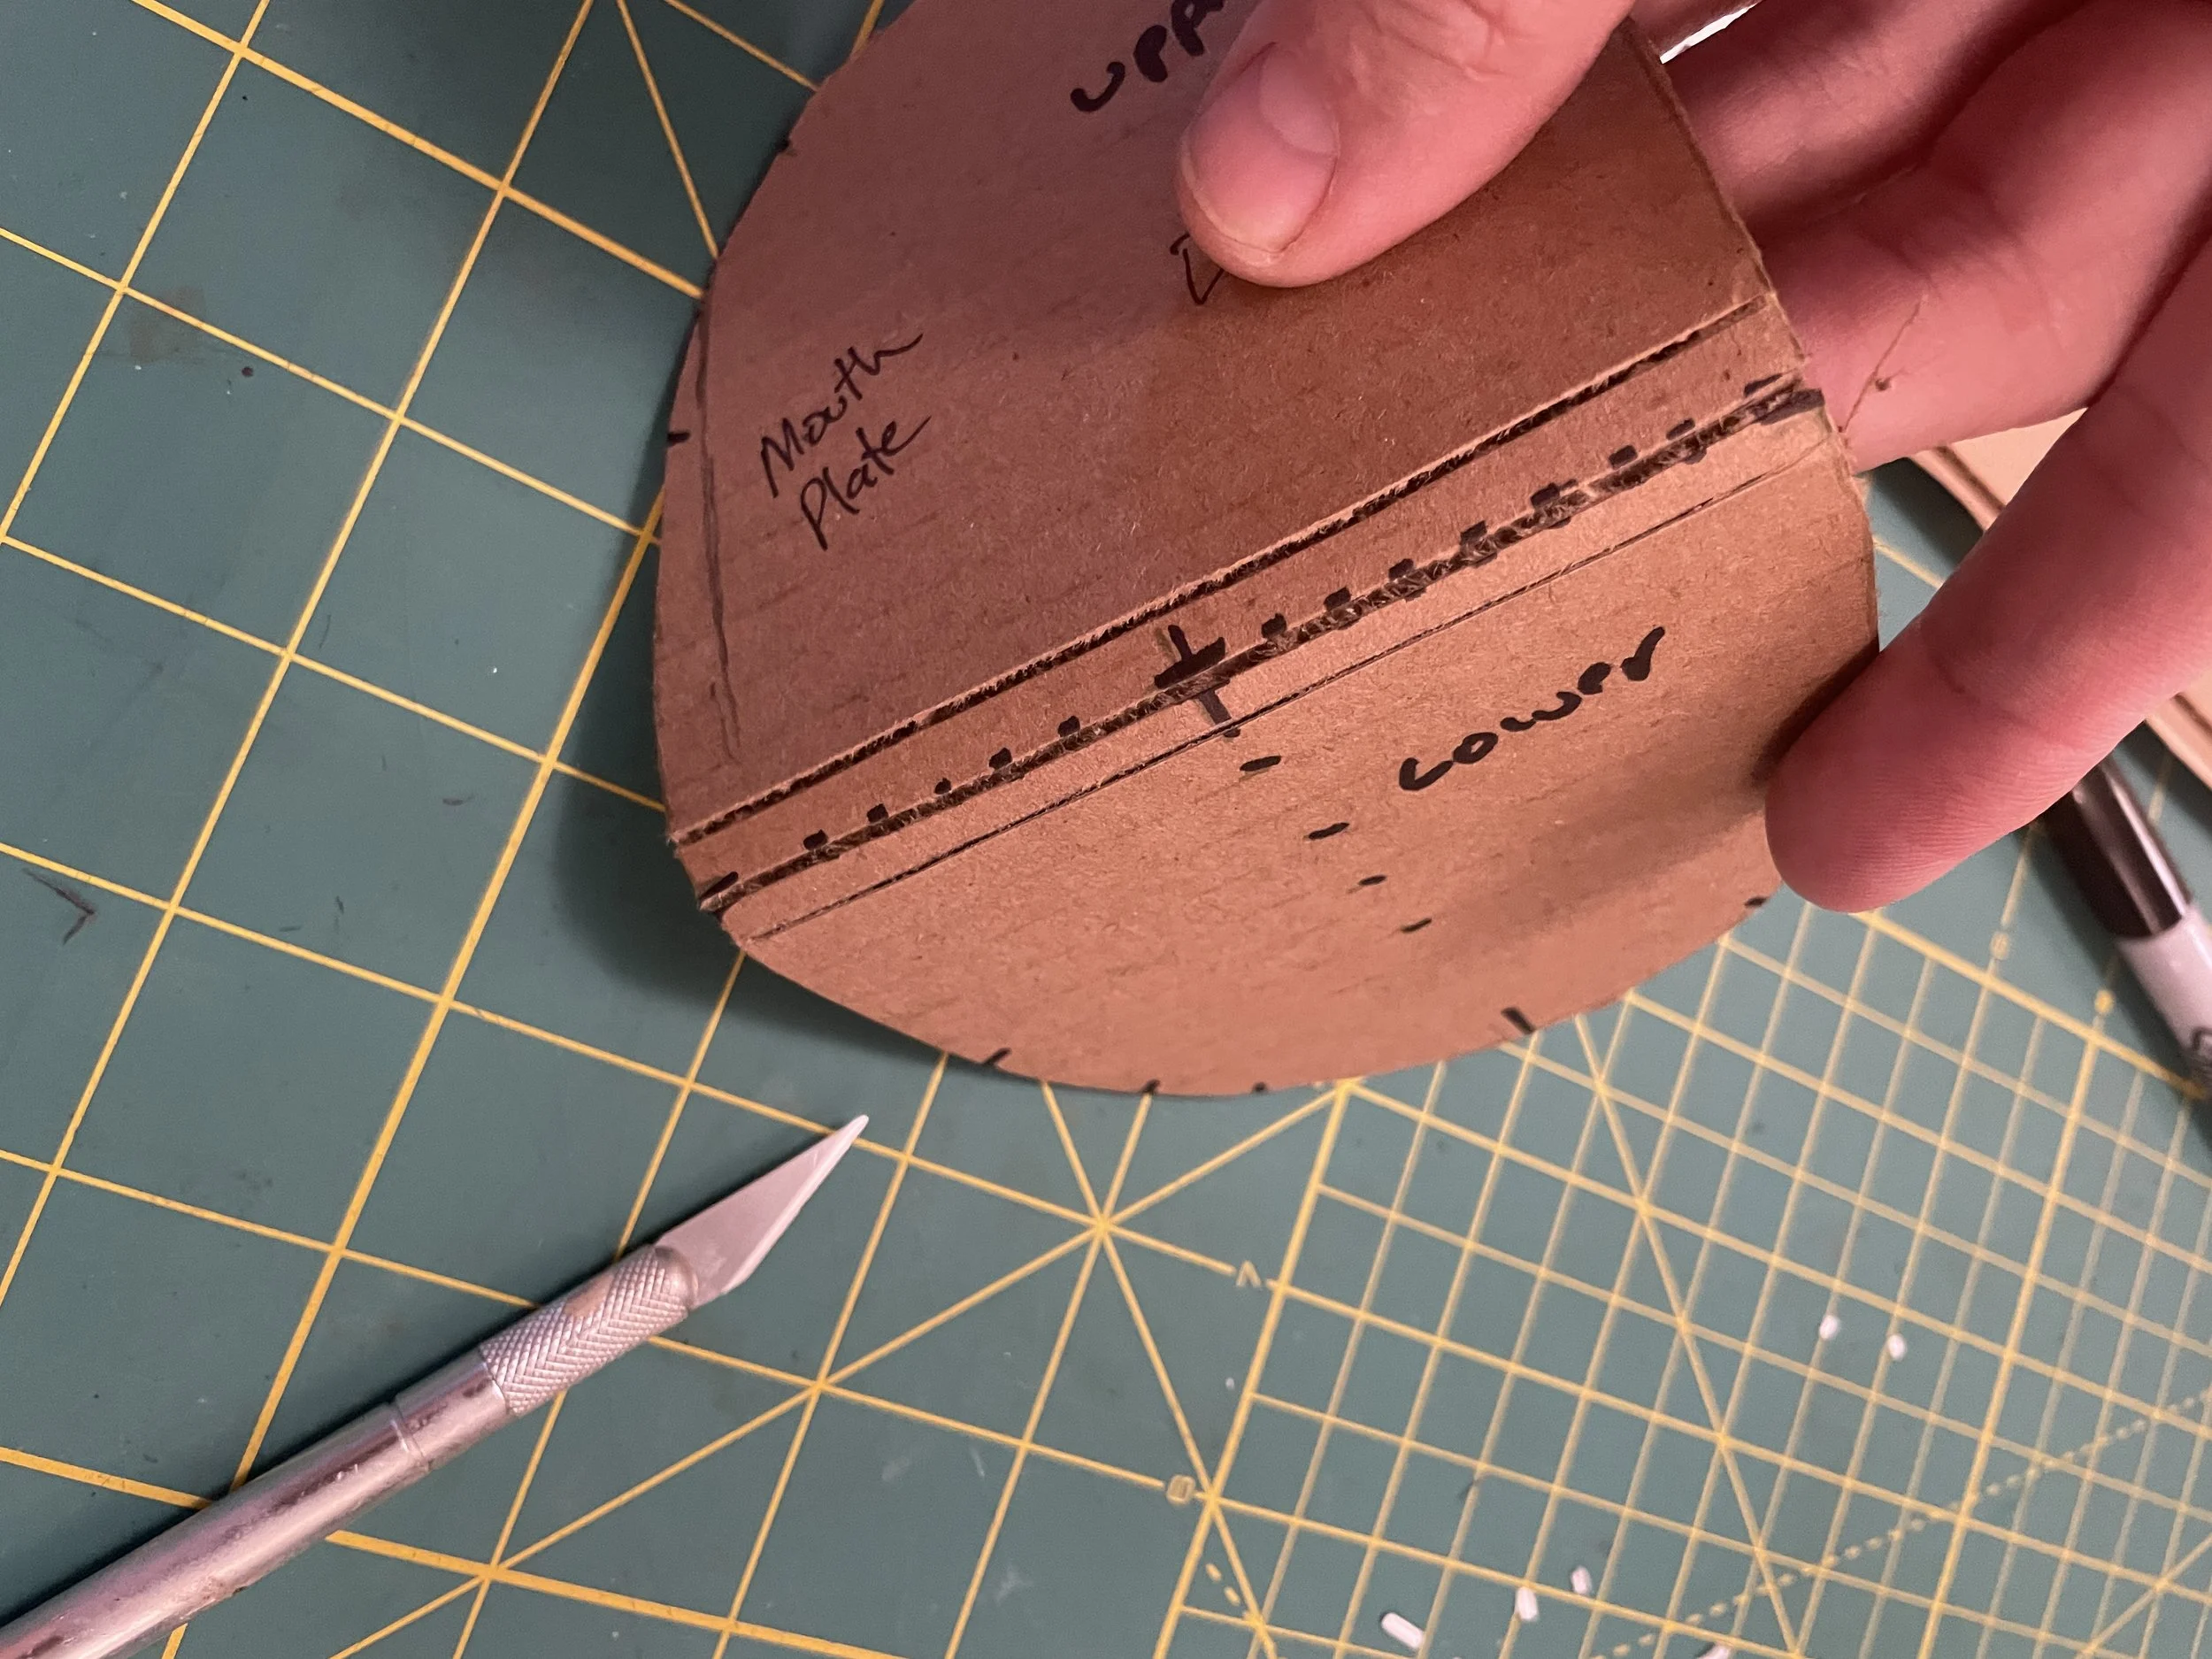
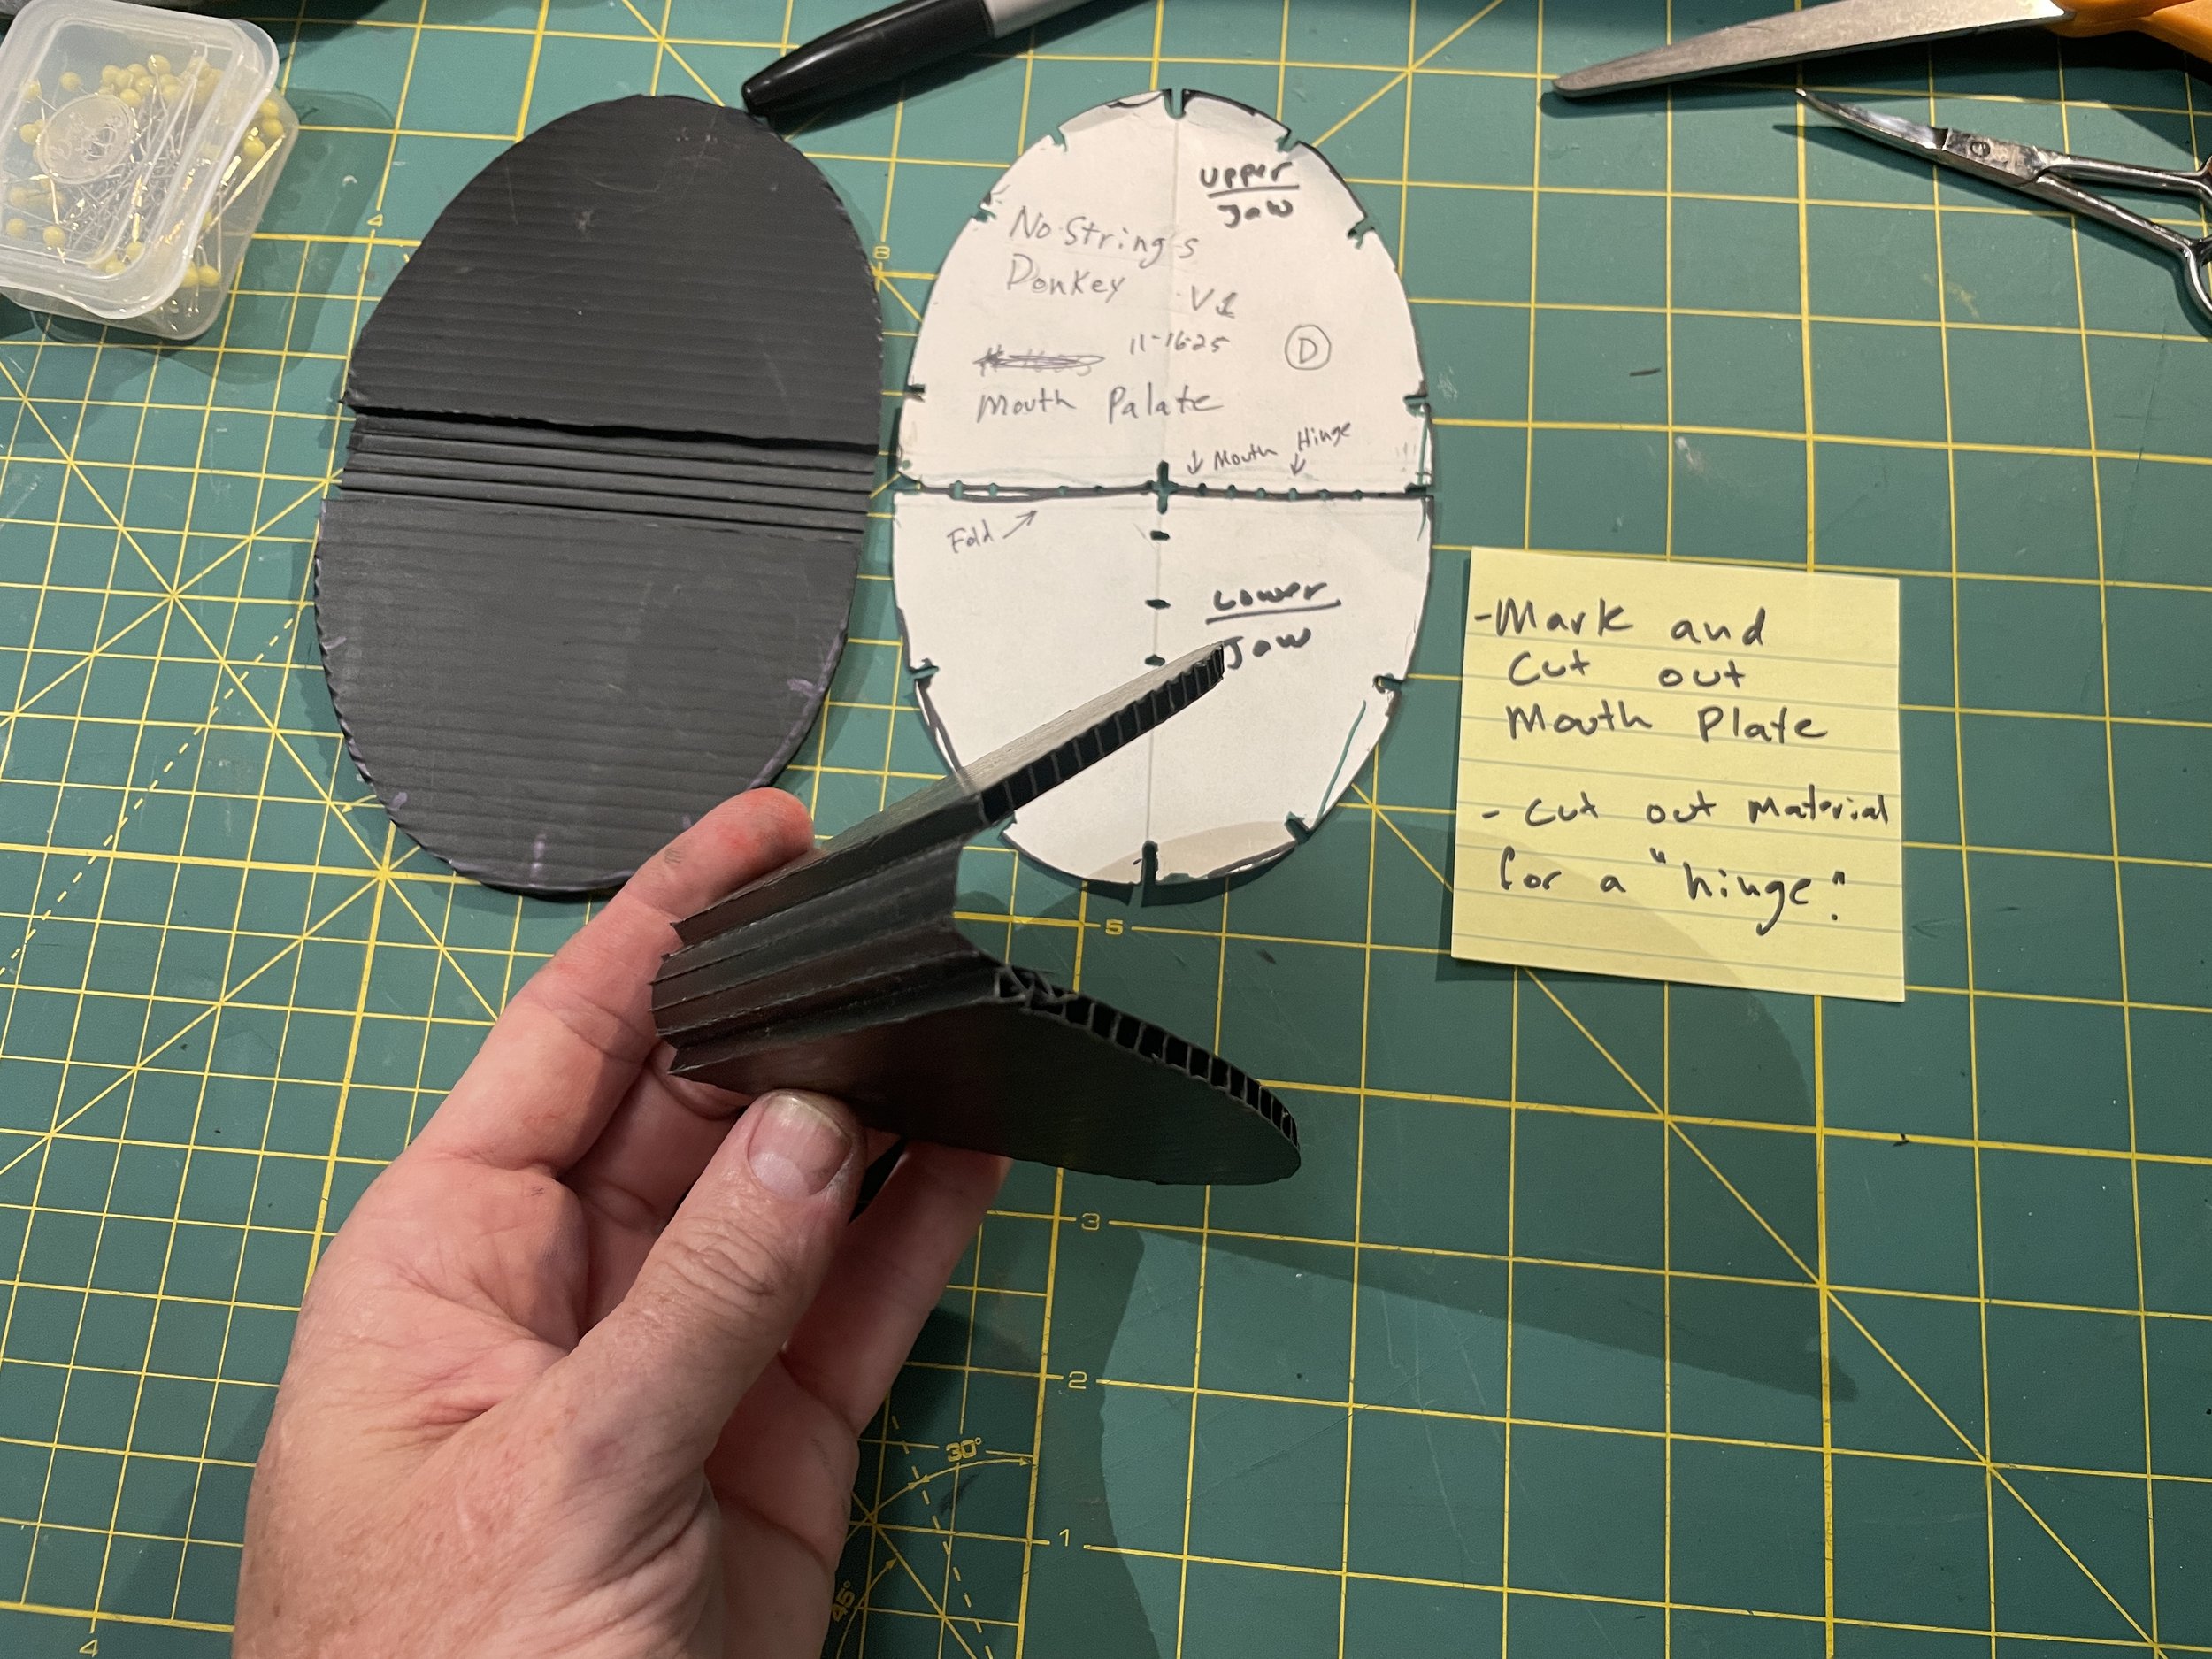
Mark the hinge line and fold the plate.
Short part = lower jaw
Long part = upper jaw
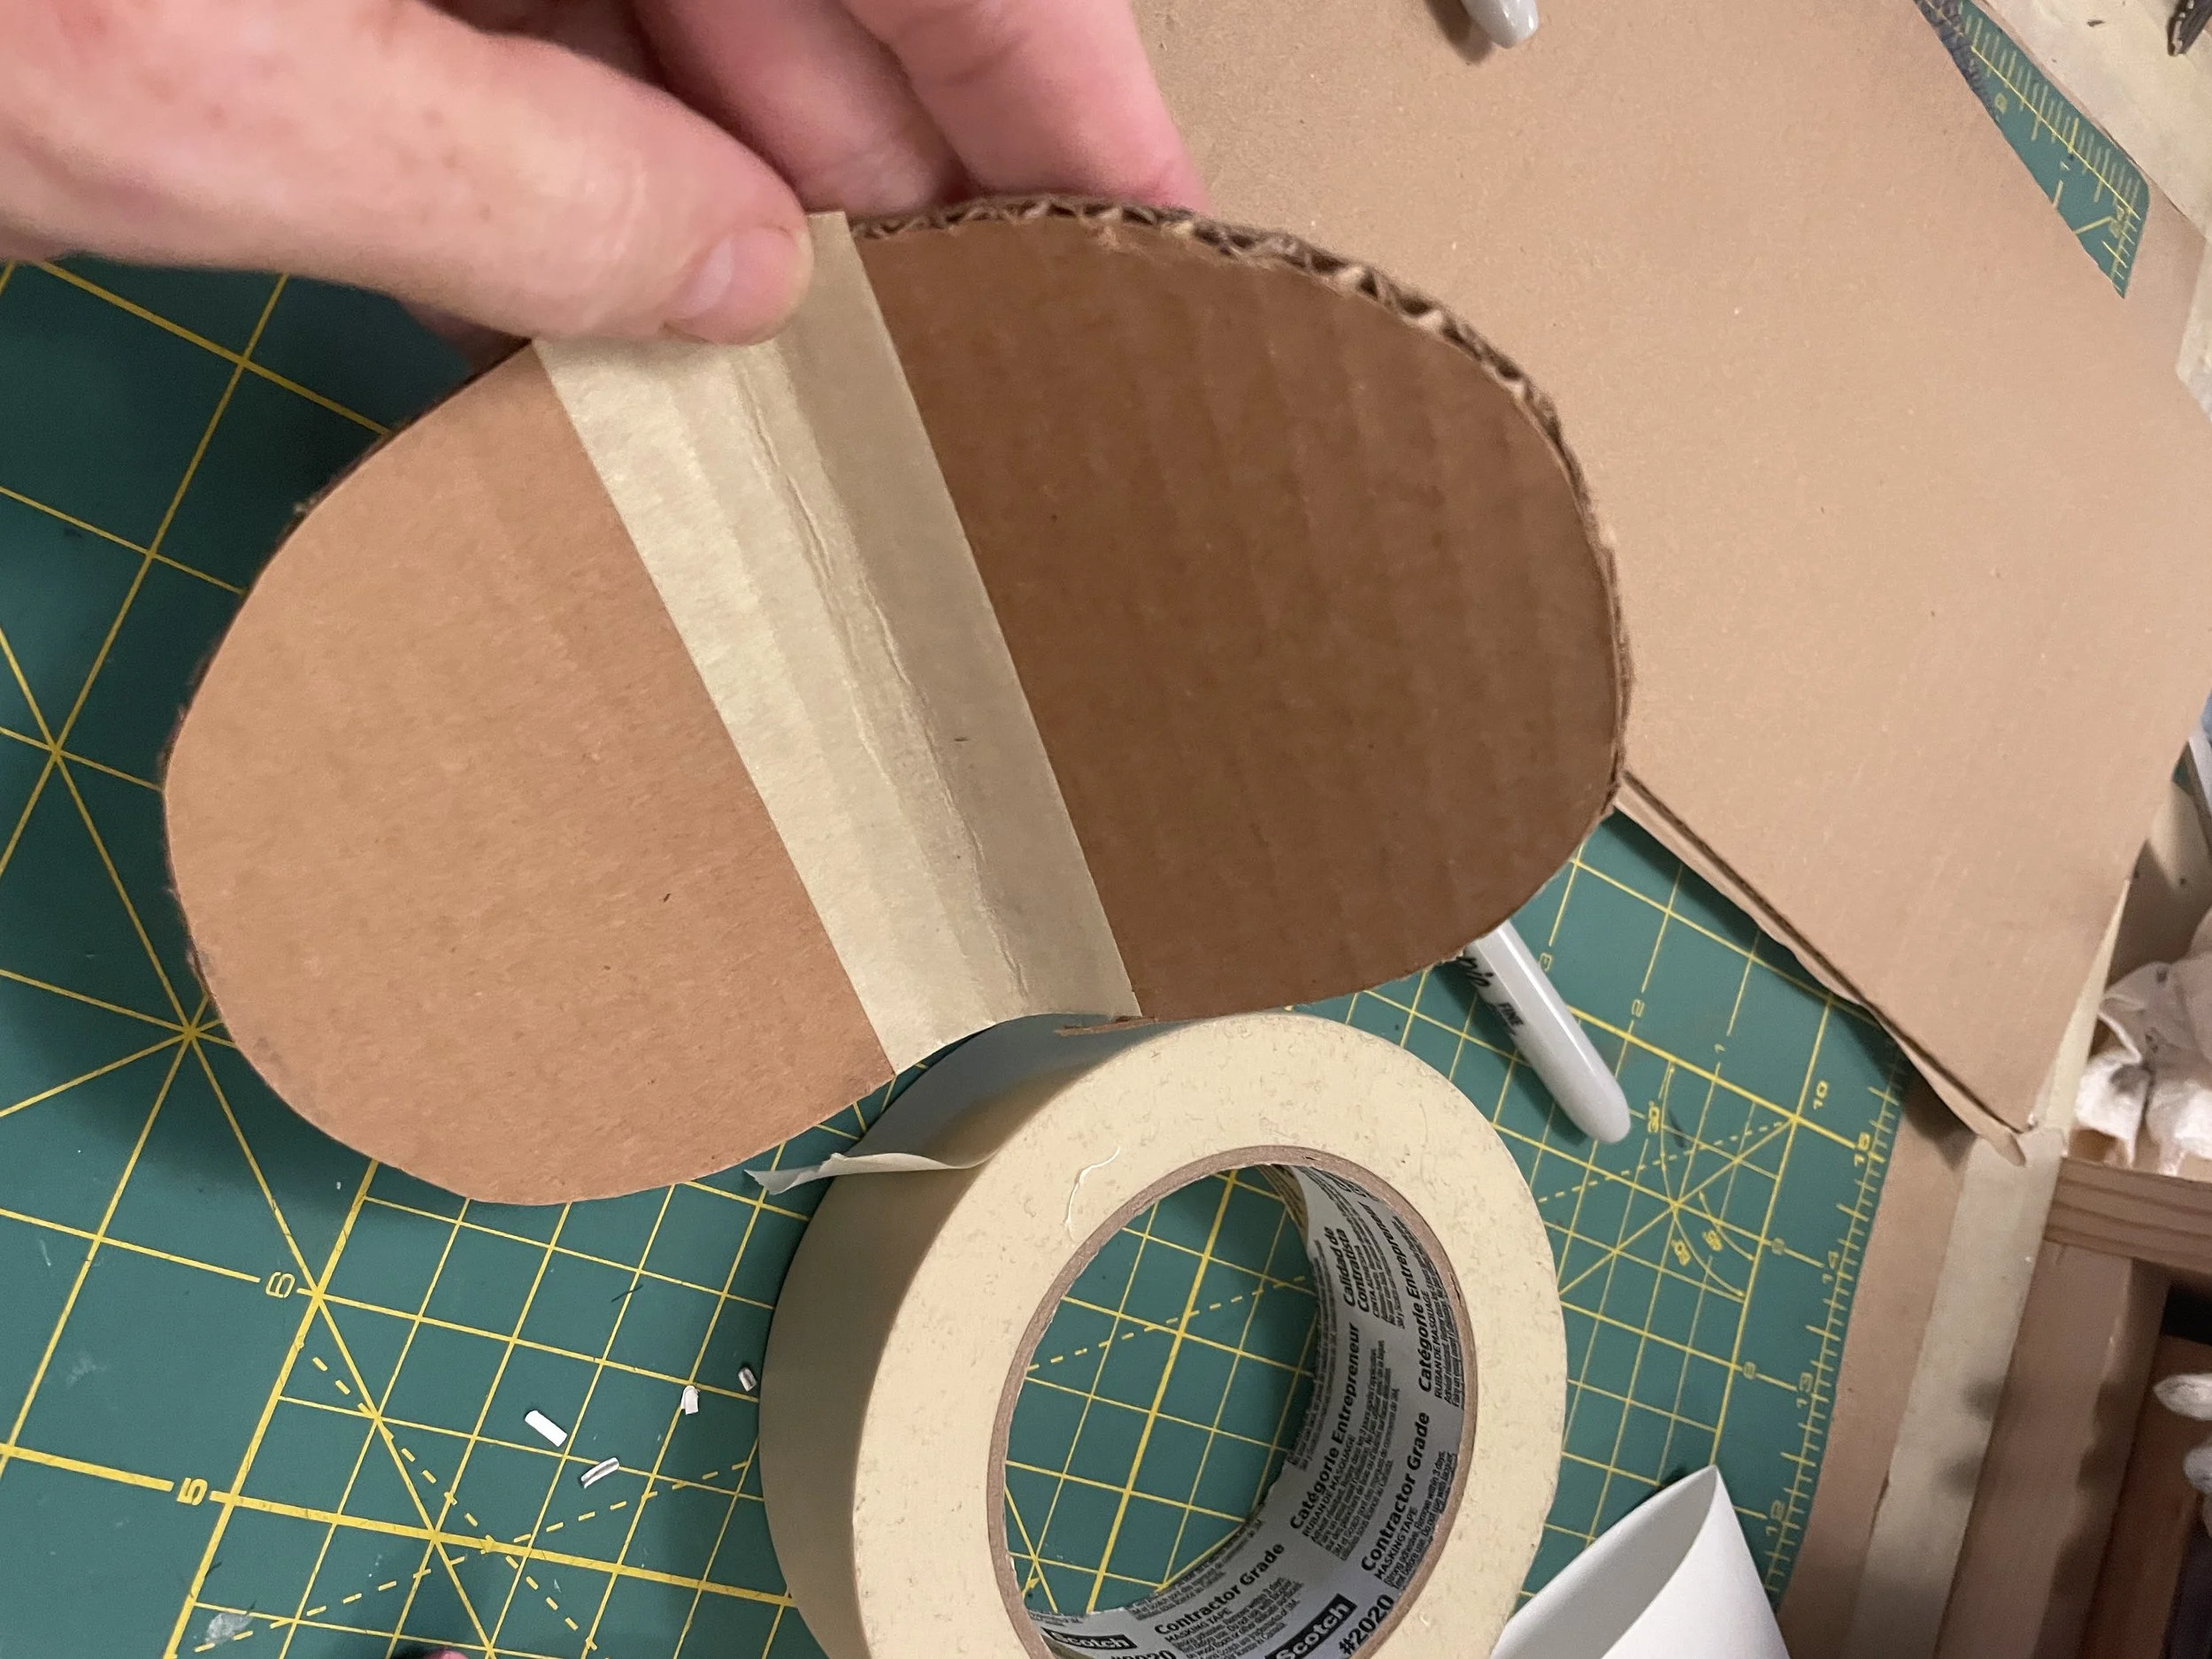
Remove a thin strip of cardboard along the hinge so it can bend. Reinforce the hinge with masking tape.
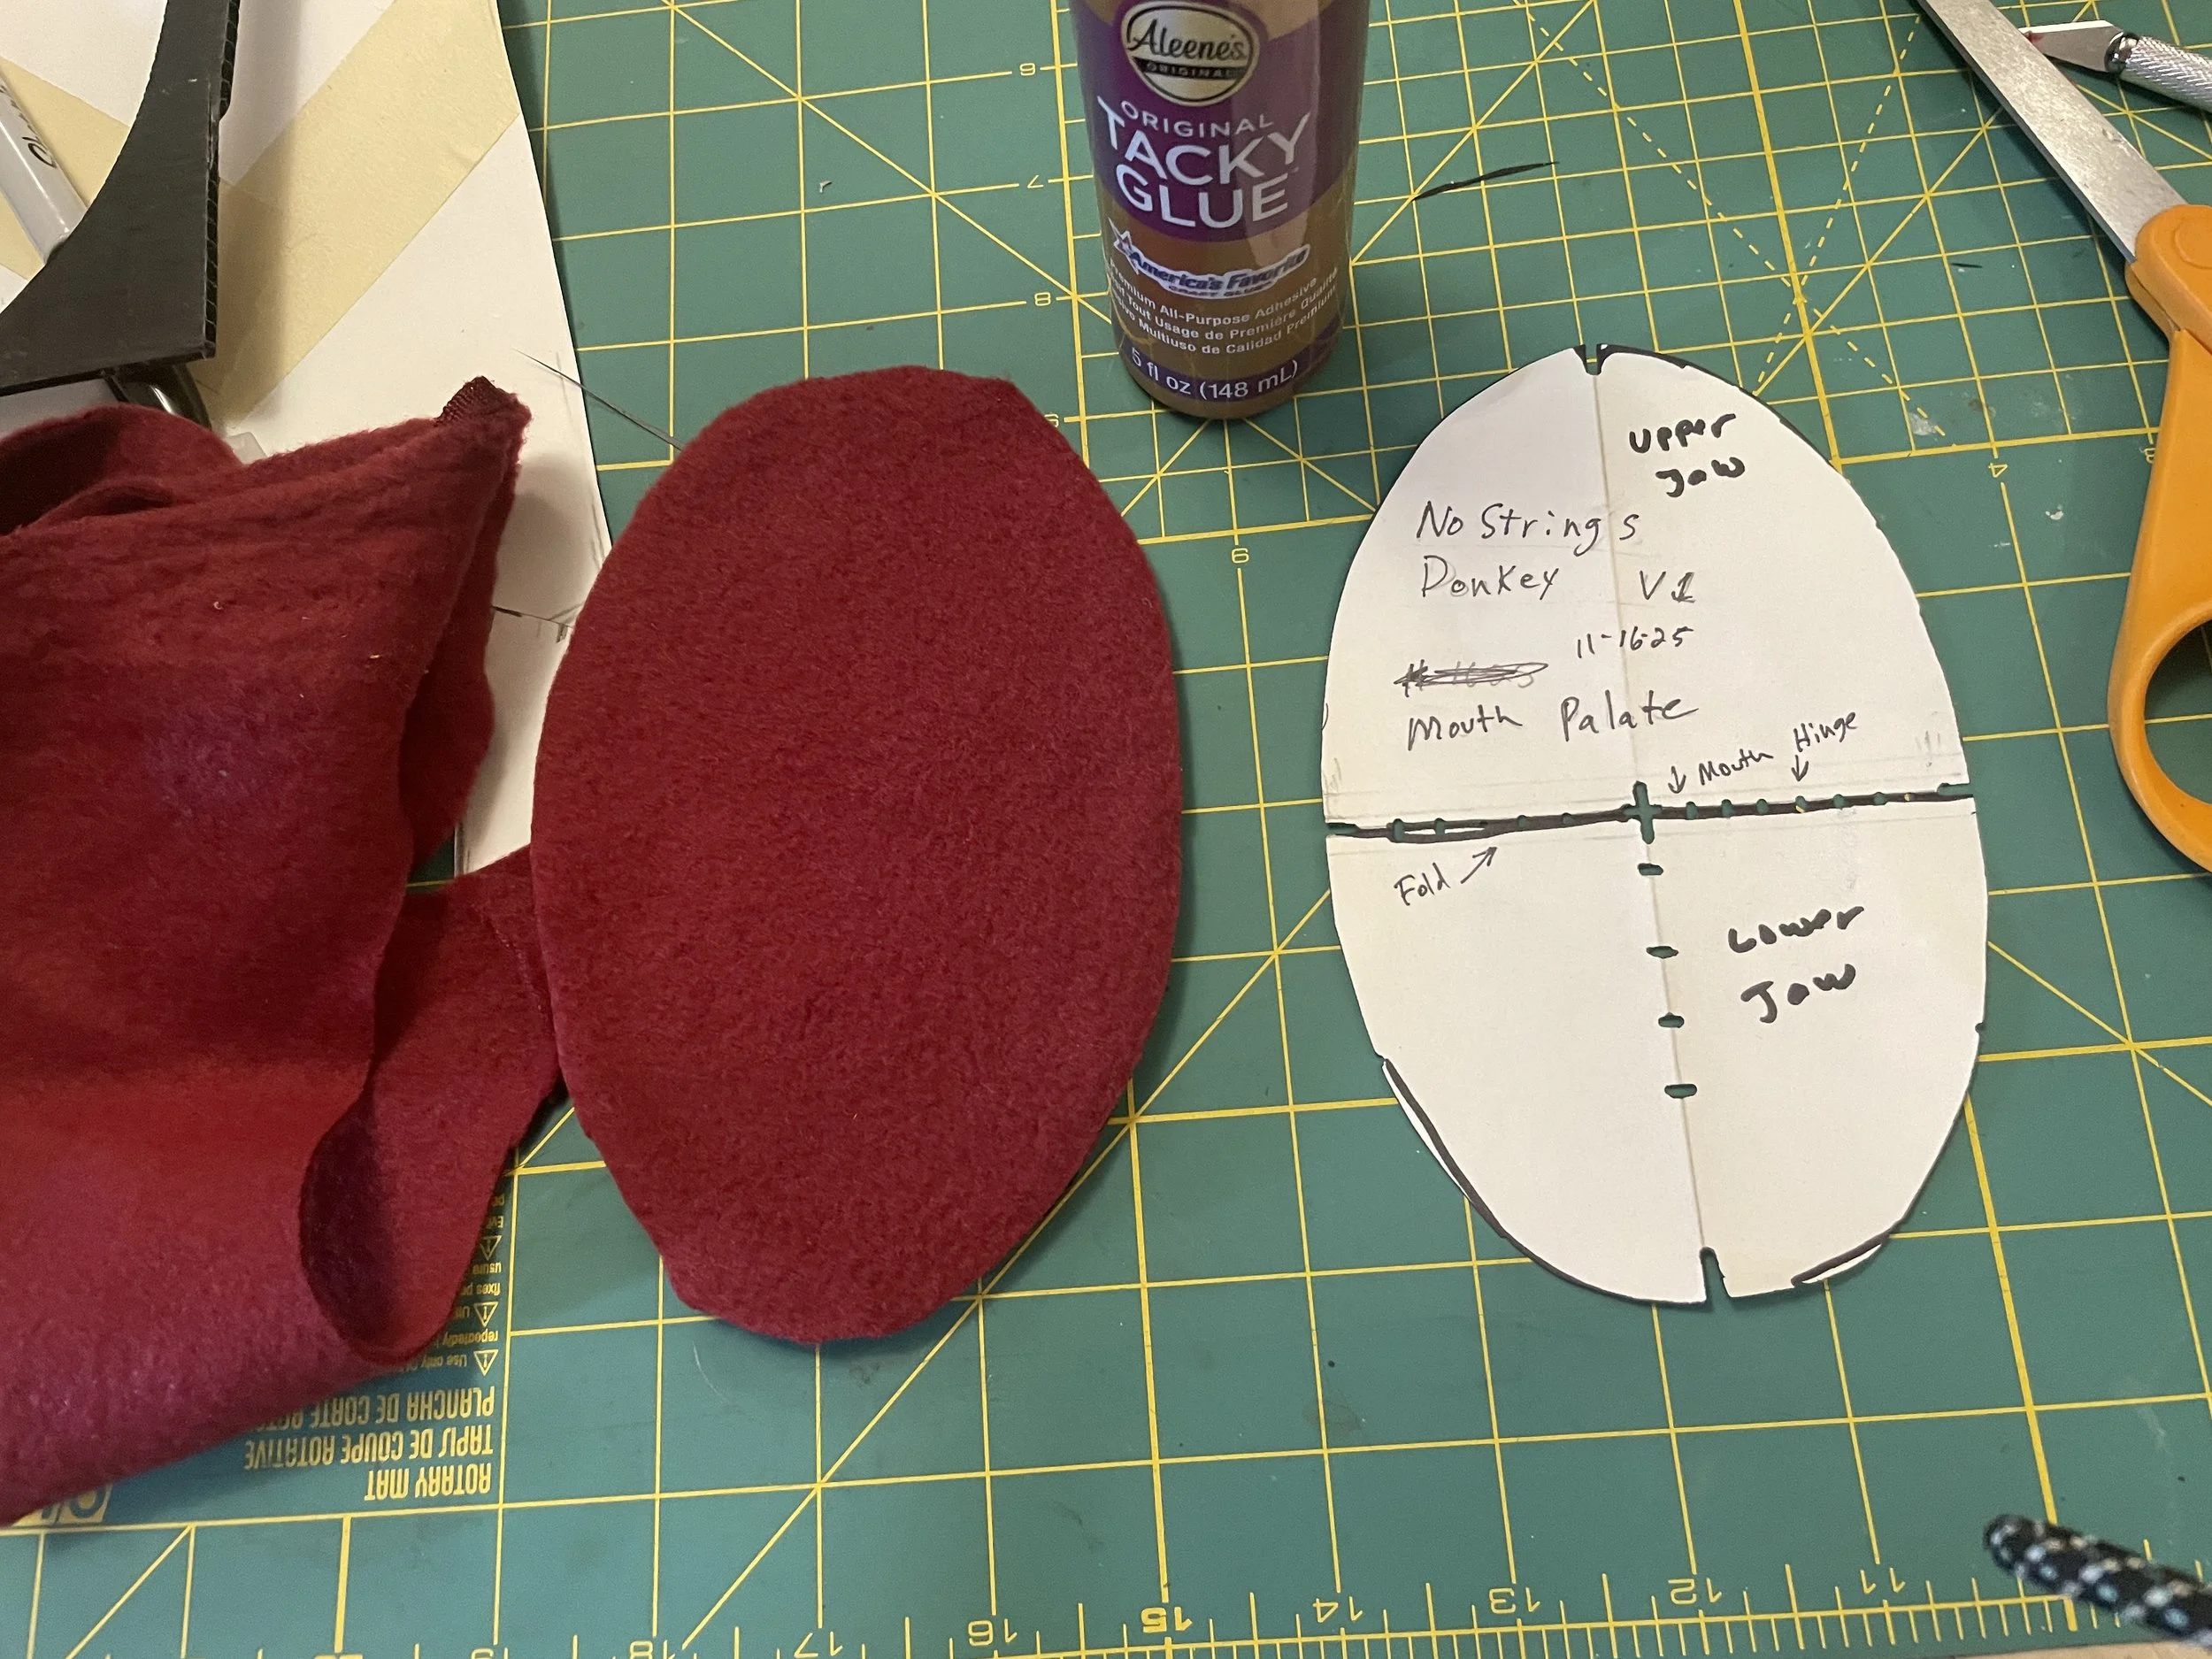
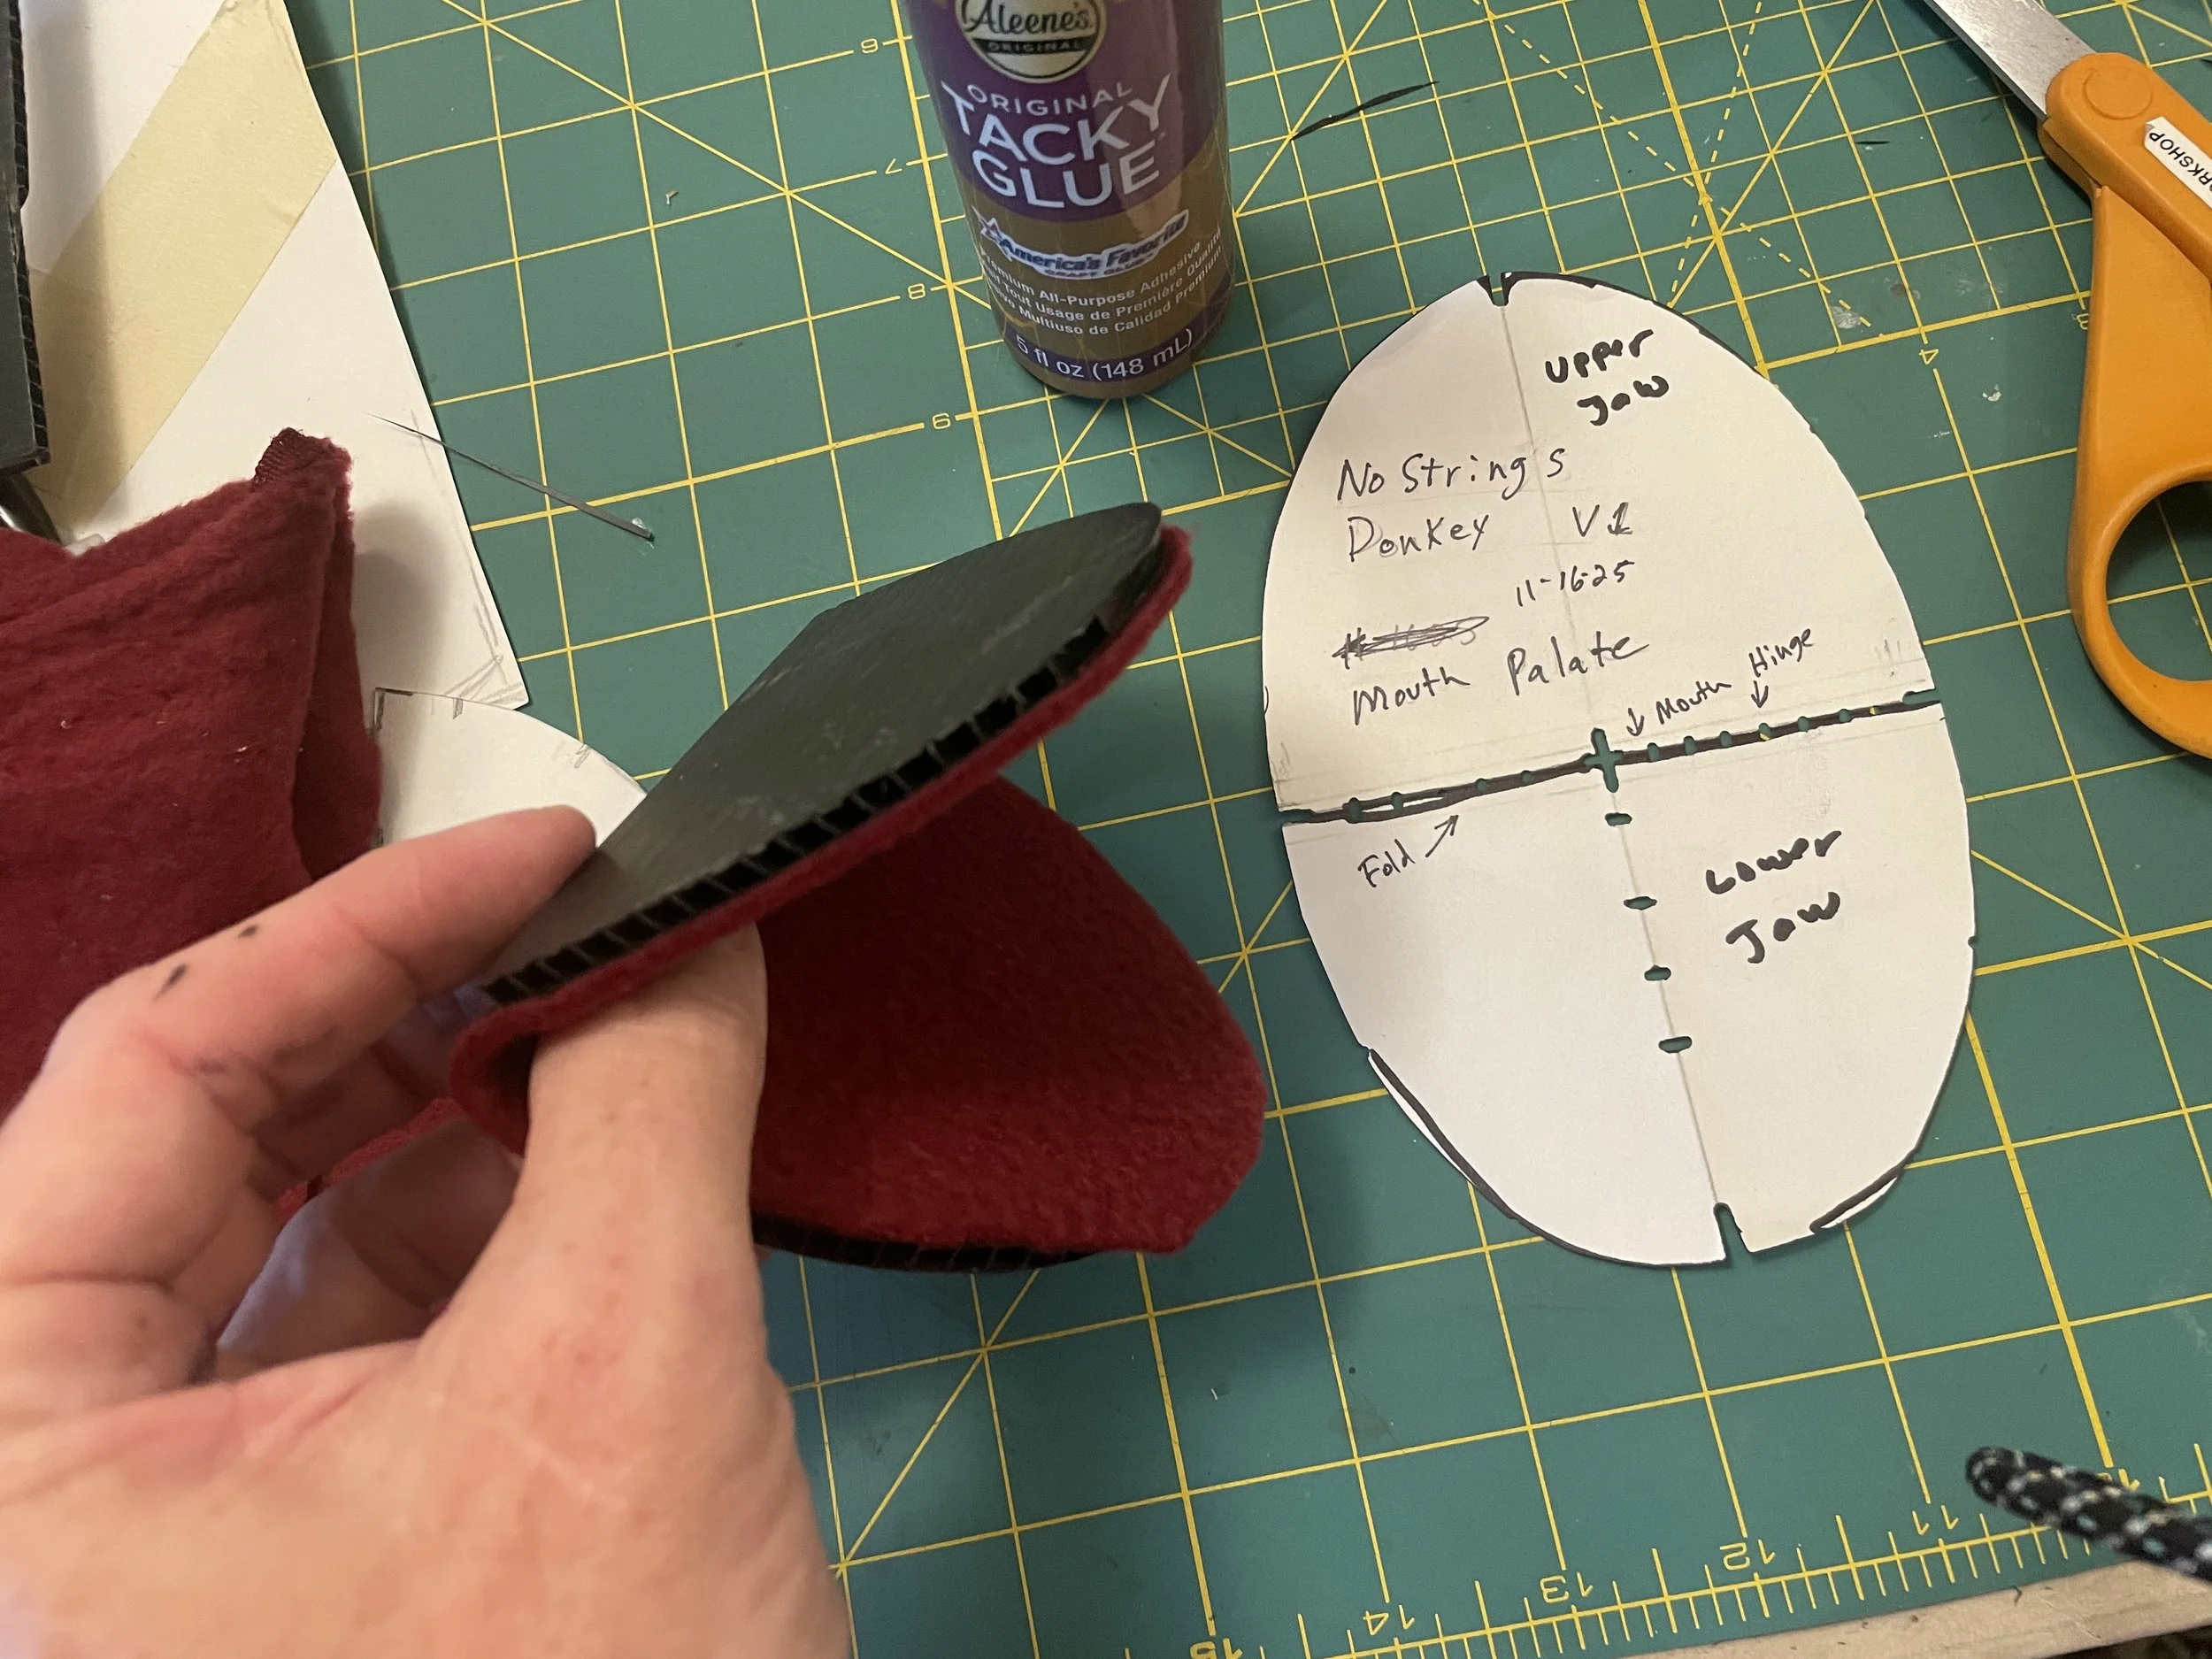
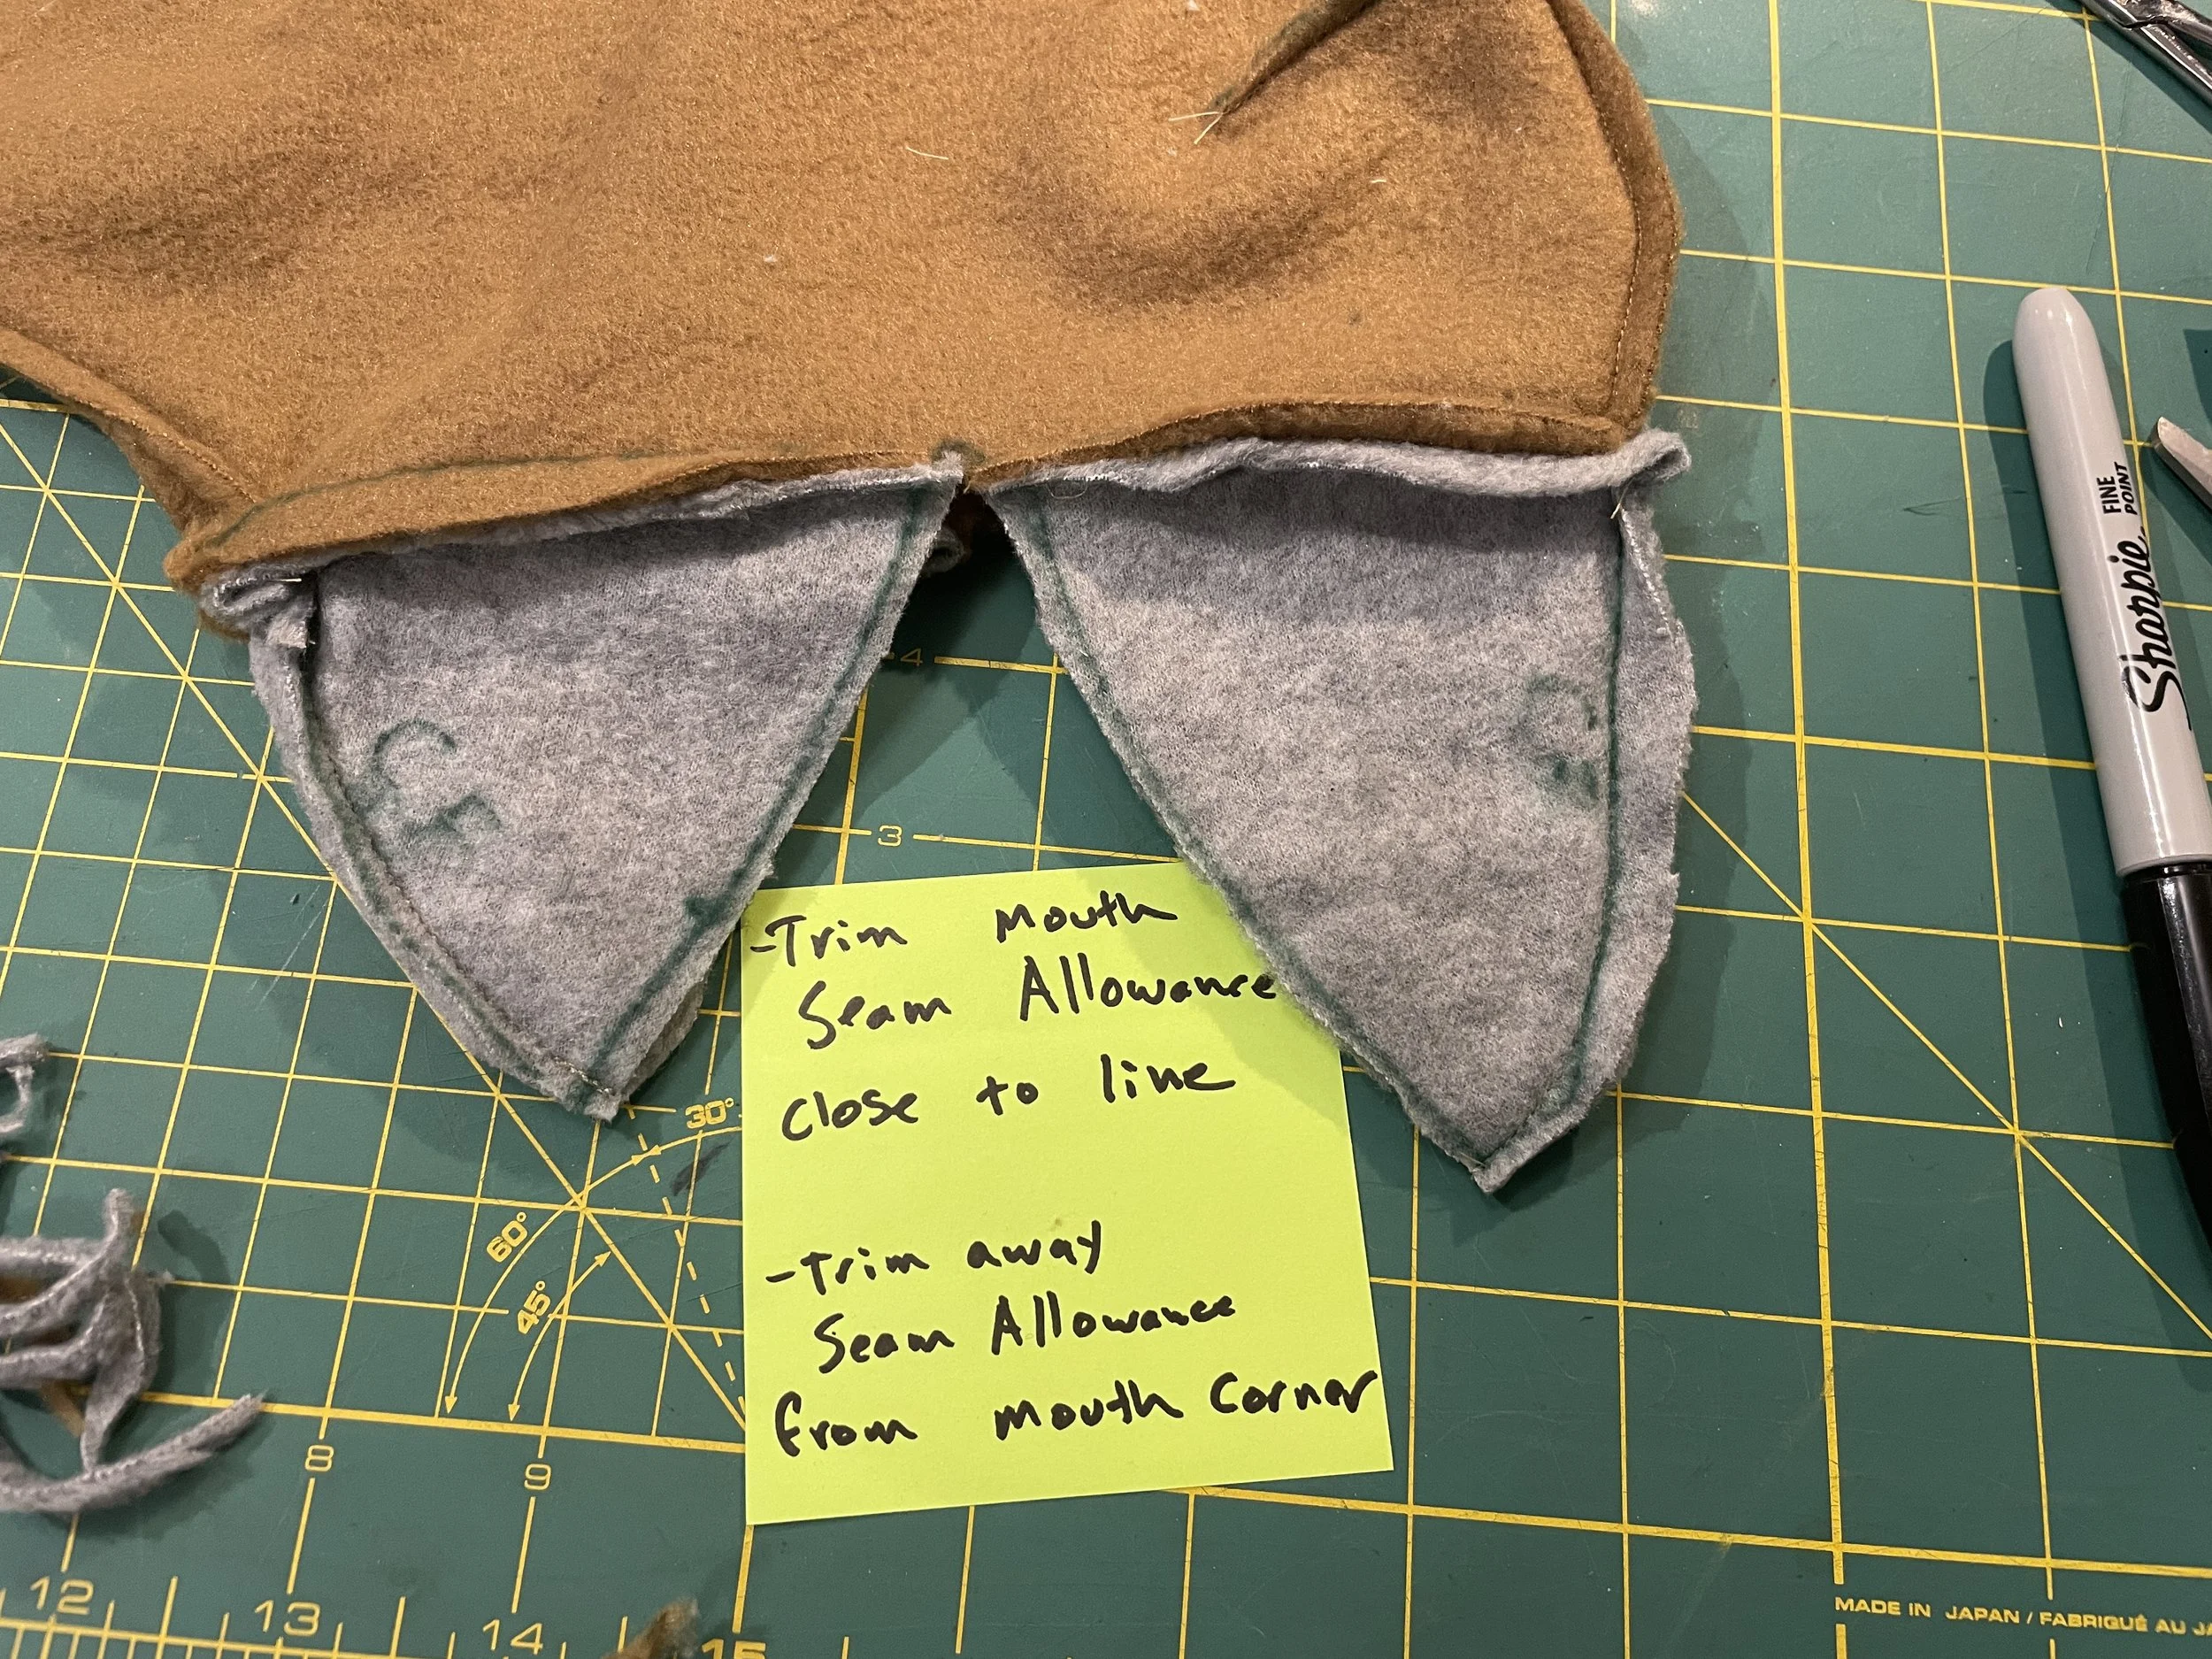
Glue felt to the inside of the mouth. Trim to the edges.
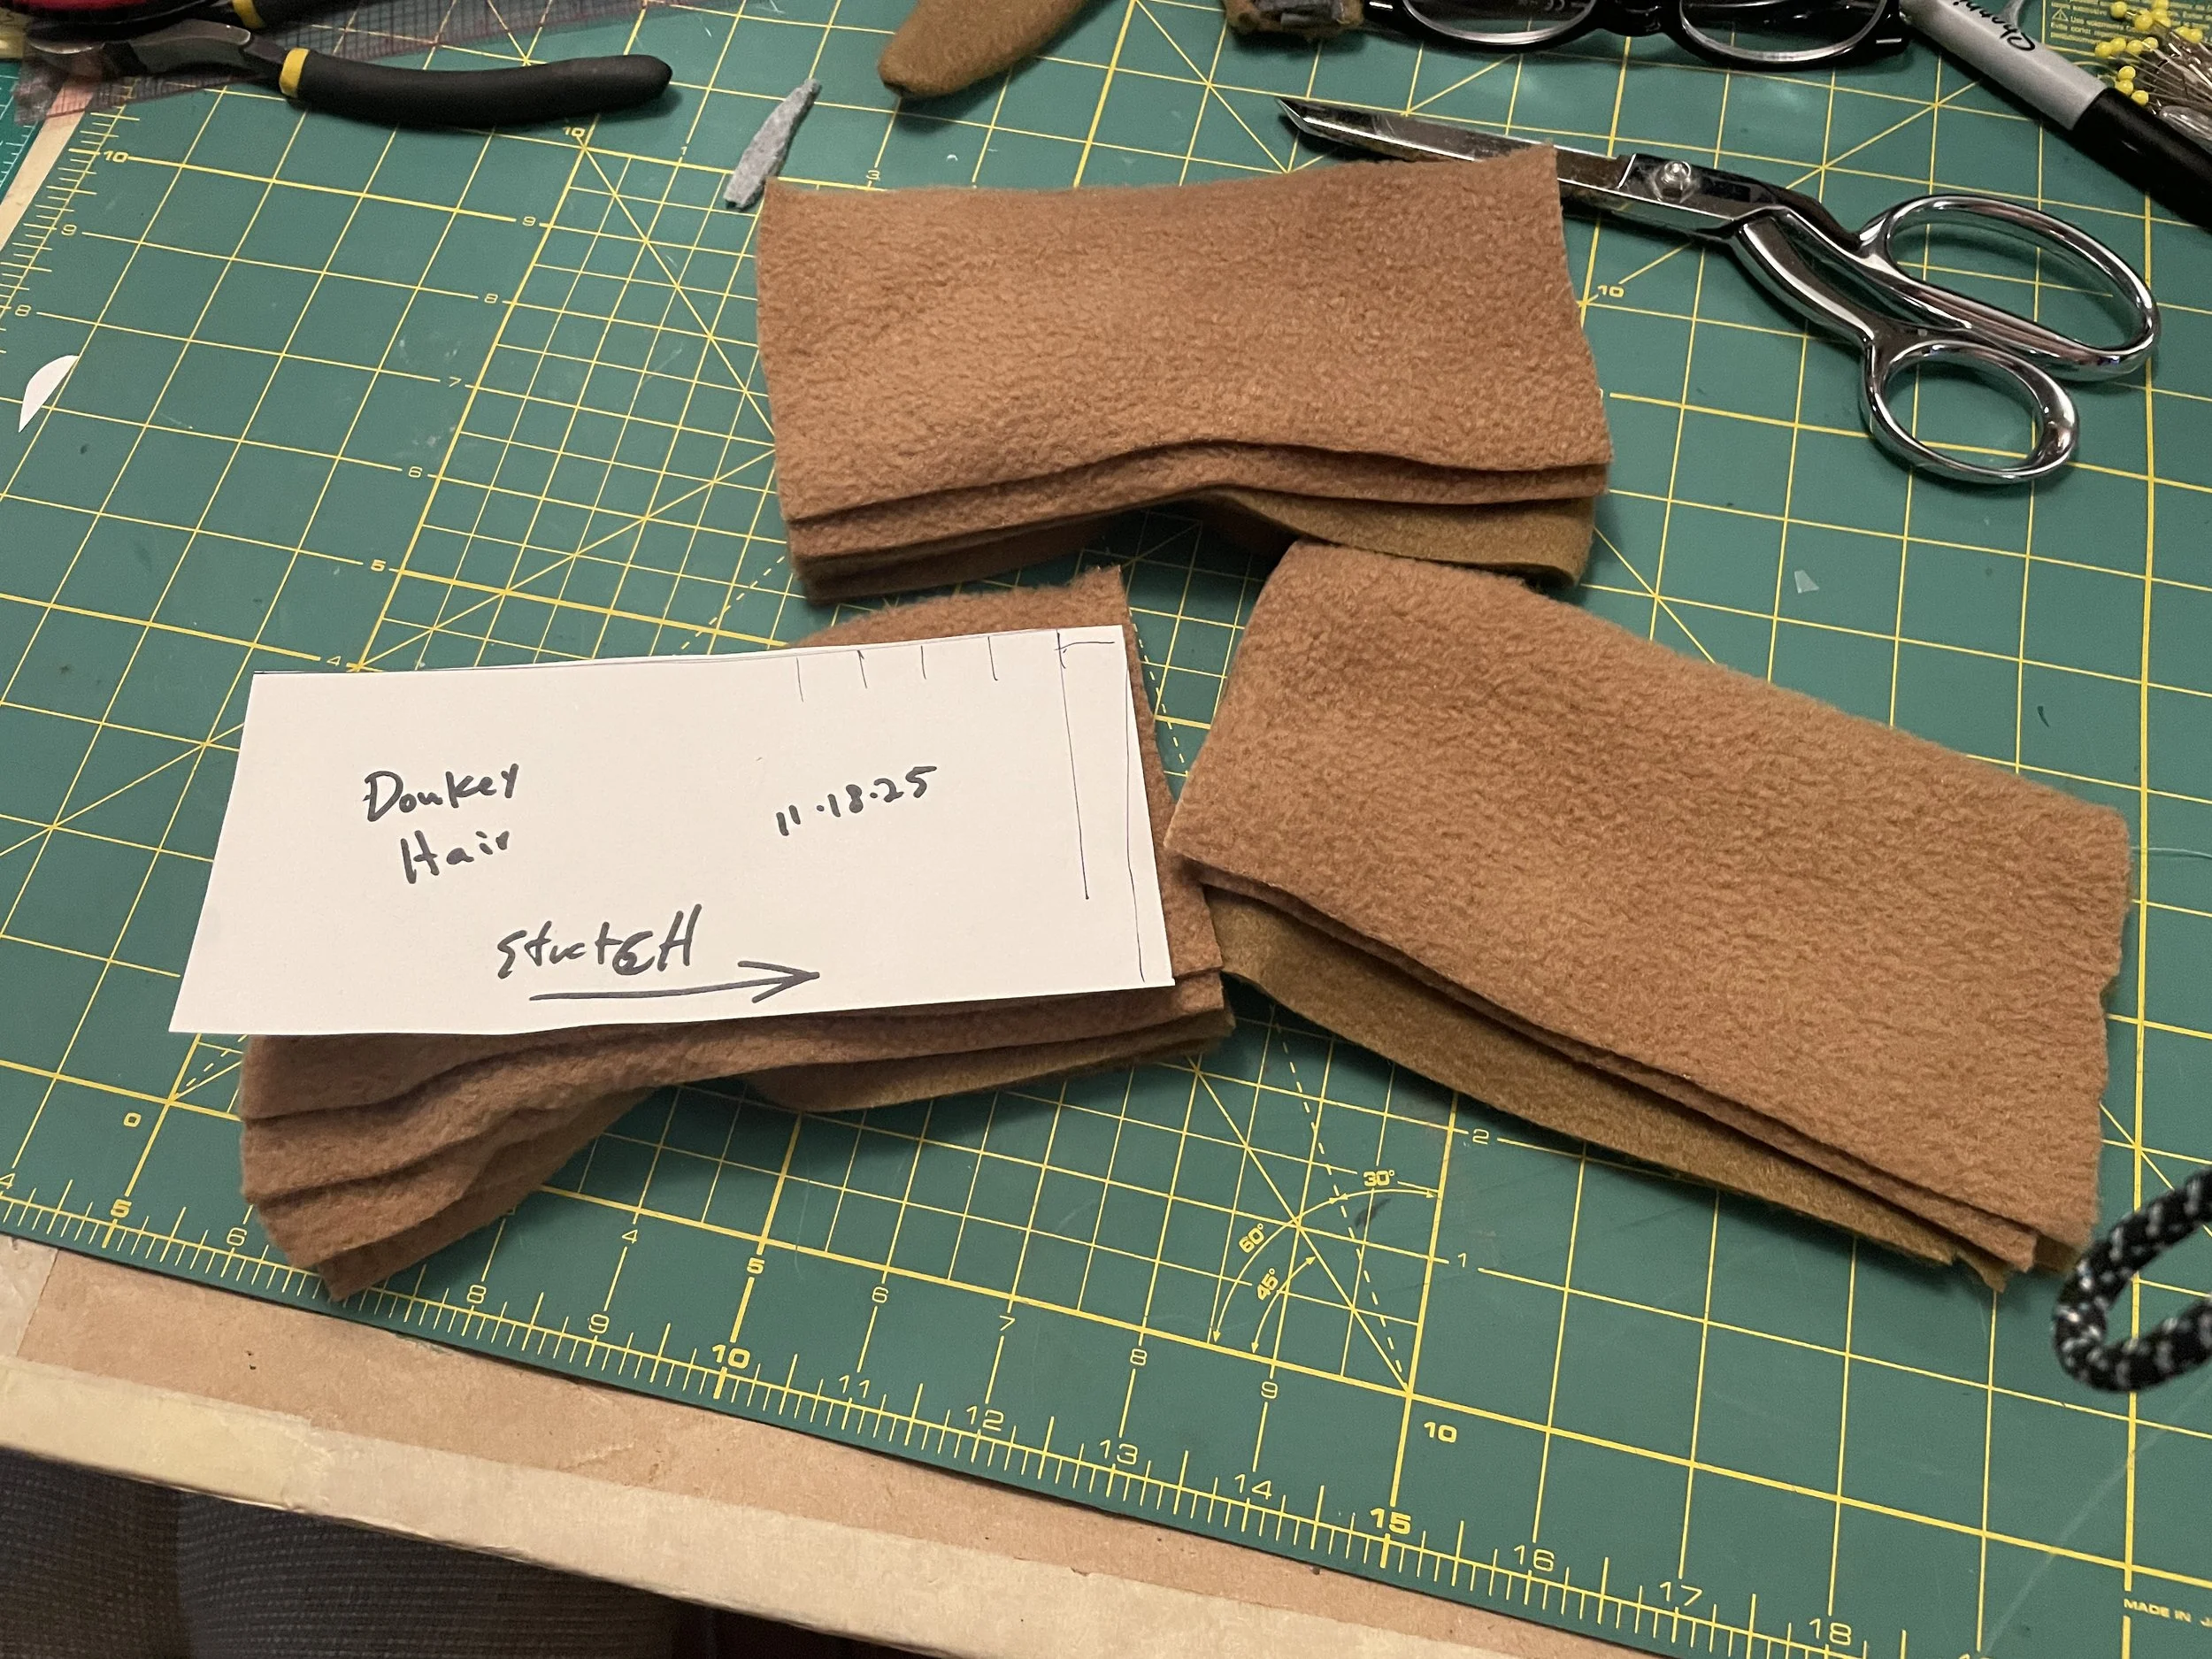
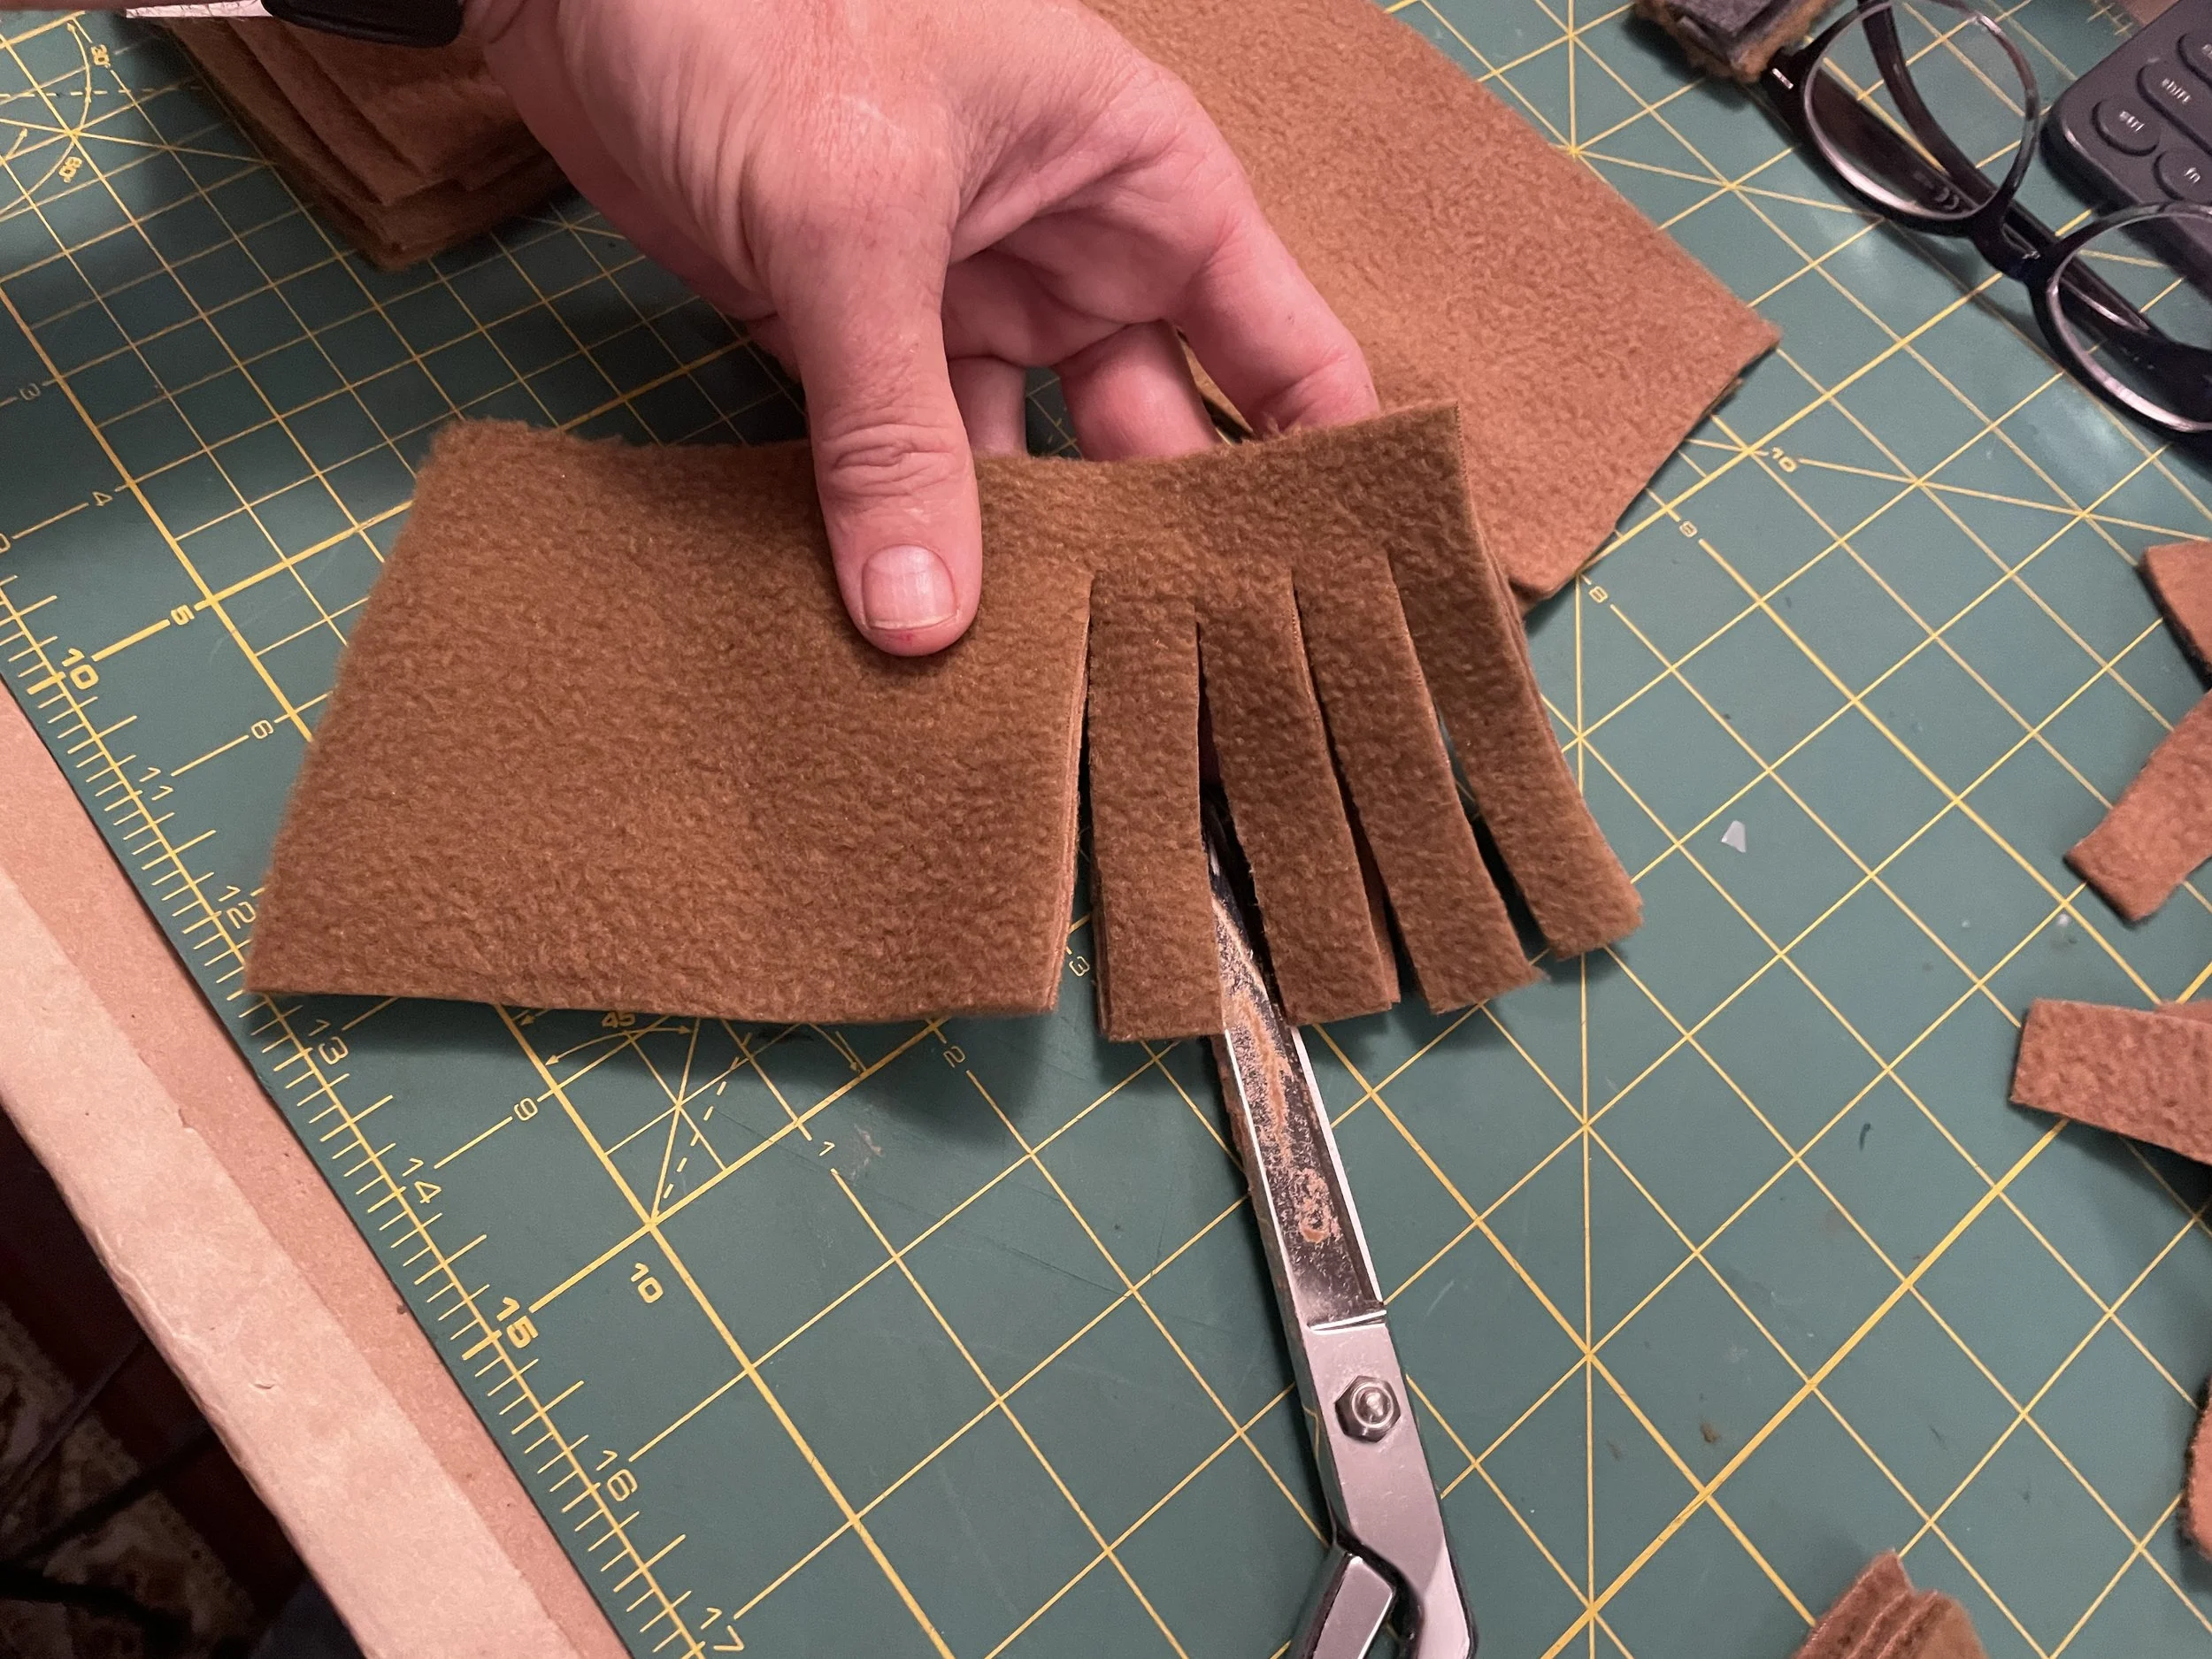
Step 2 – Cut the Hair
Cut two rectangles of brown fleece using the hair pattern.
Cut vertical strips into each piece, leaving a solid edge for sewing.
Set these pieces aside until the body is ready.
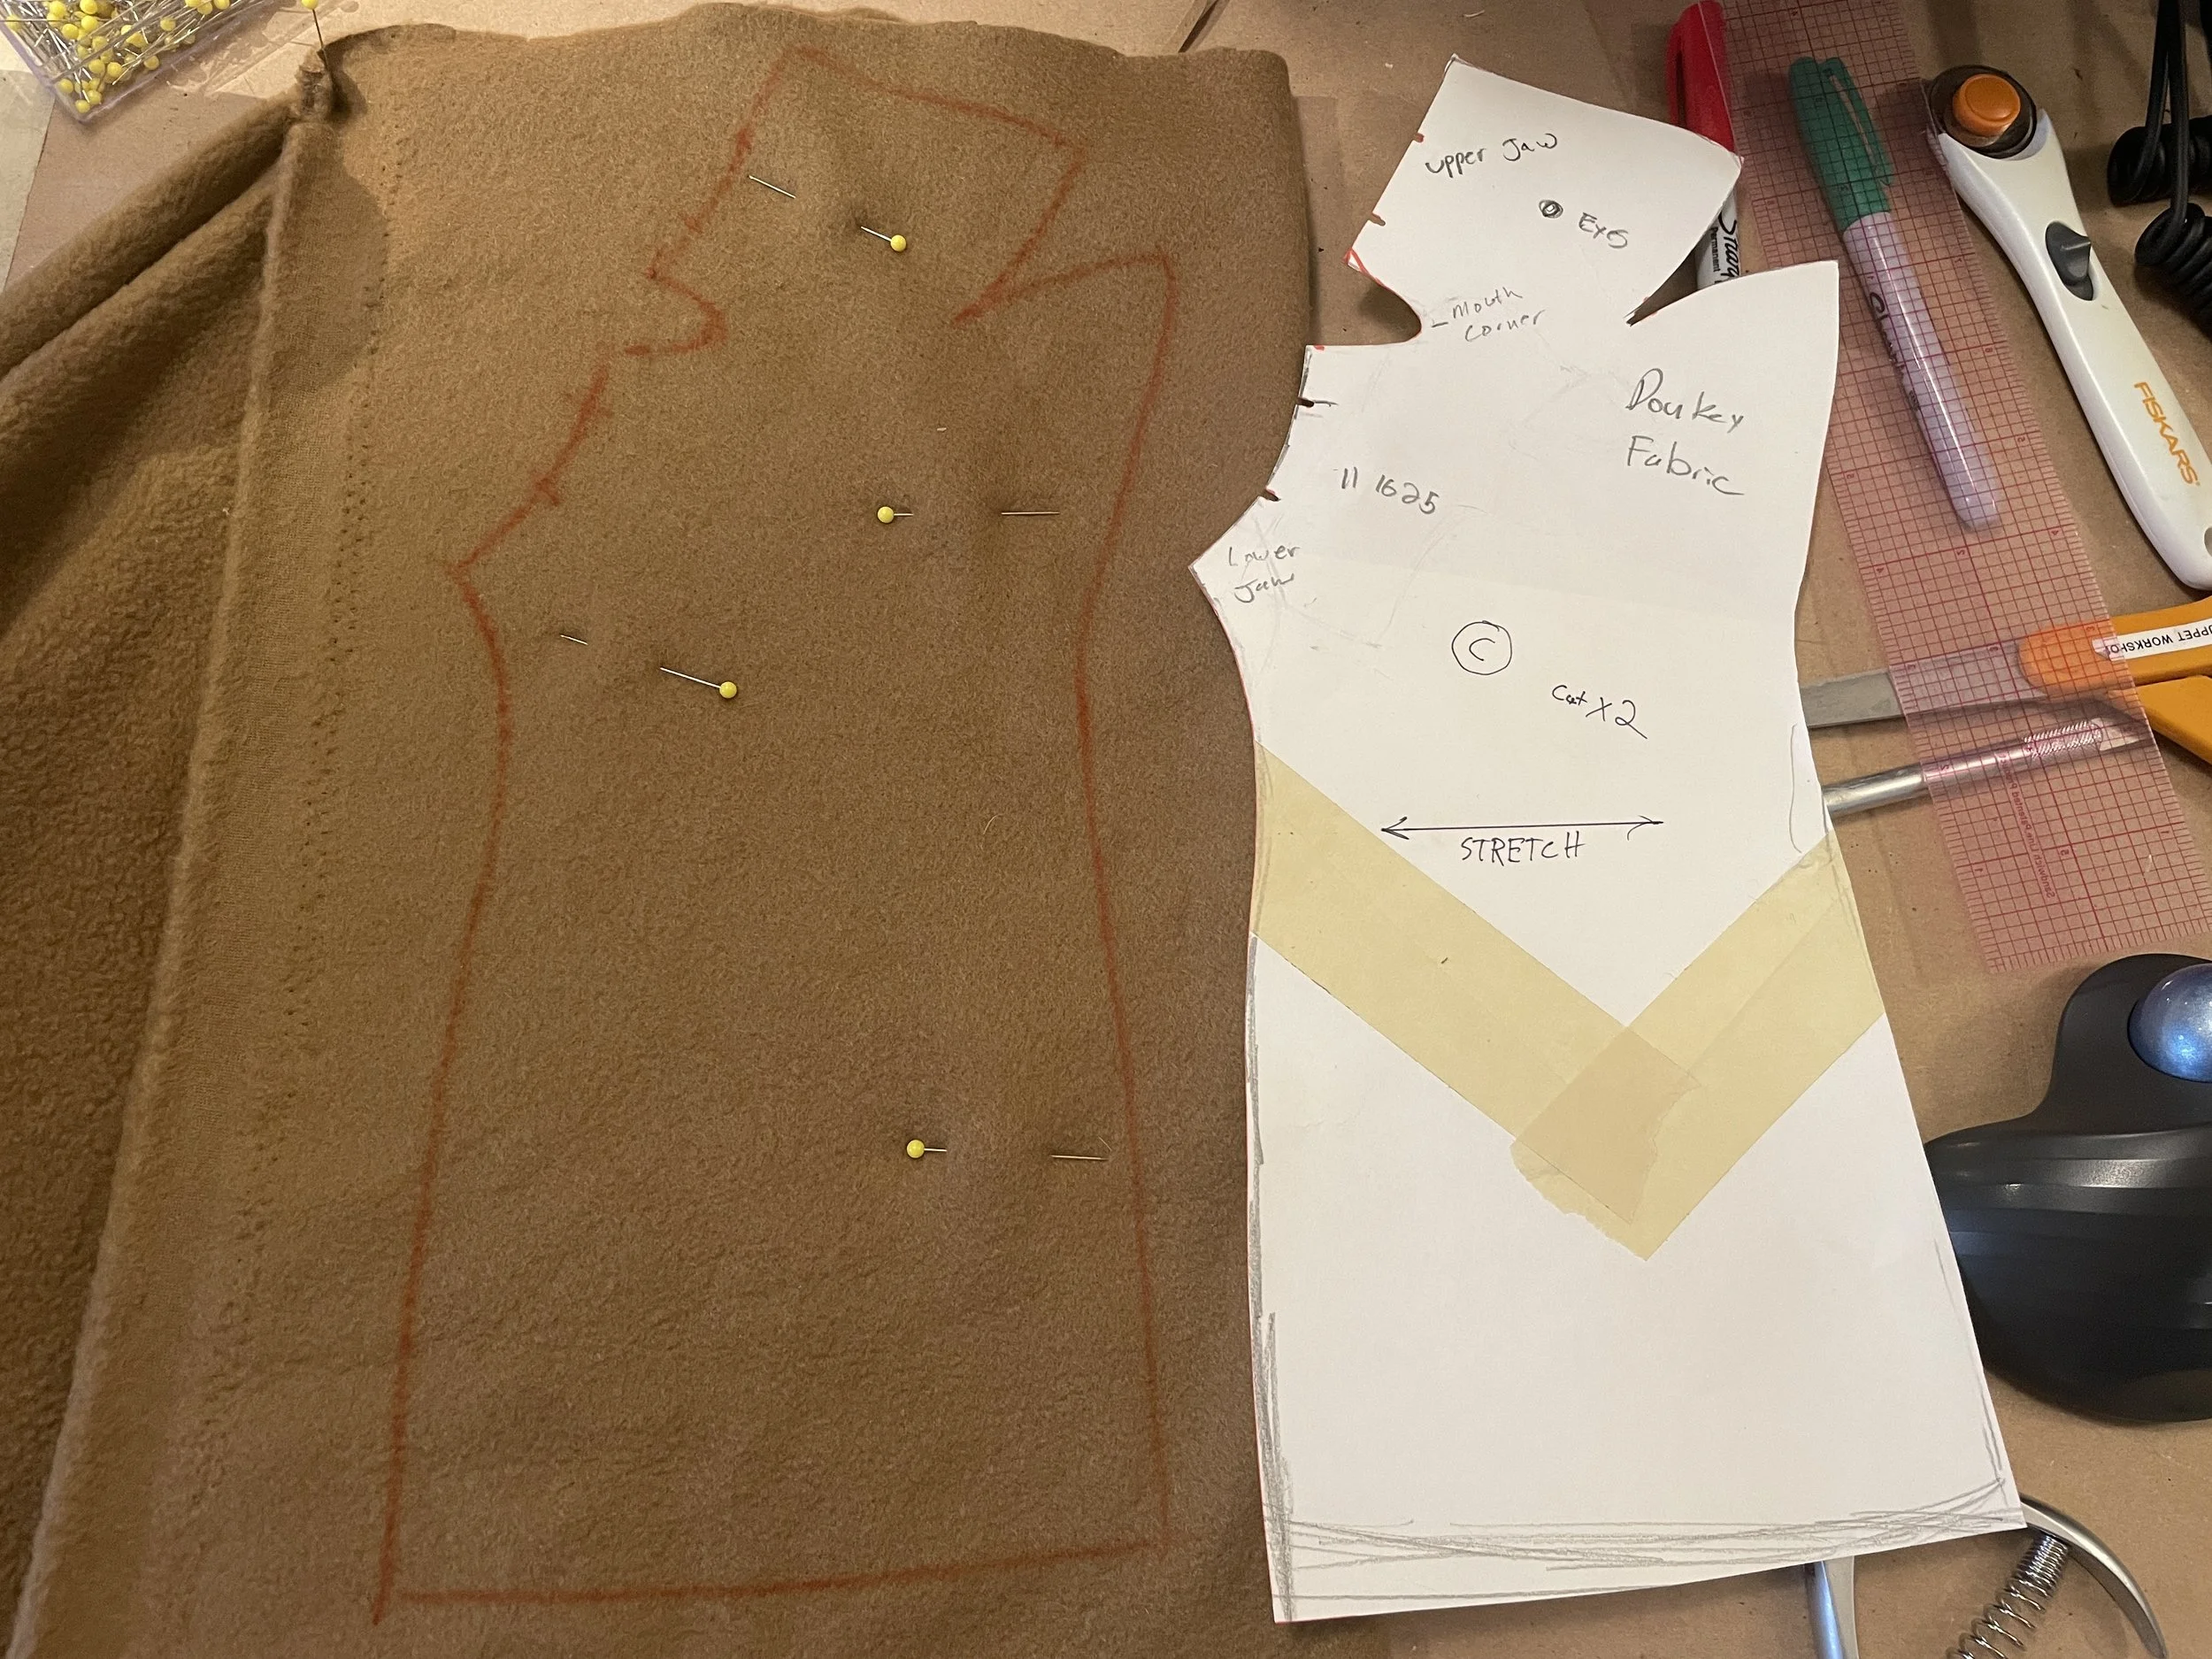
Step 3 – Sew the Main Body
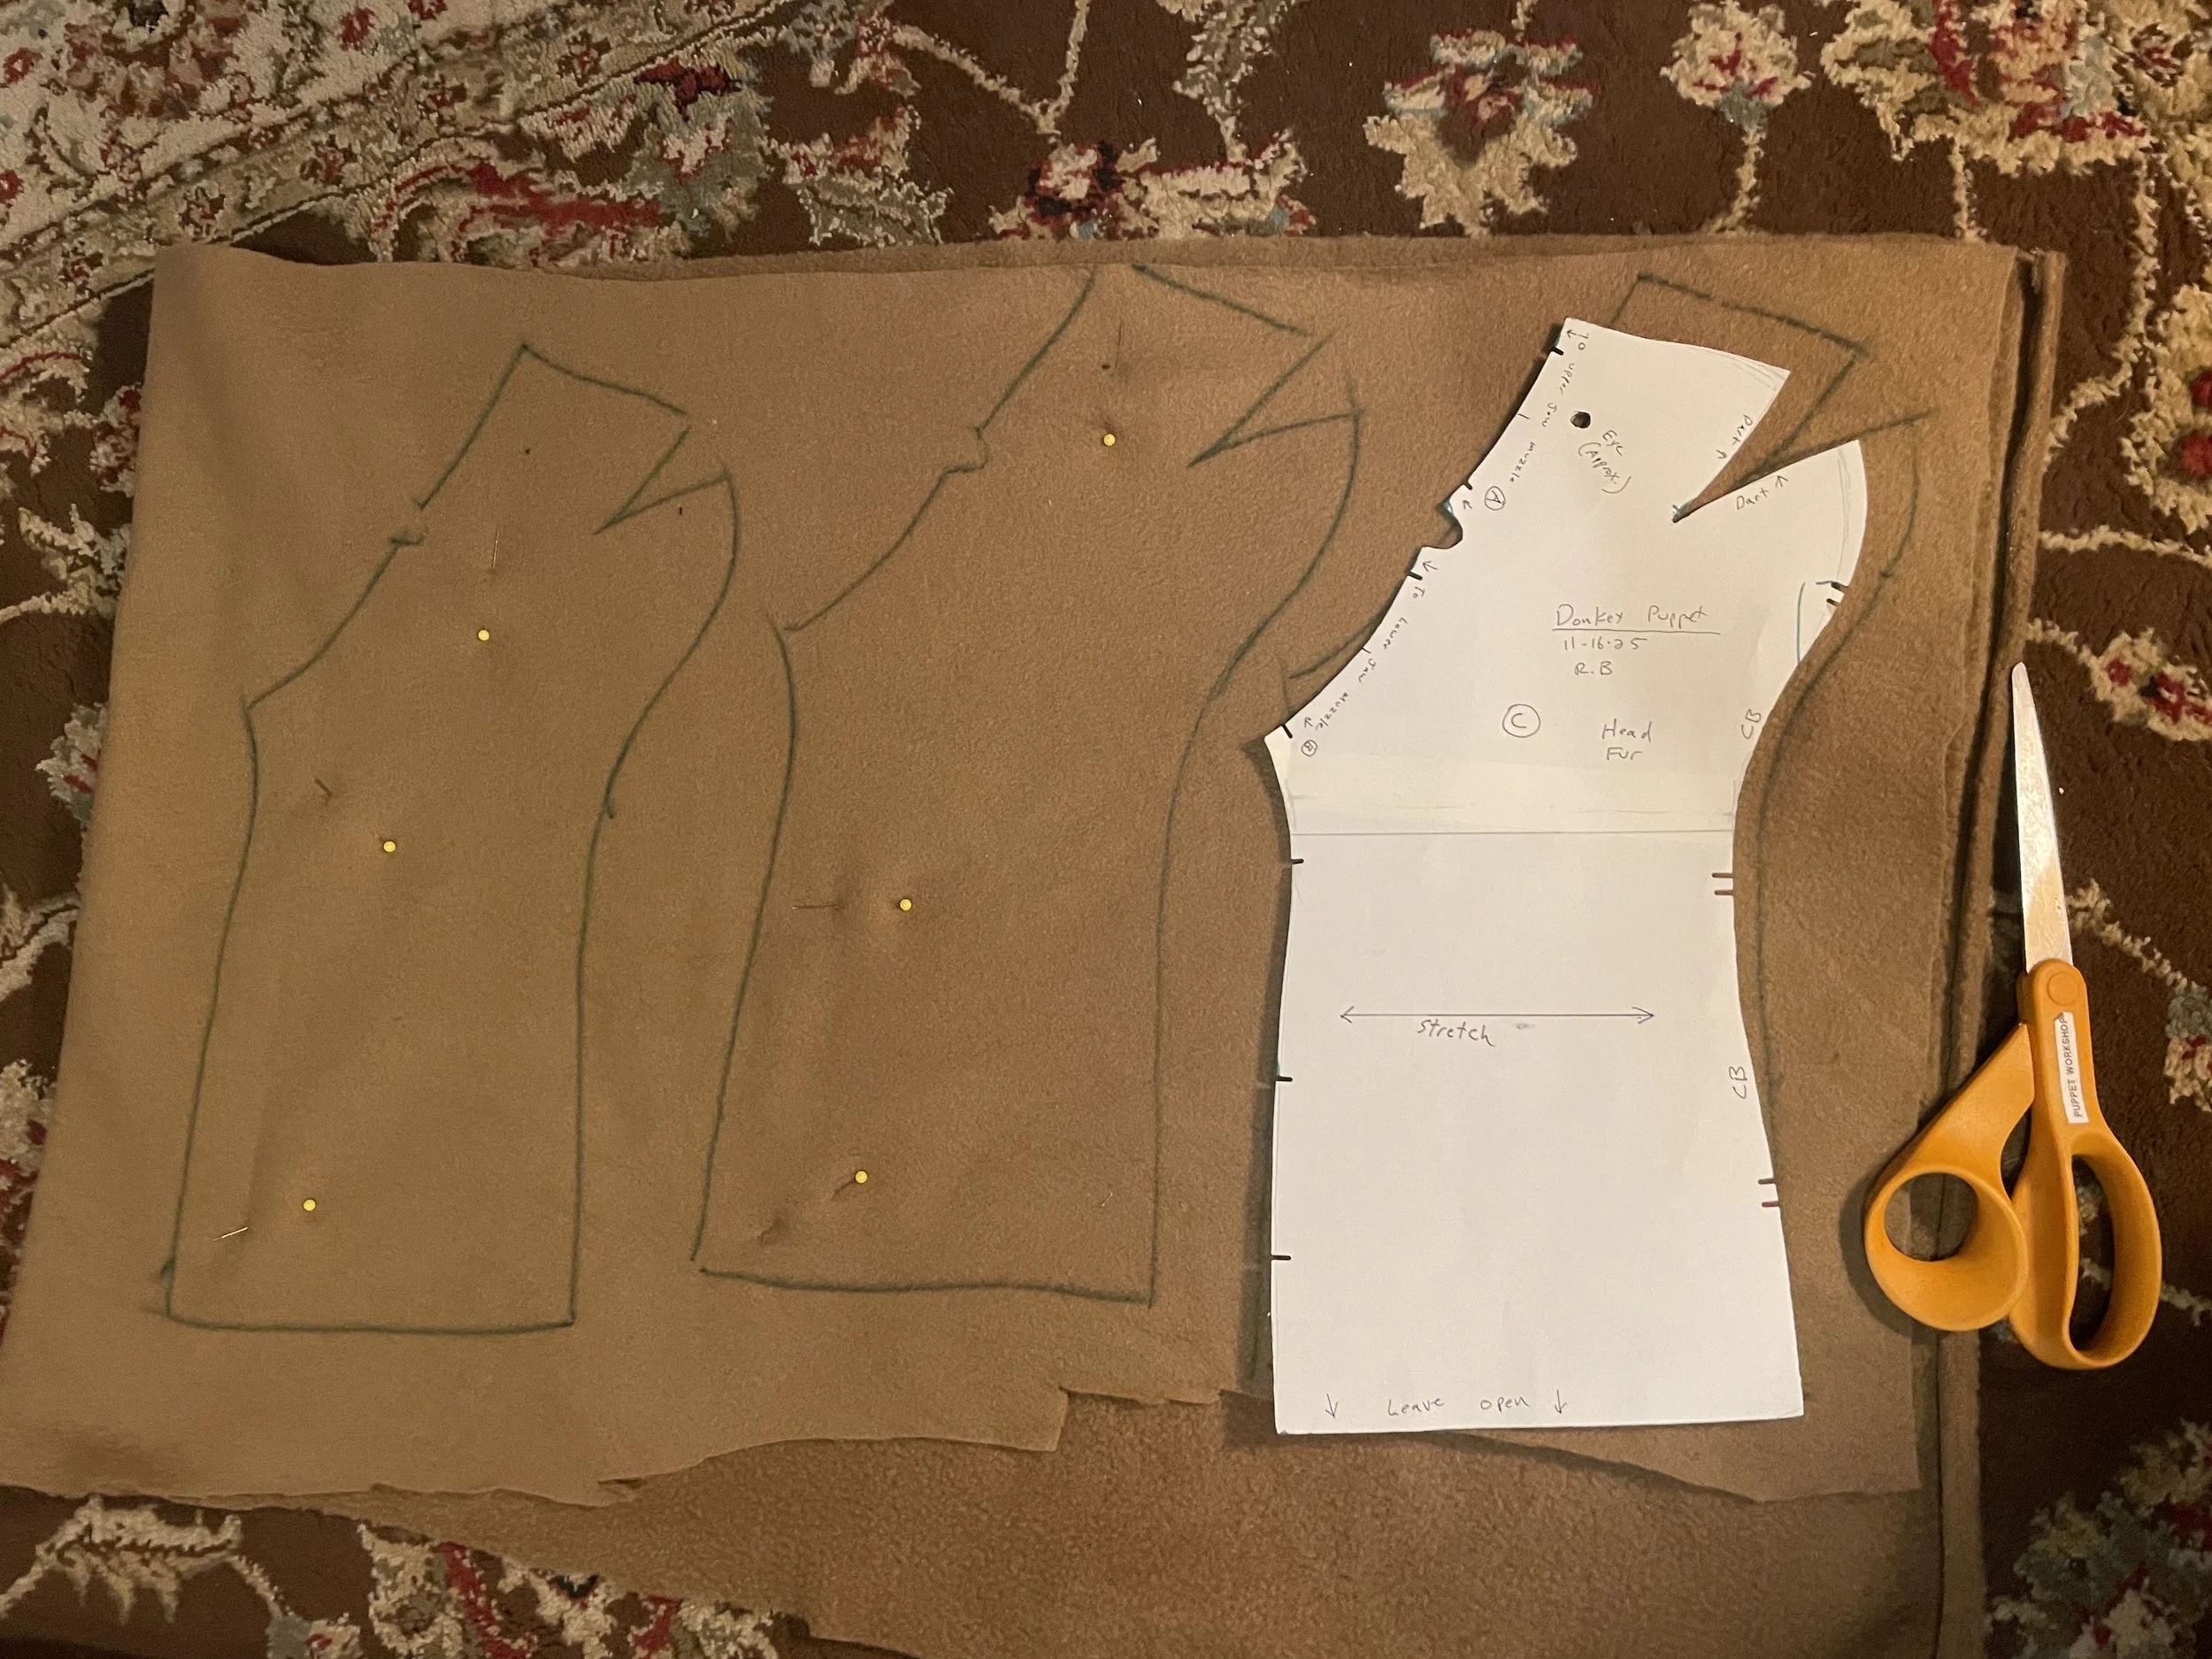
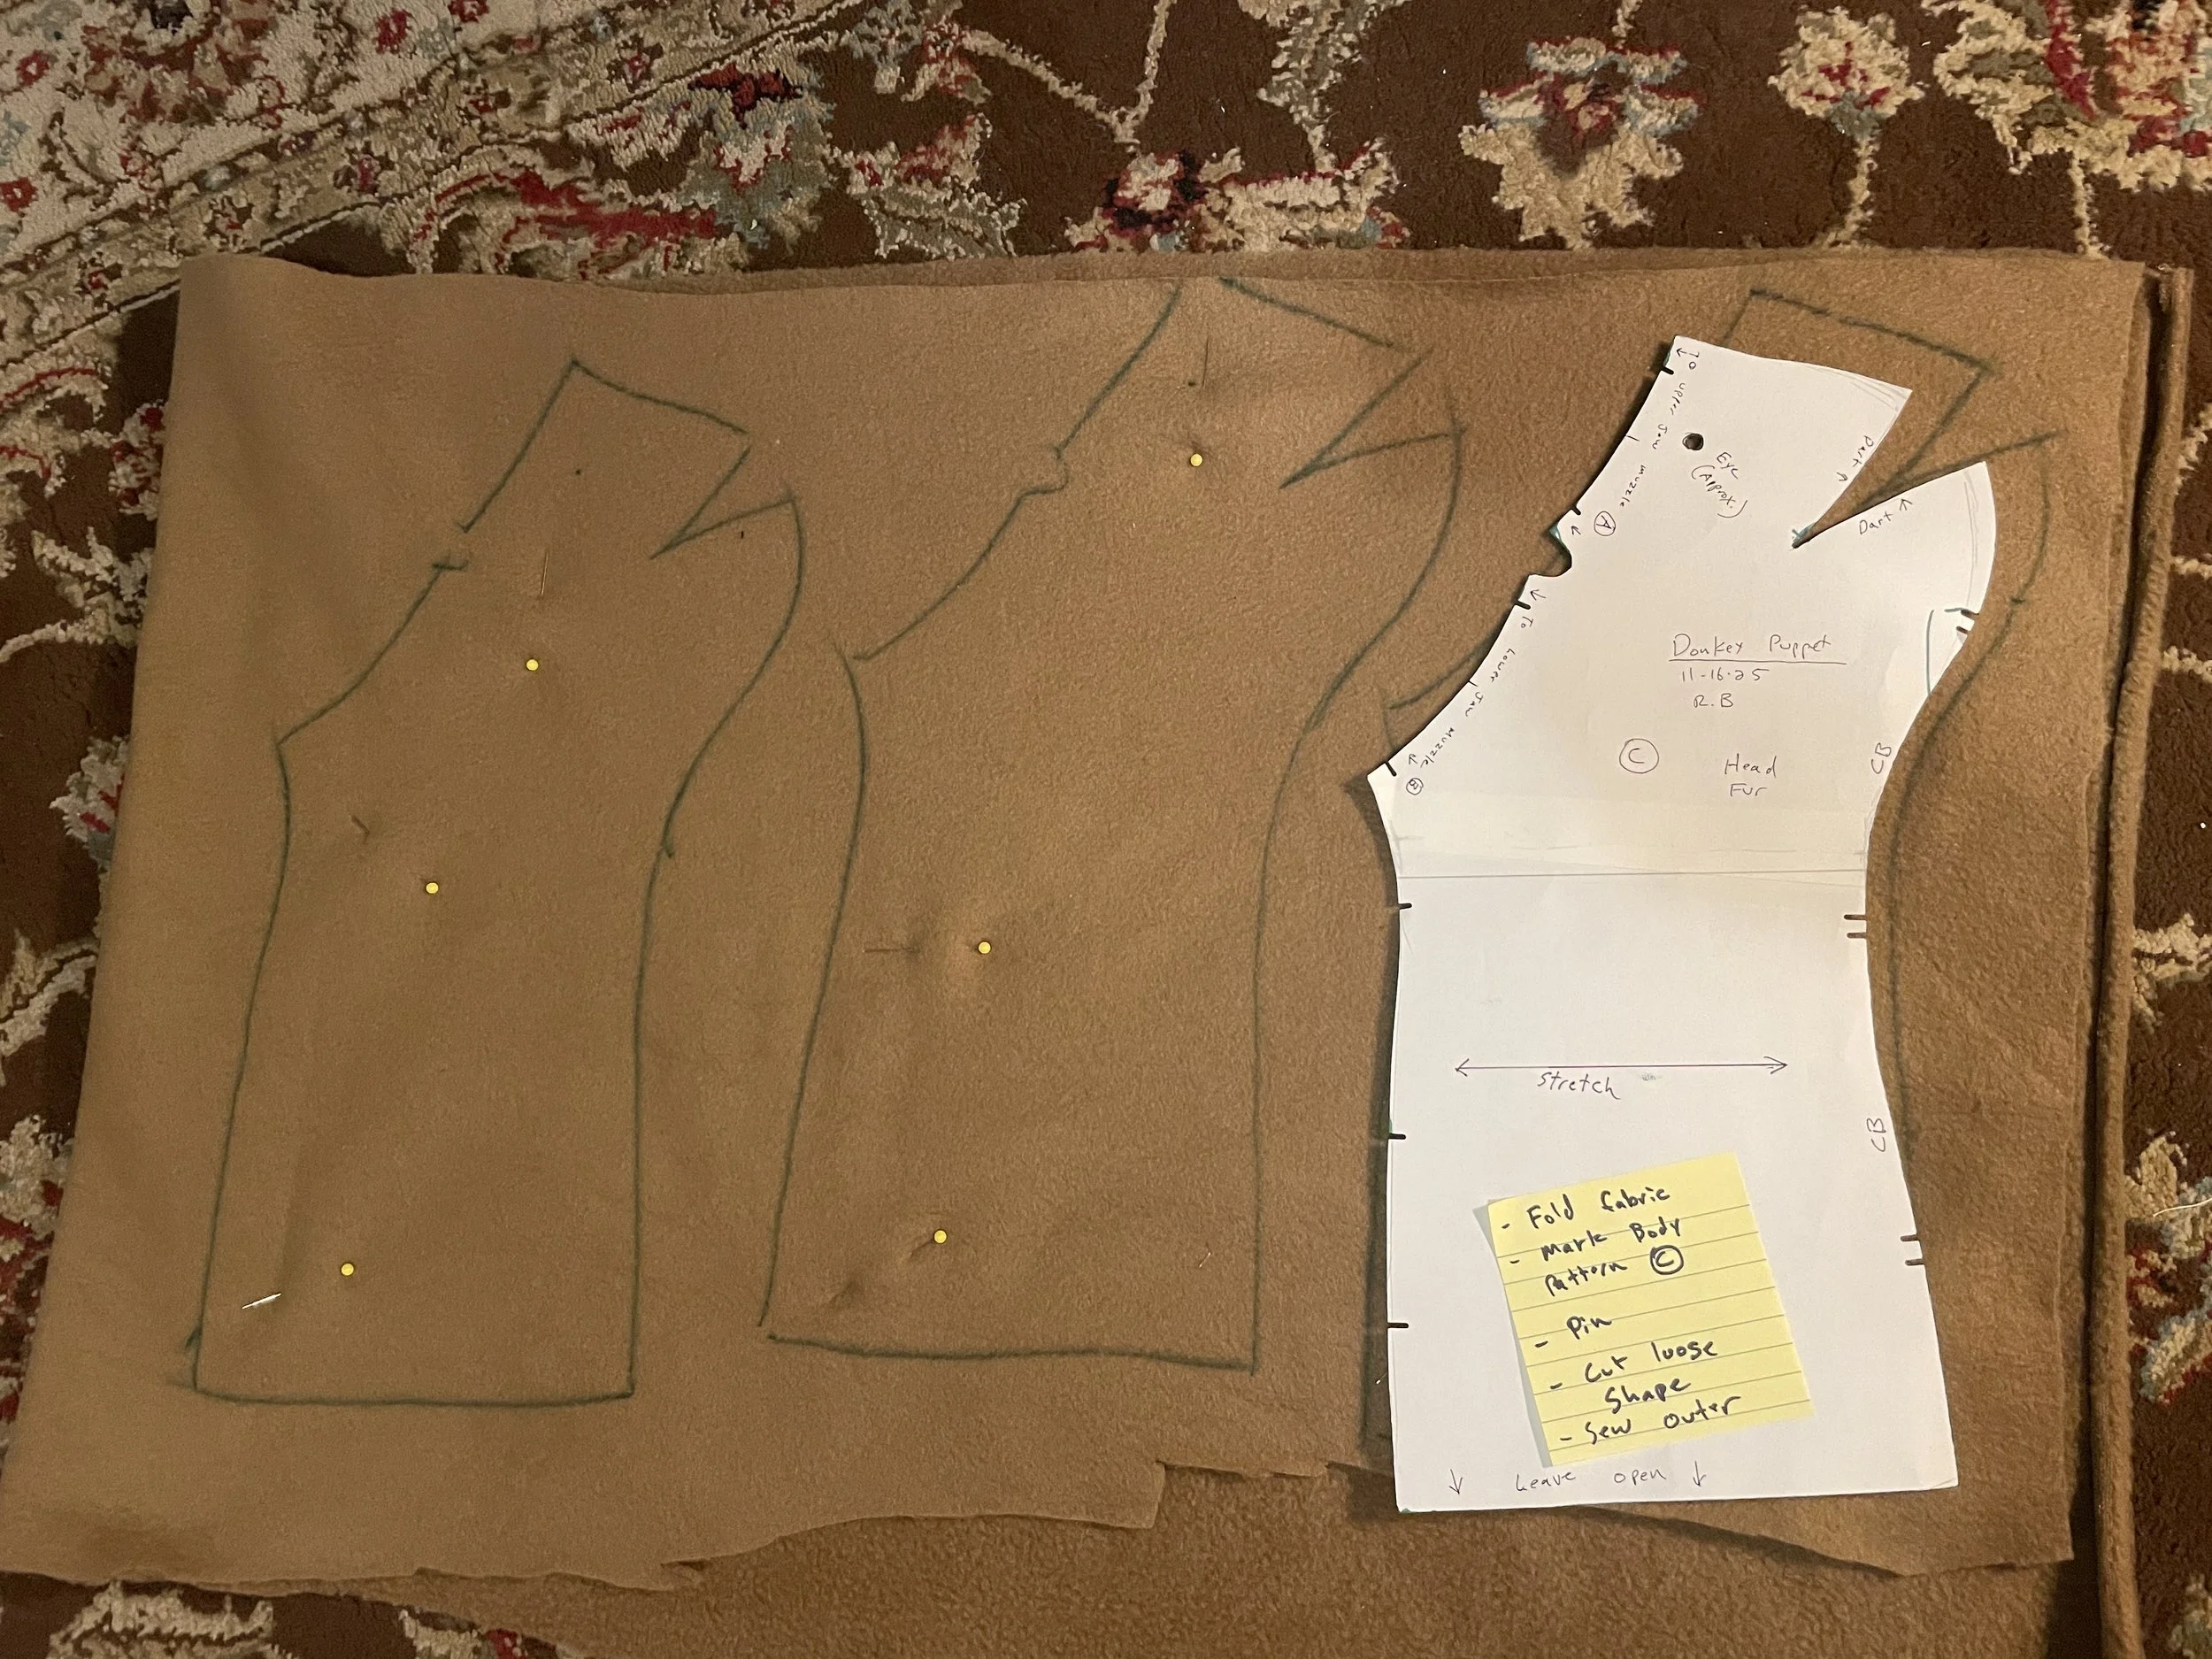
Check which direction the fleece stretches; the stretch must go around the puppet.
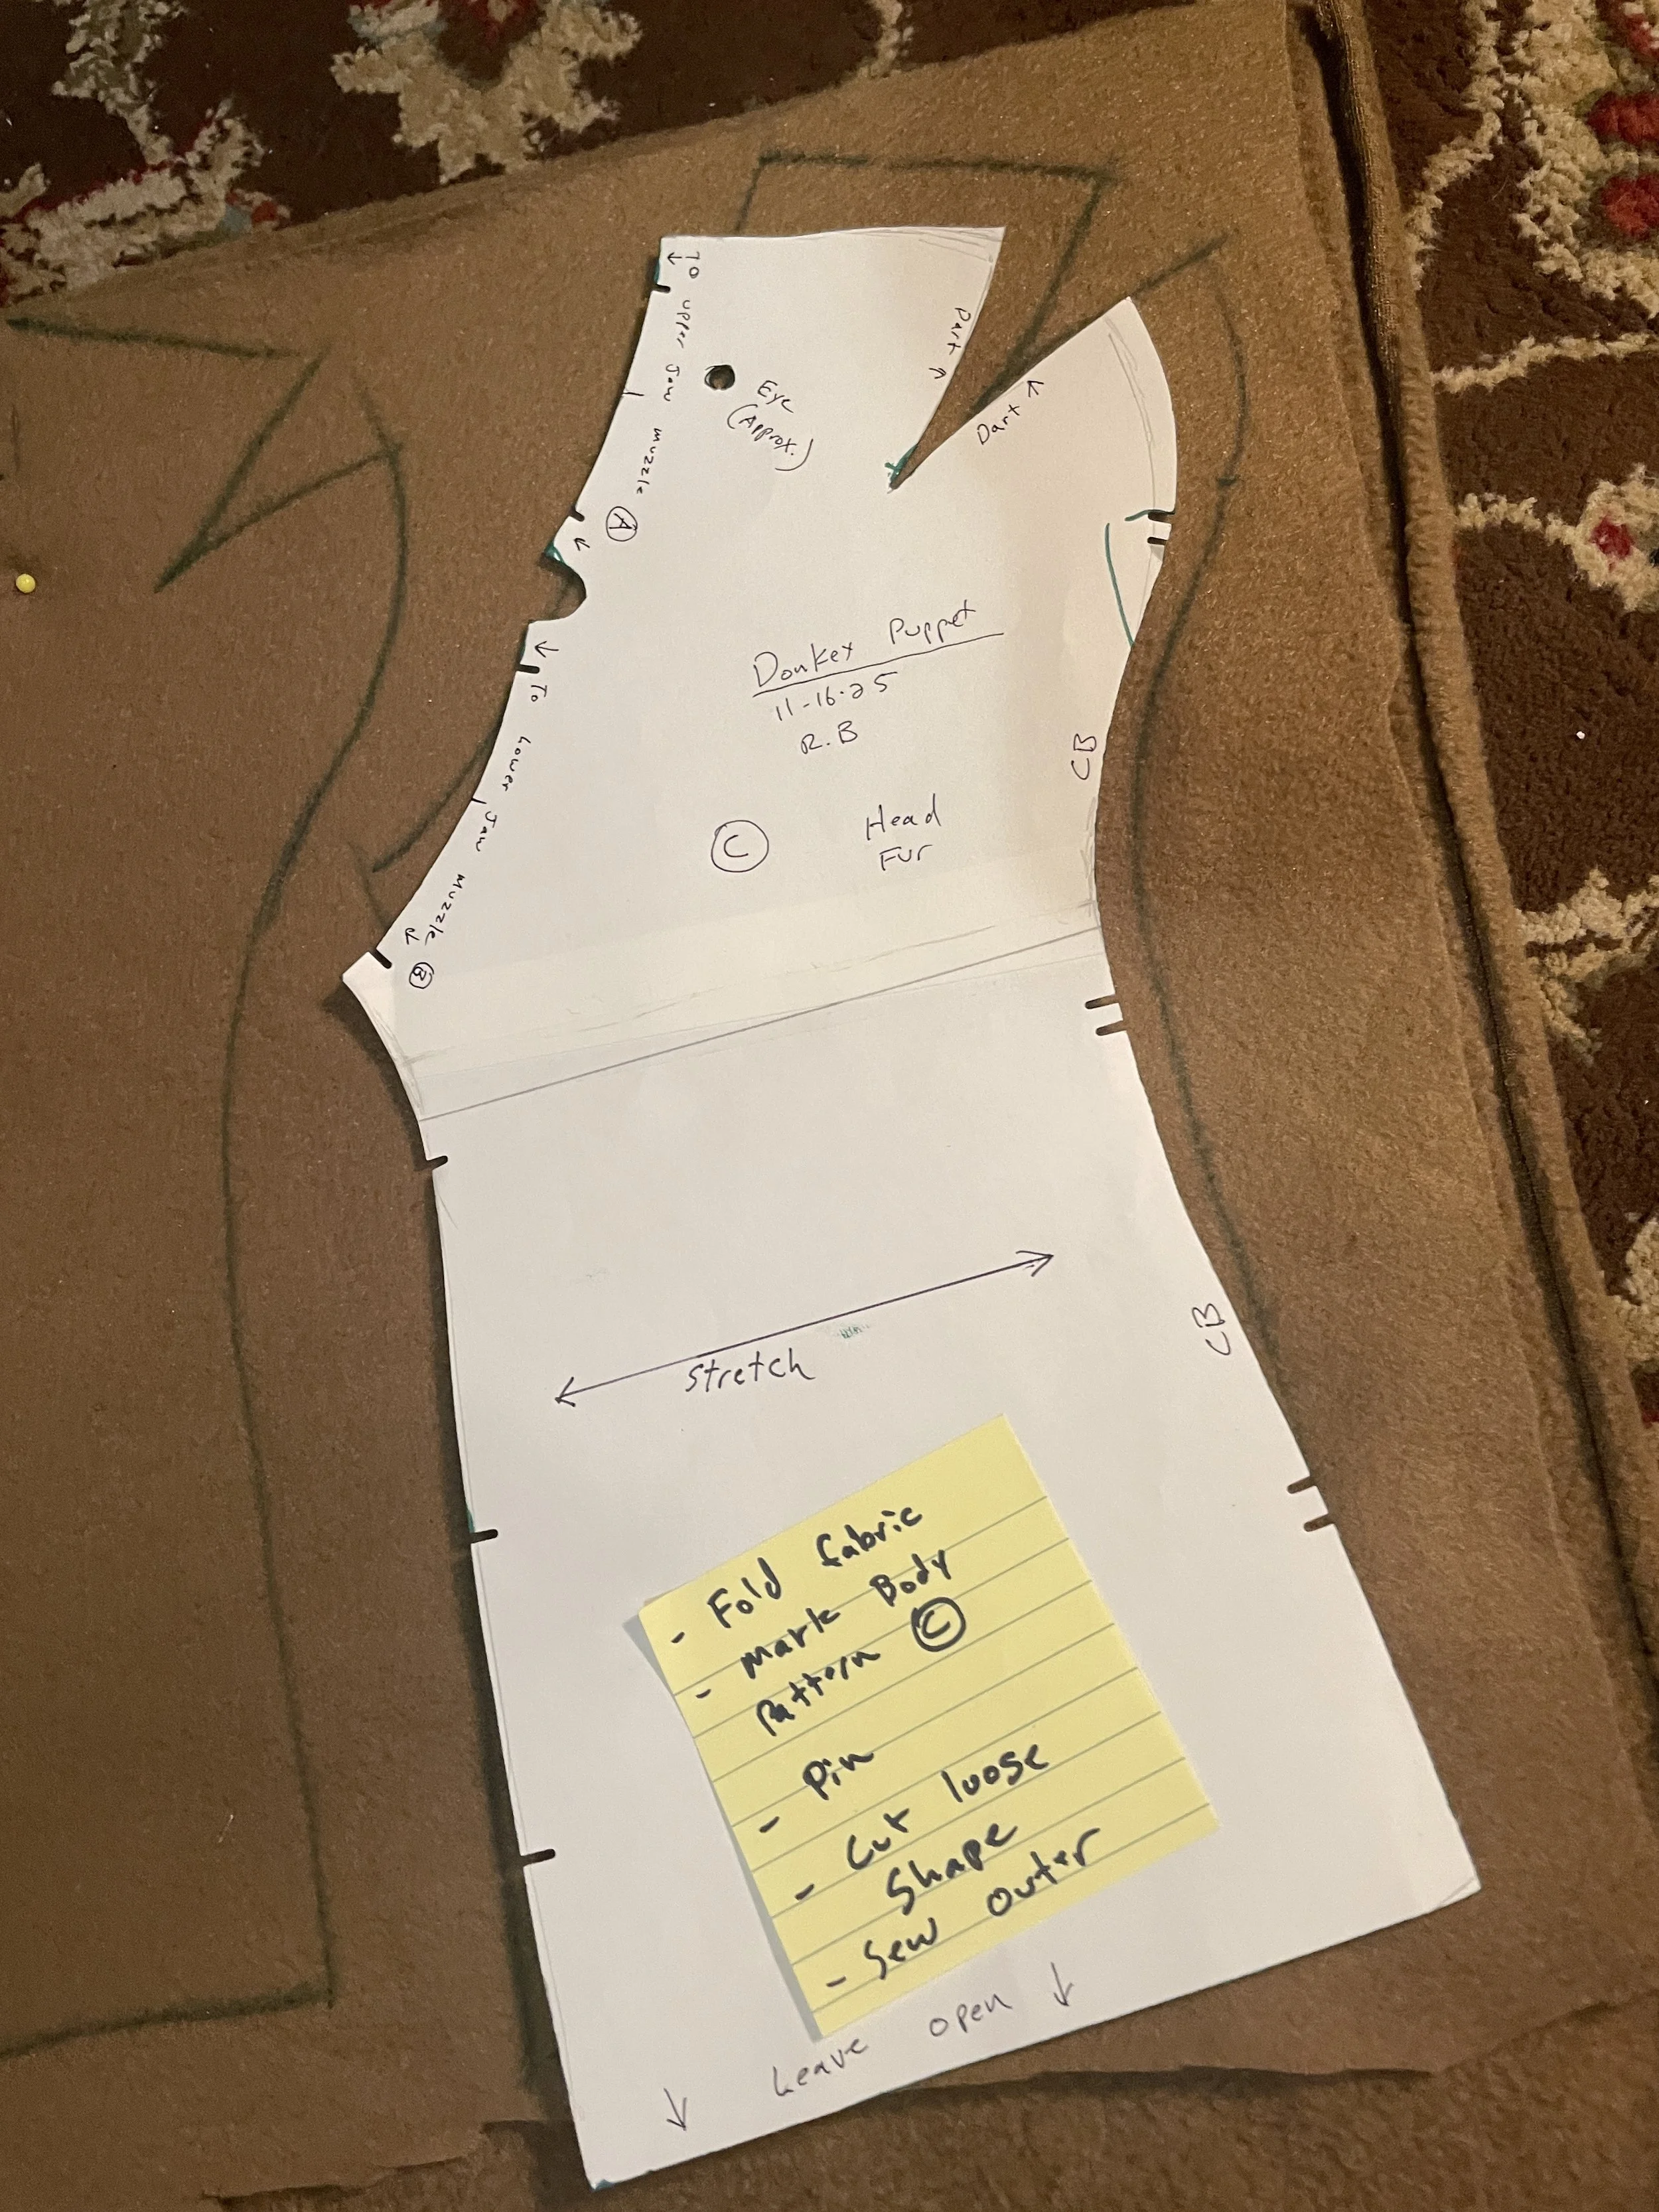
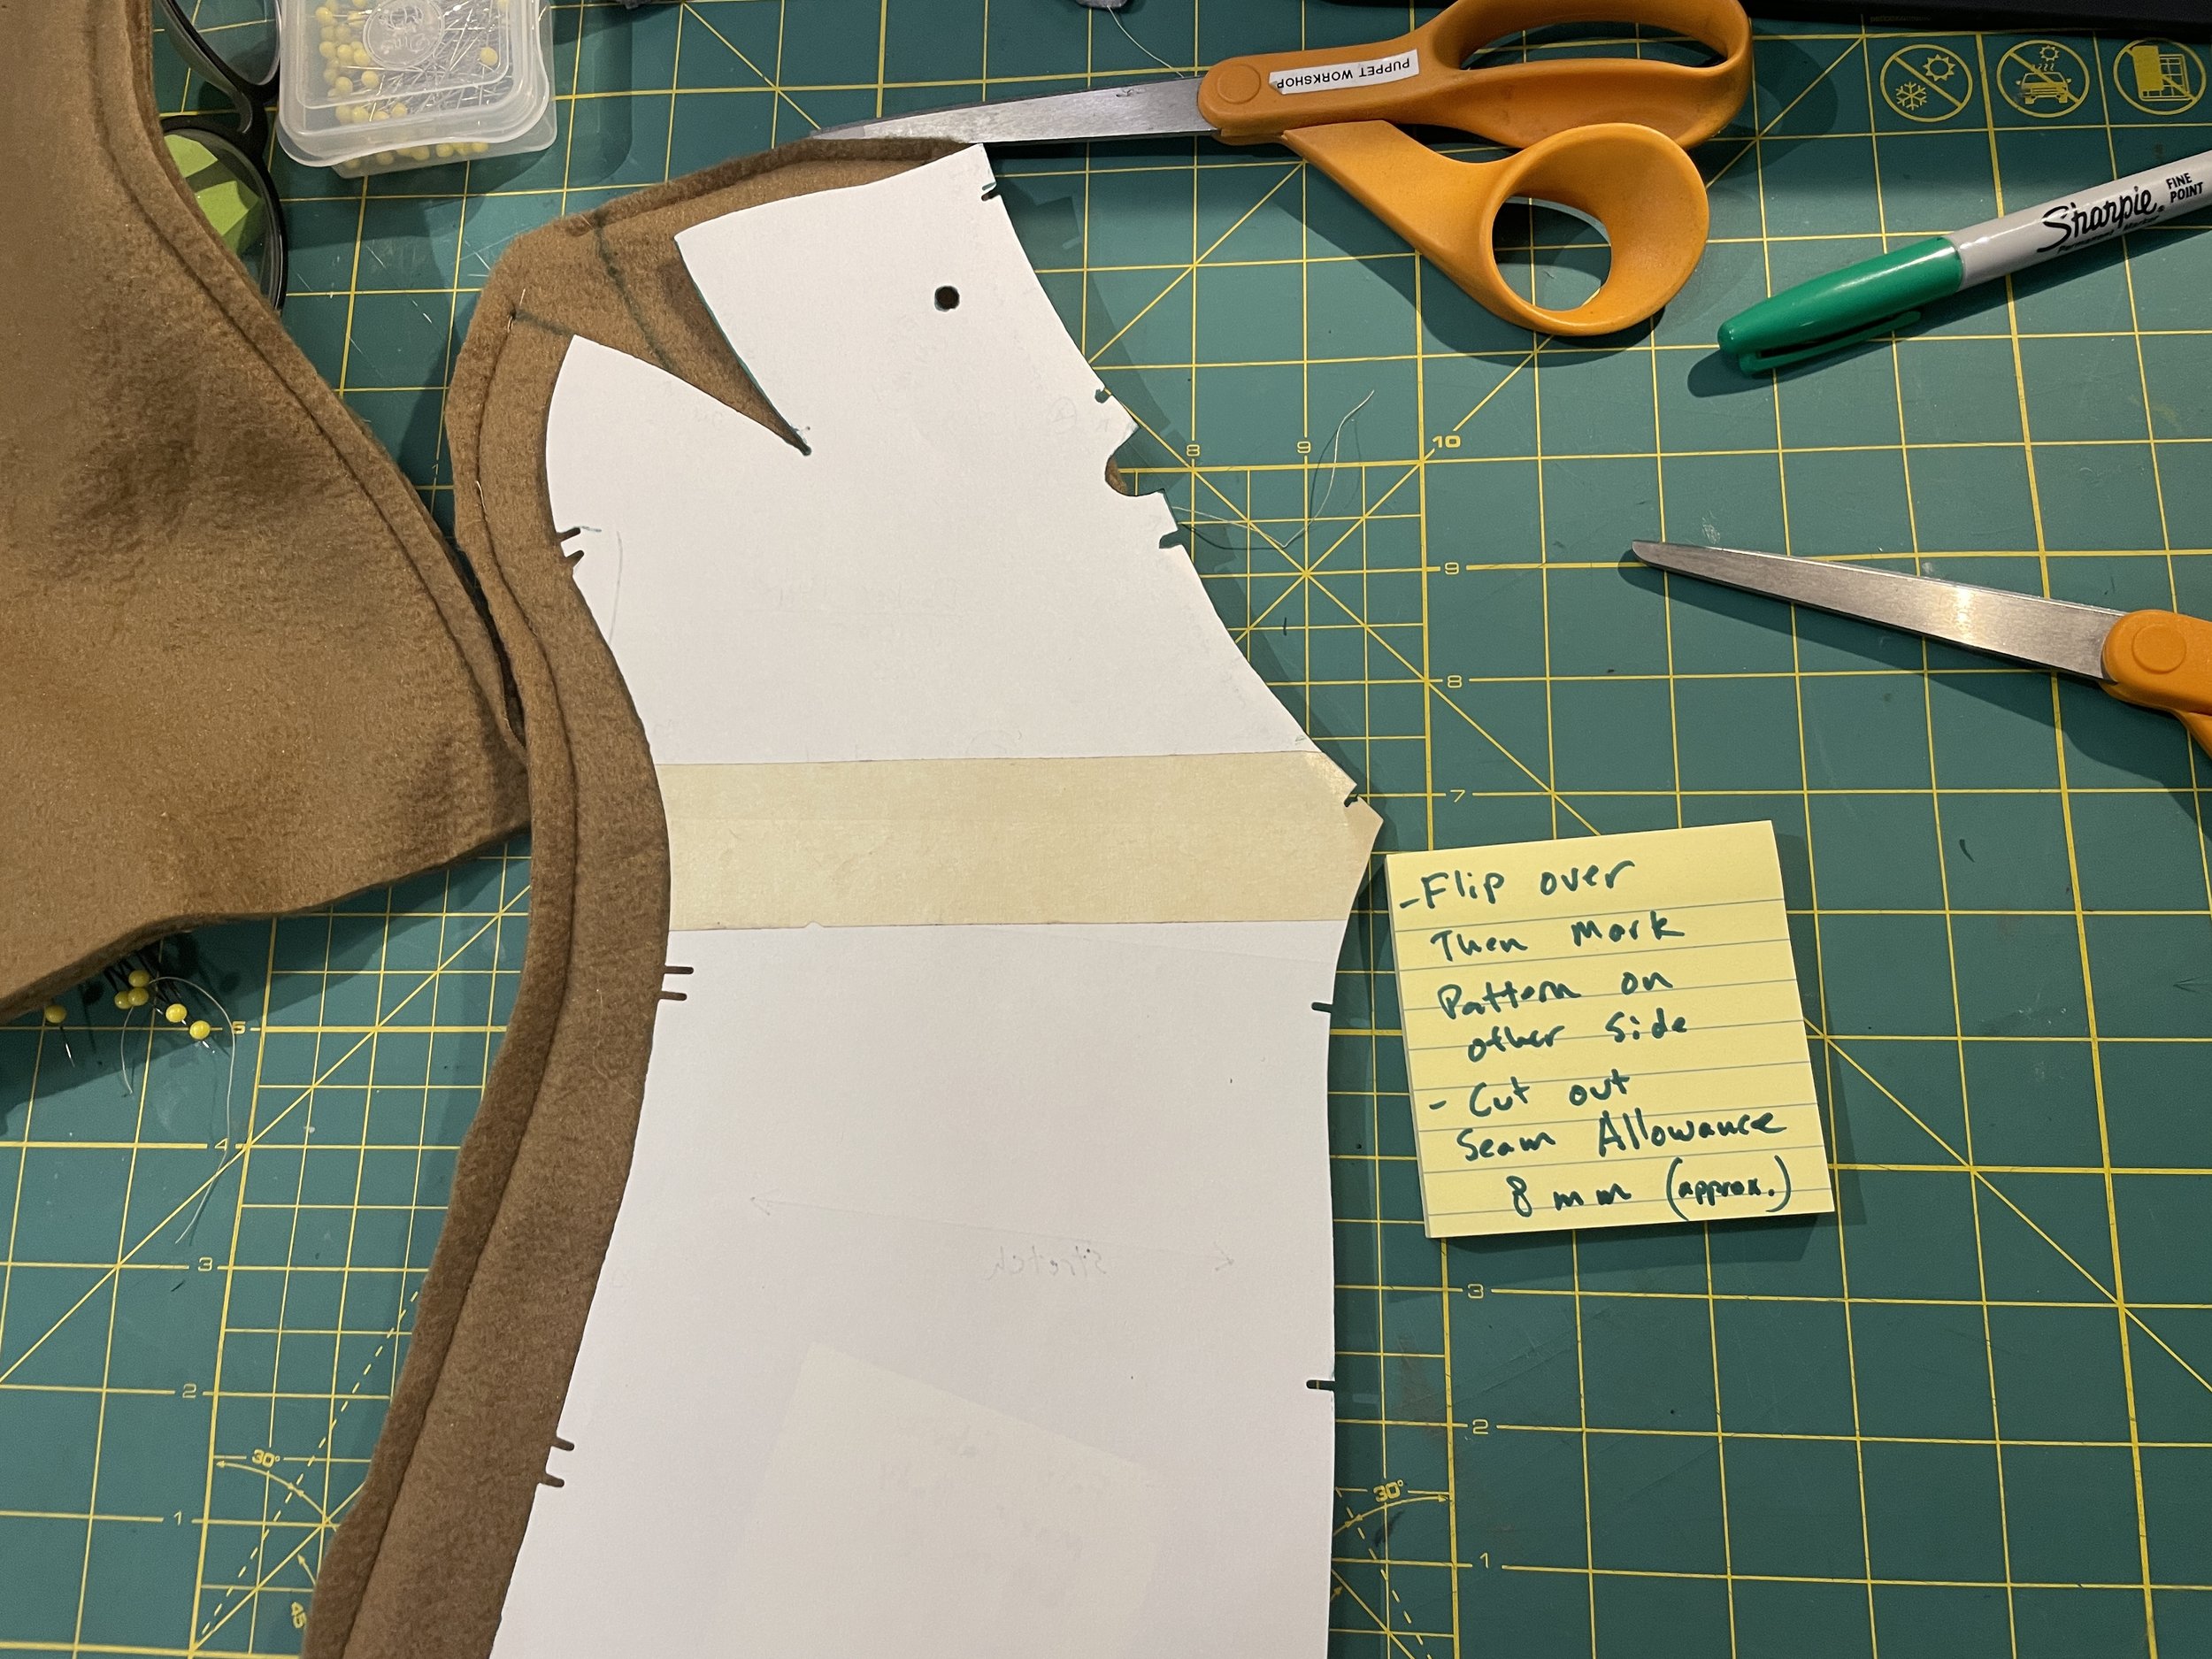
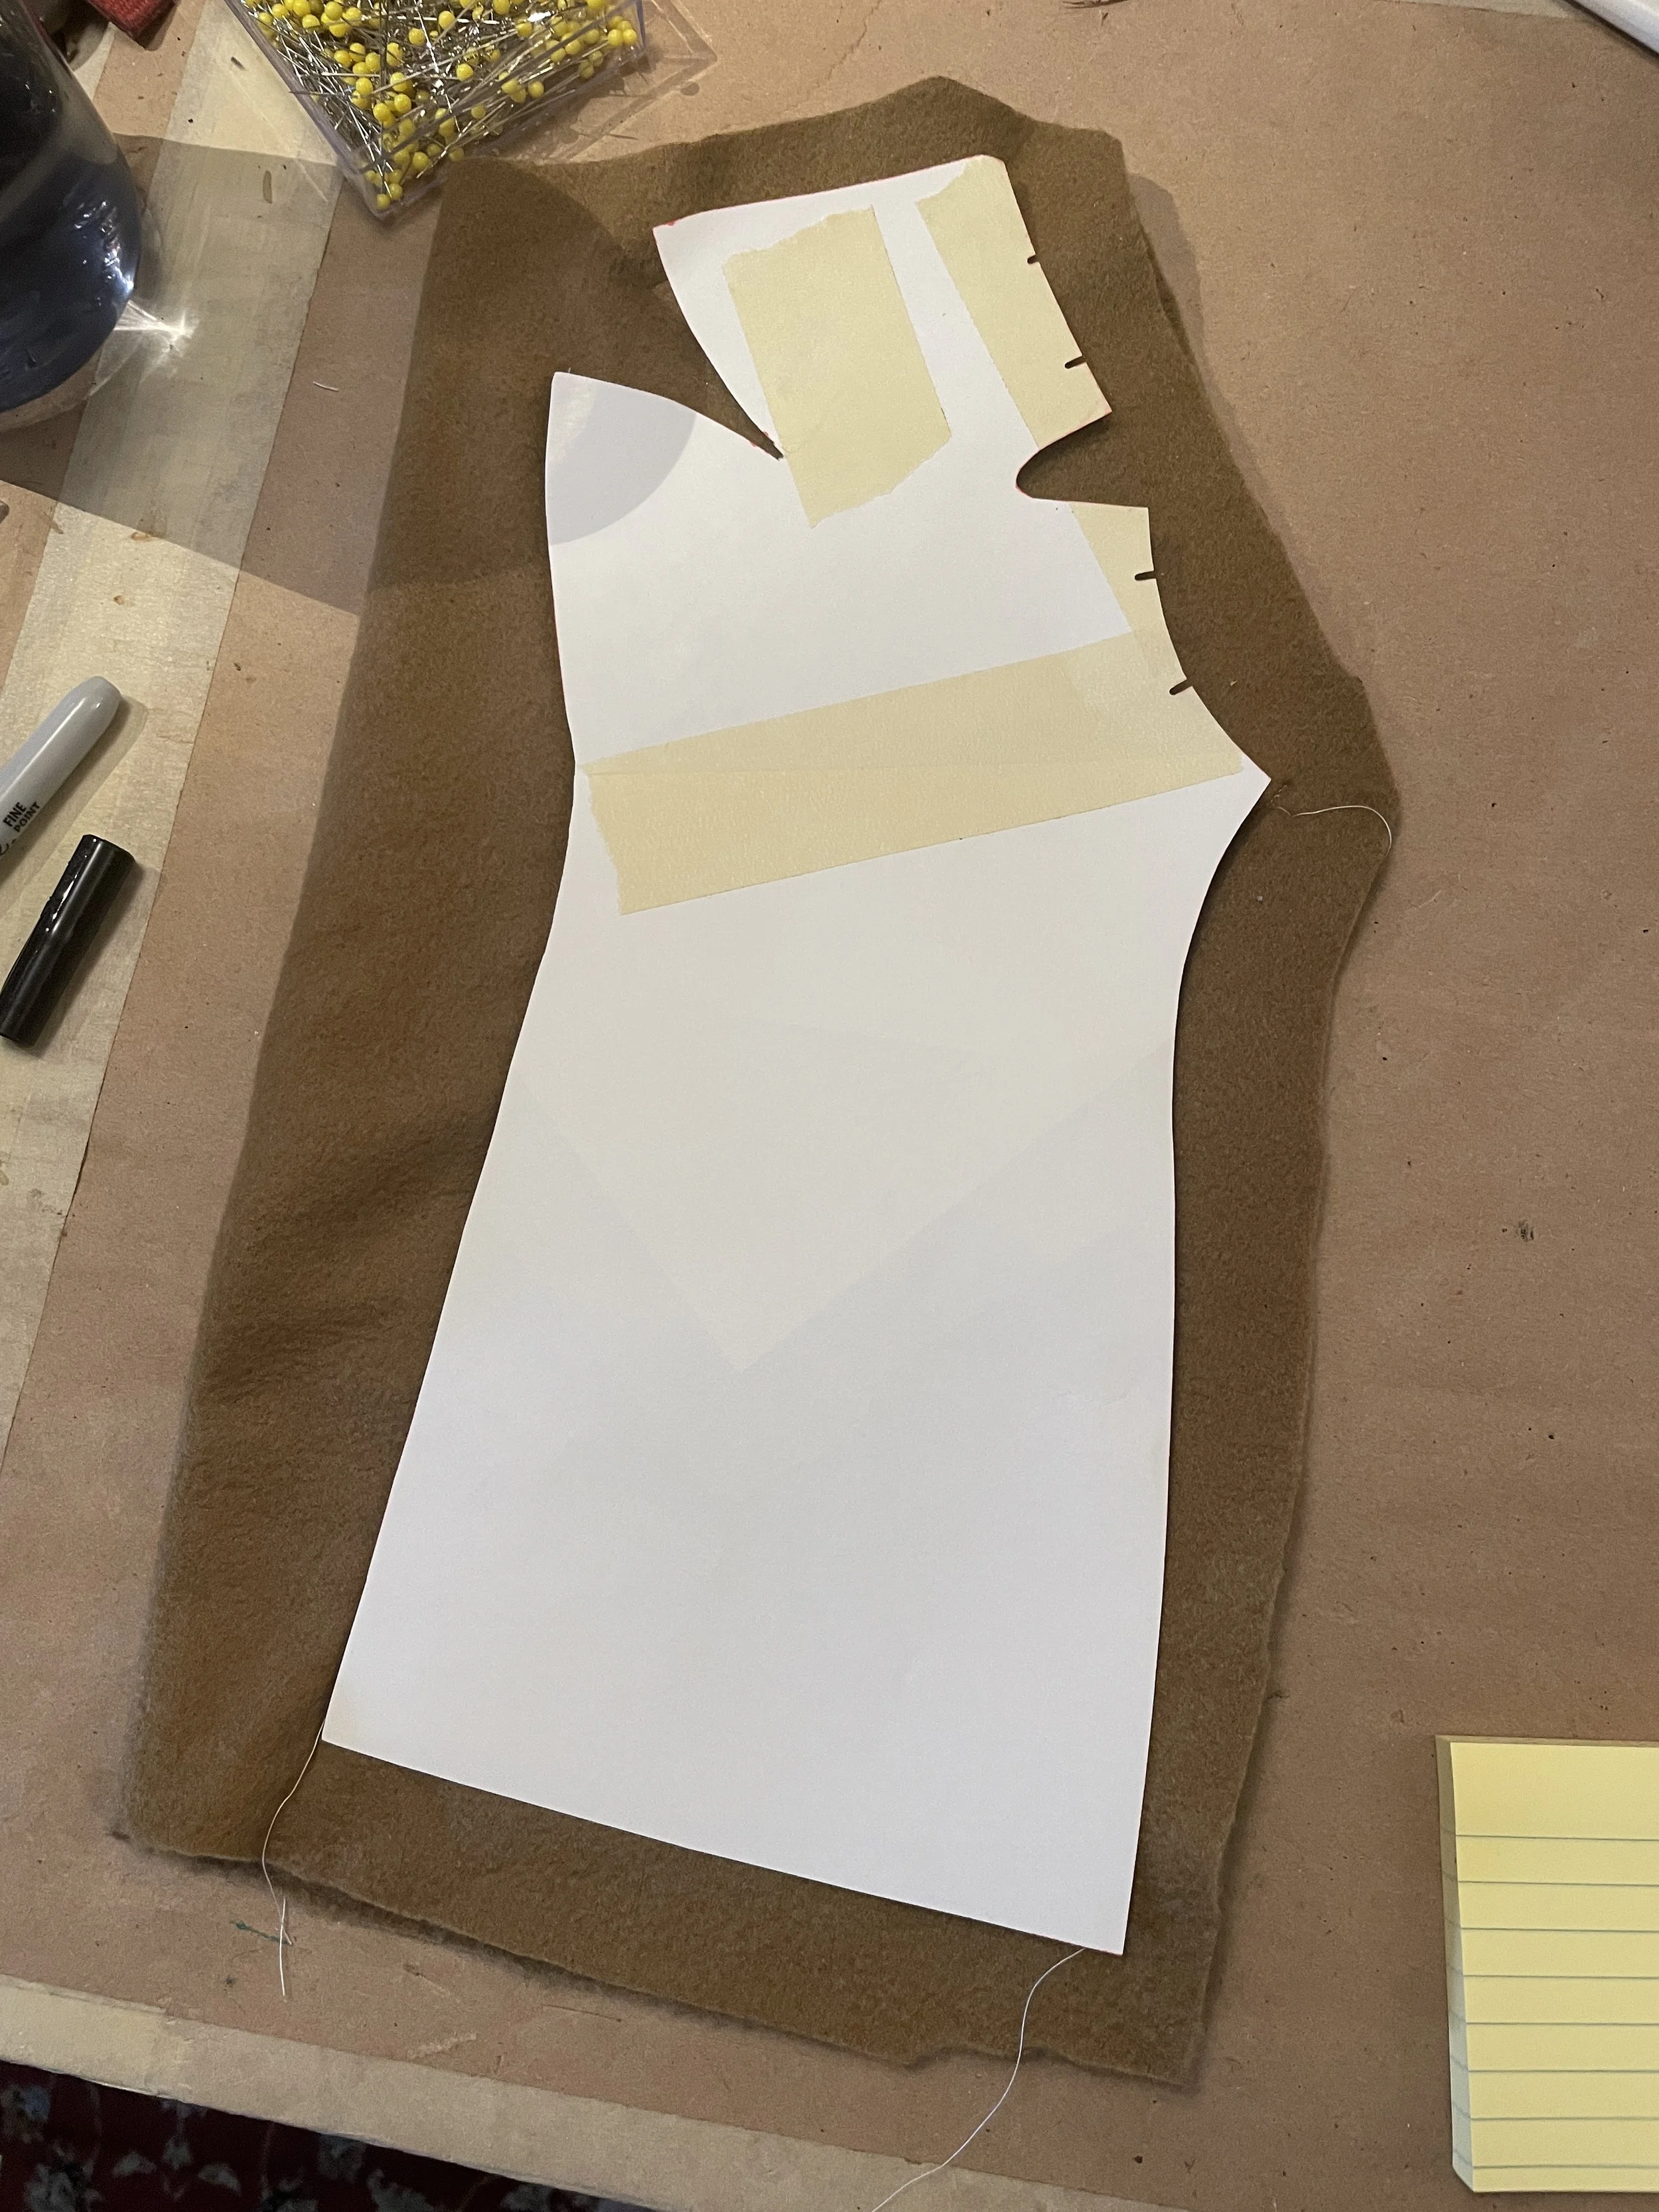
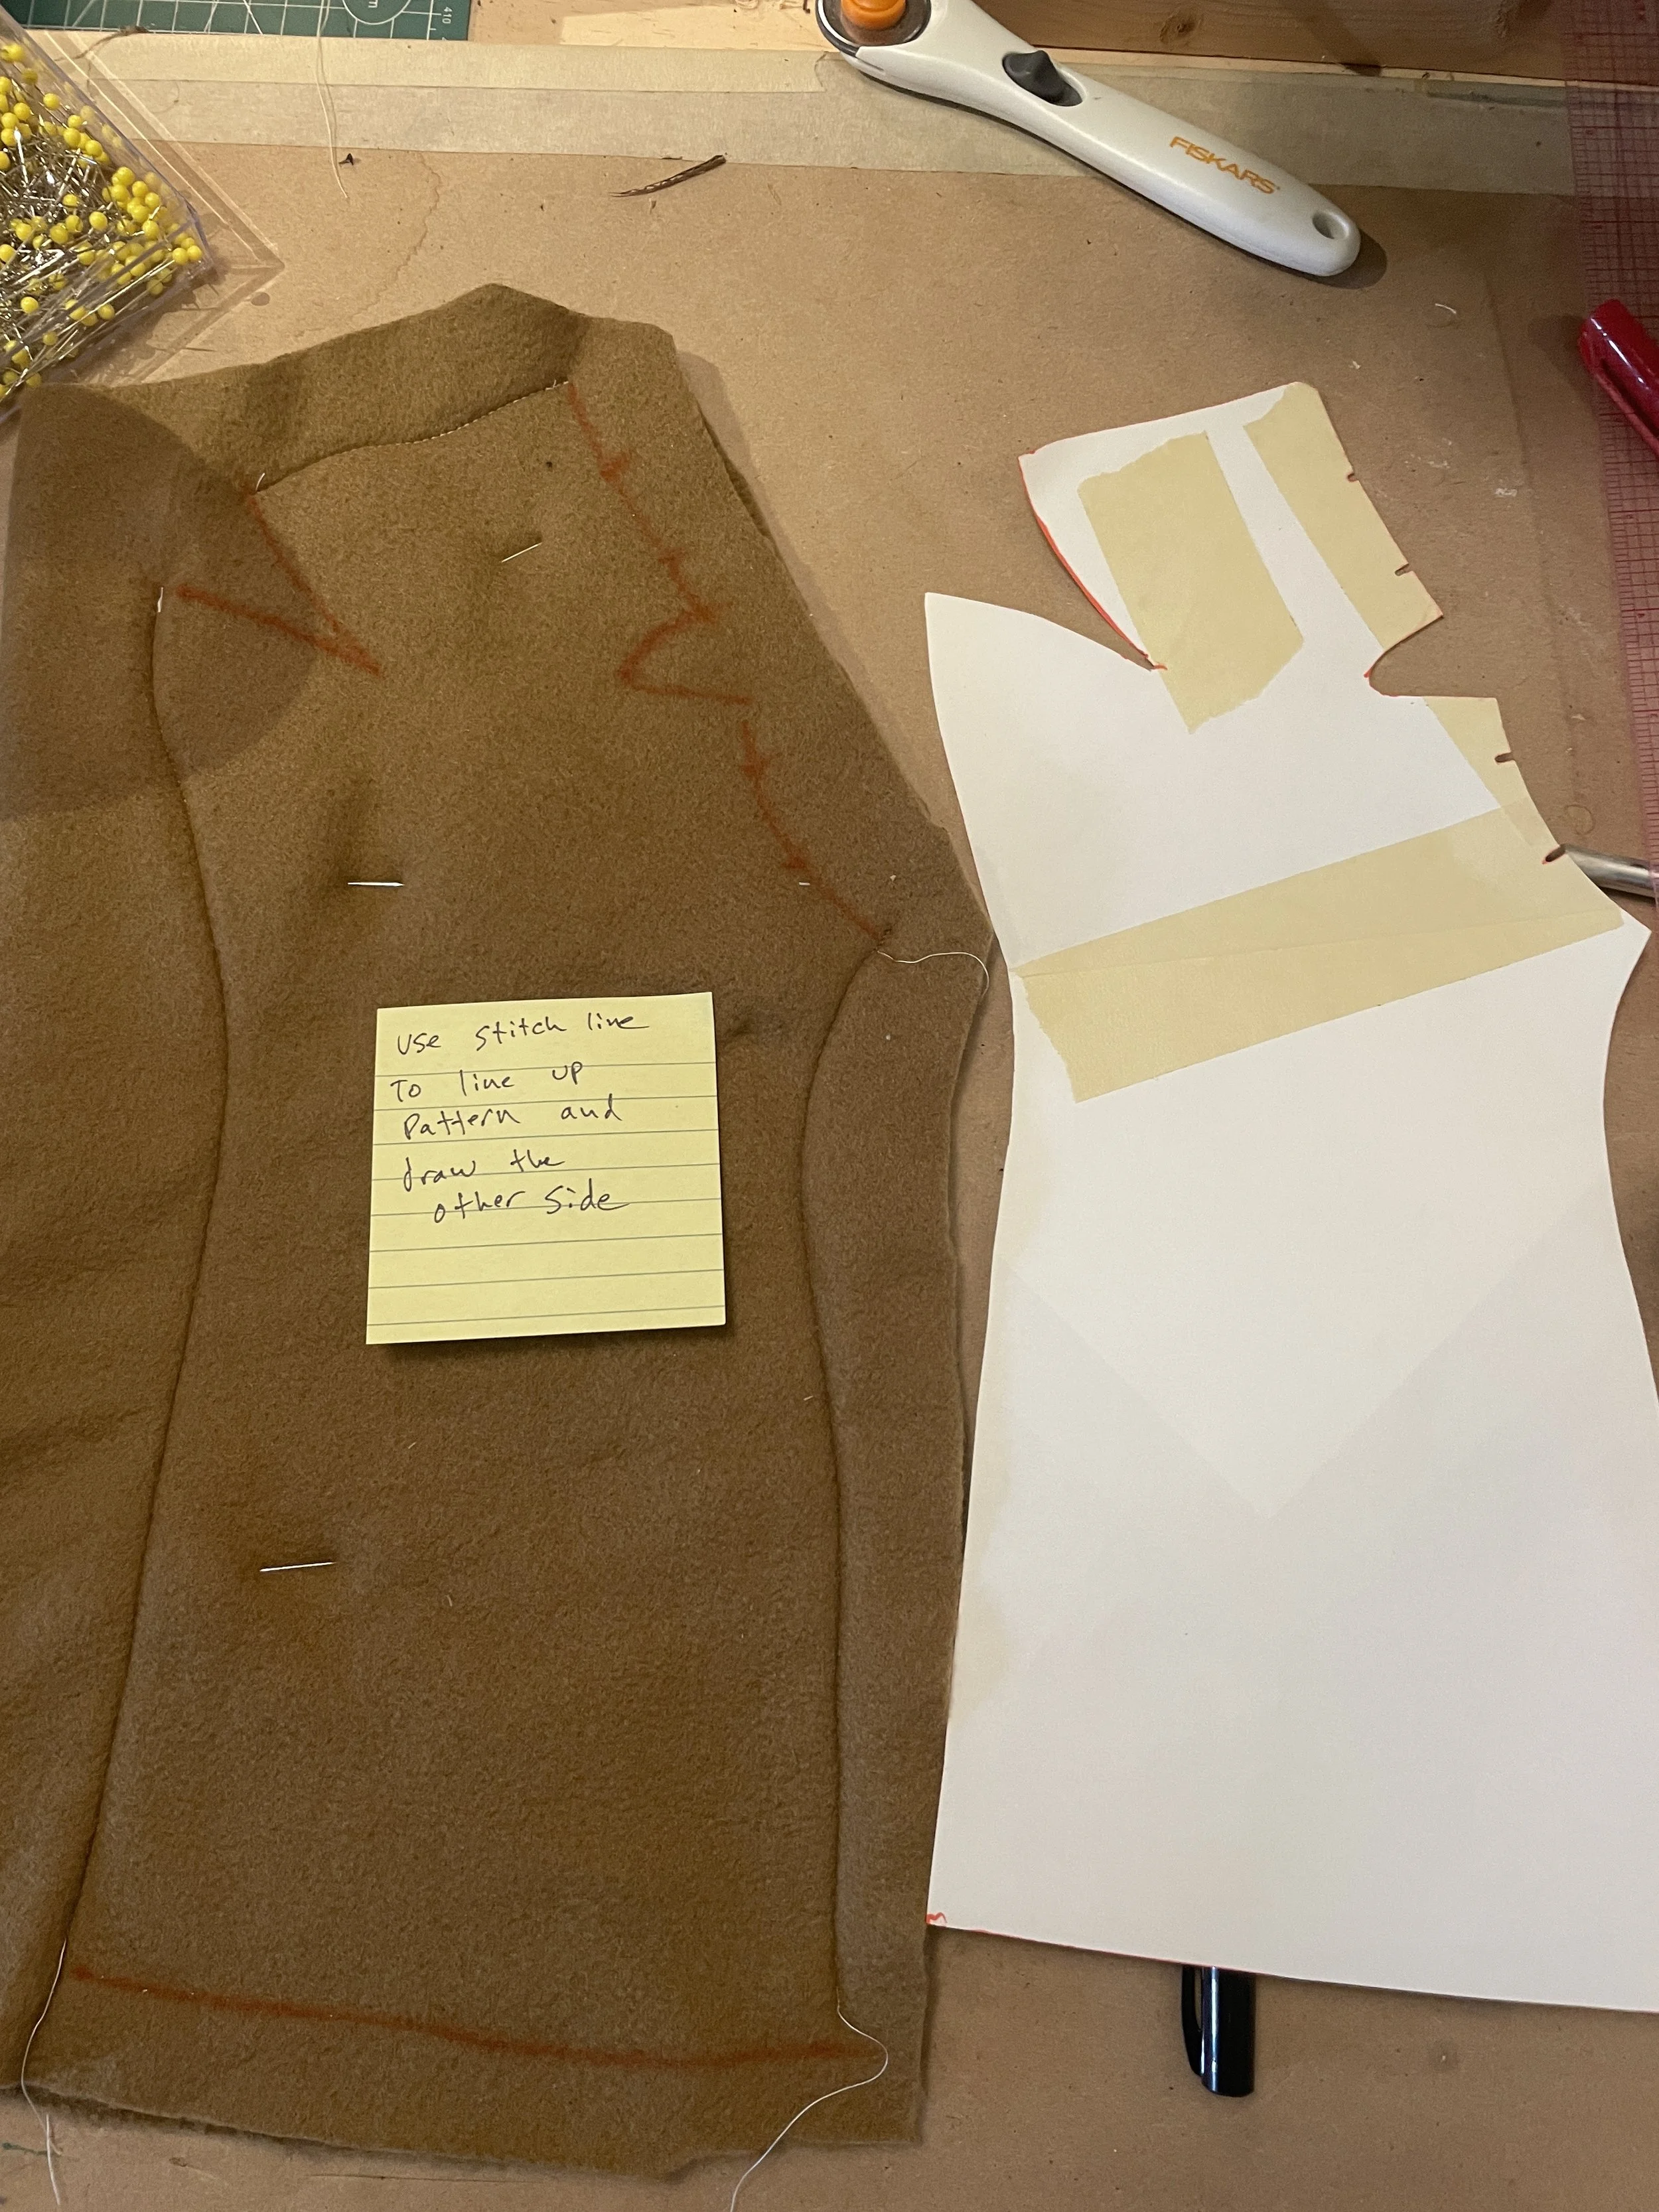
Fold the fleece in half. Pin the Body pattern to the fleece with the stretch marking aligned.
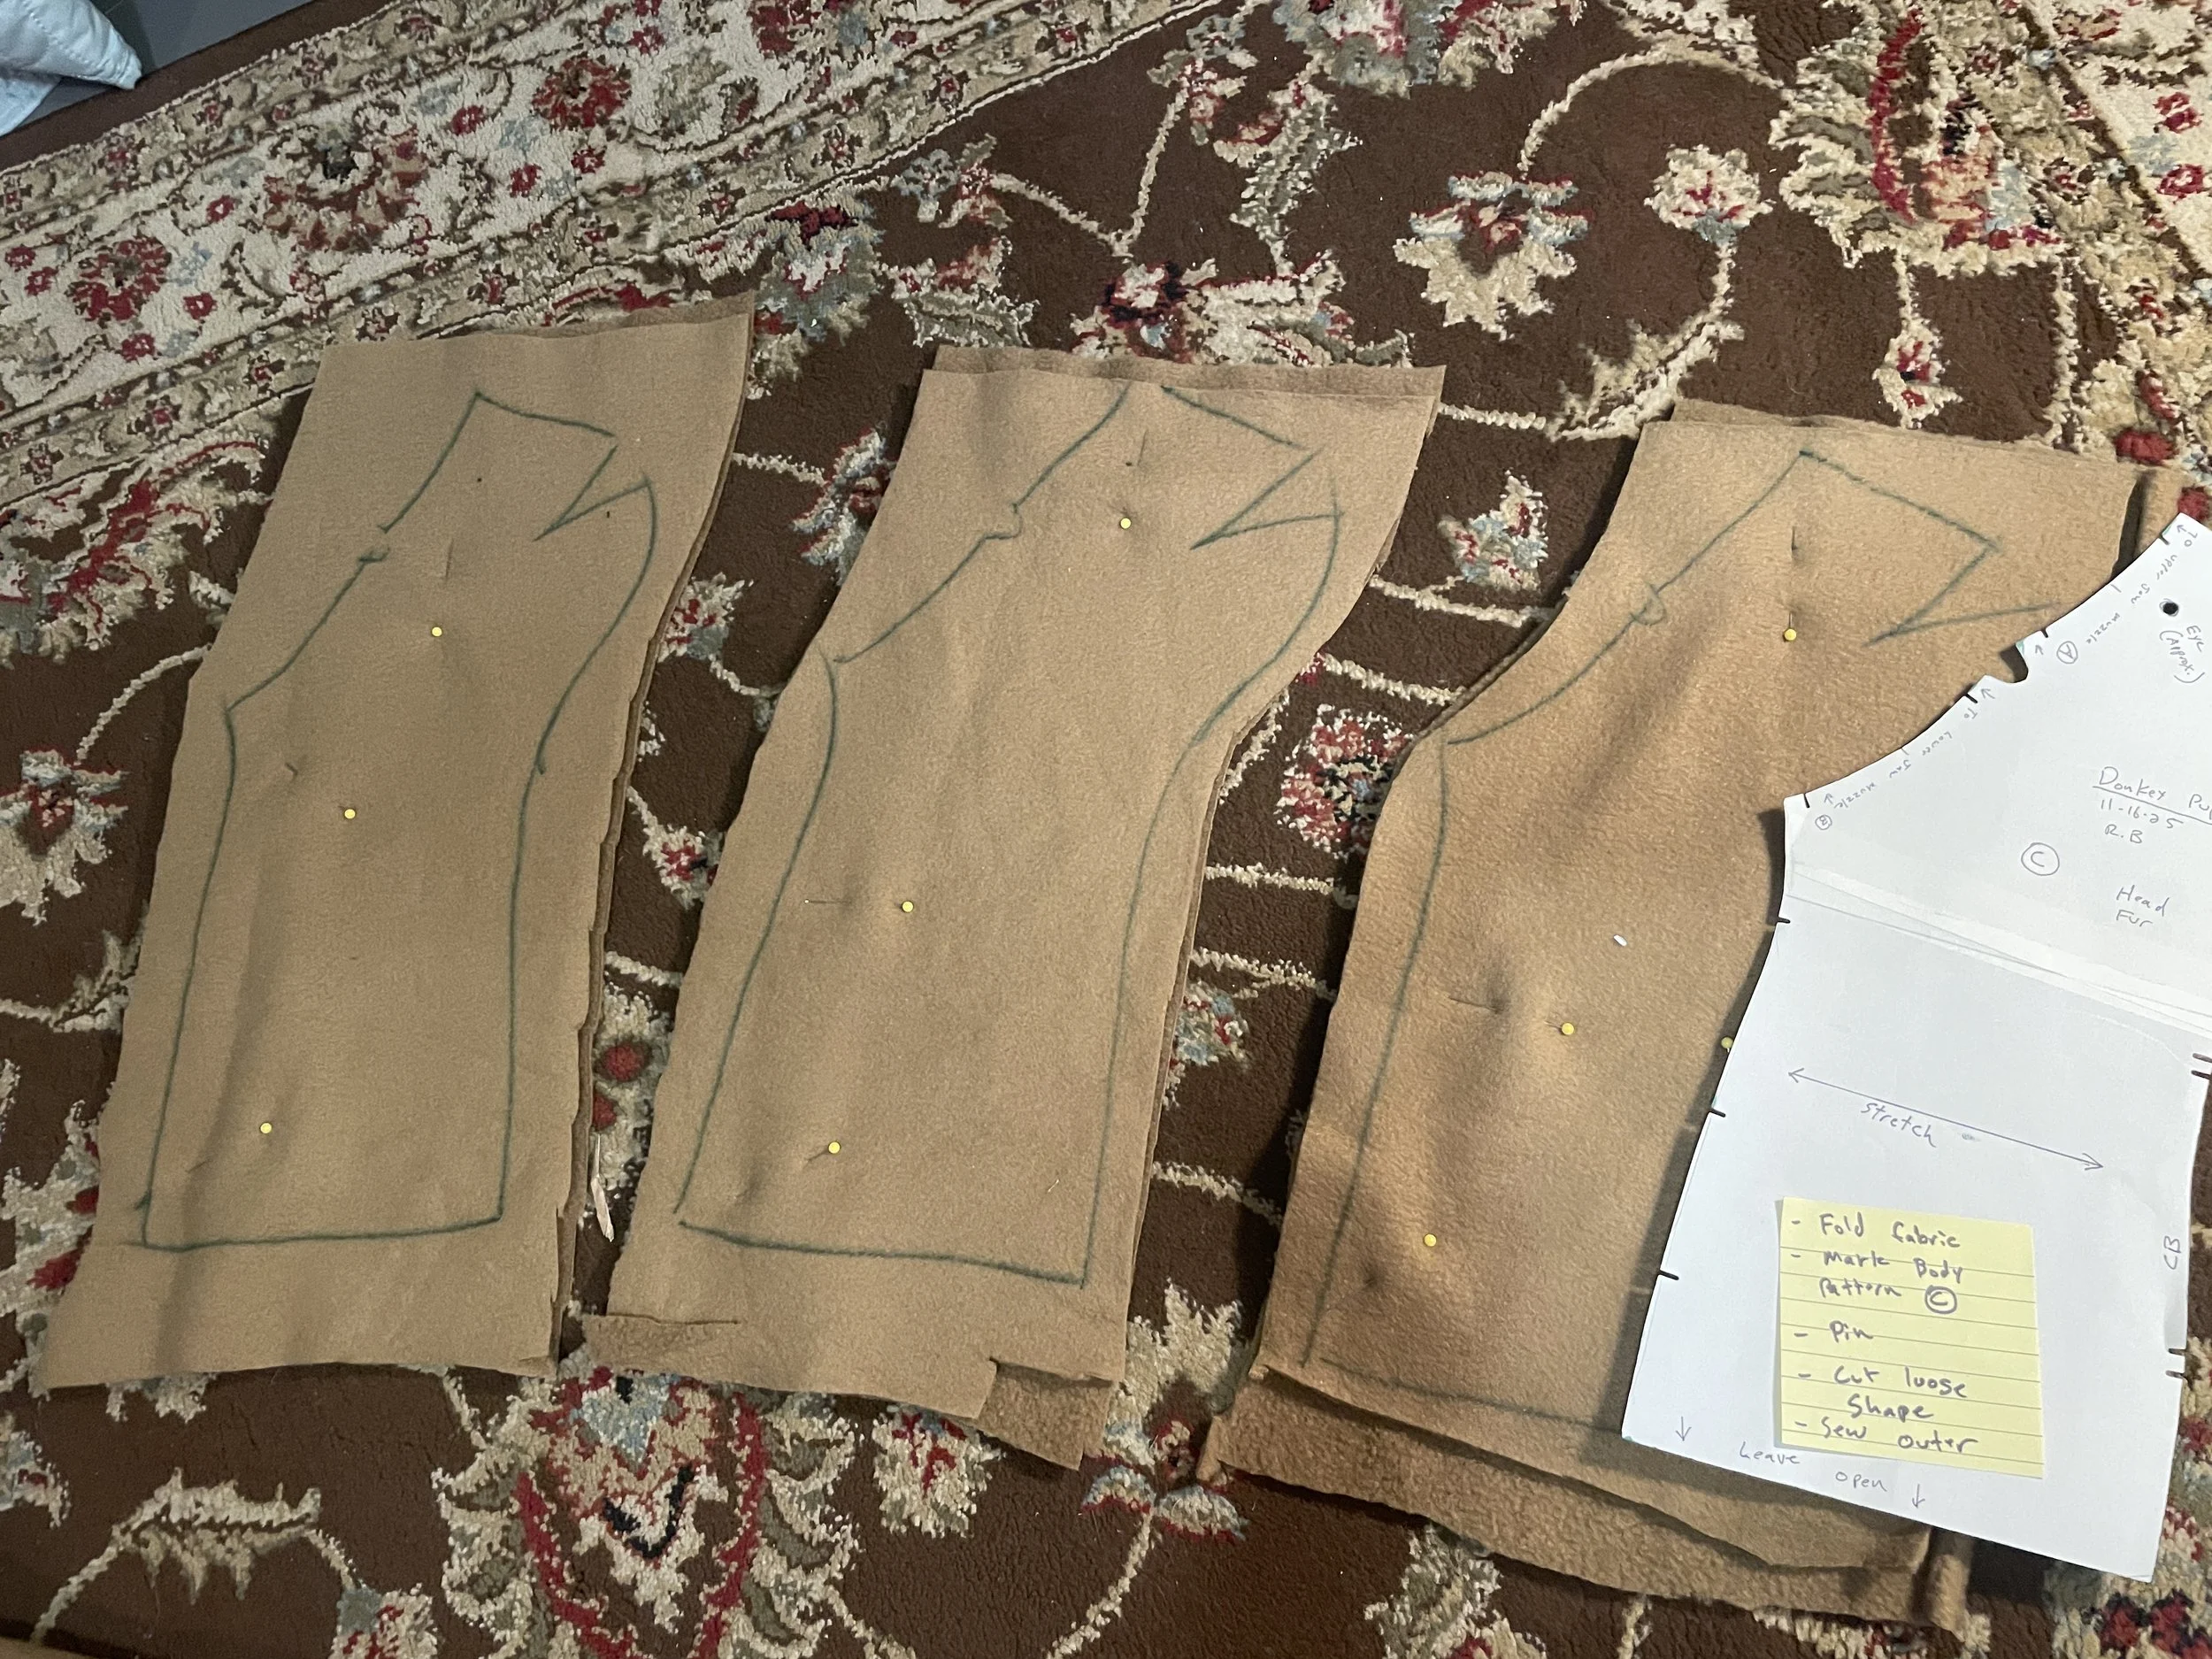
Mark the pattern on the inside of the fleece.
Rough-cut around the shape (leave extra fabric for now).
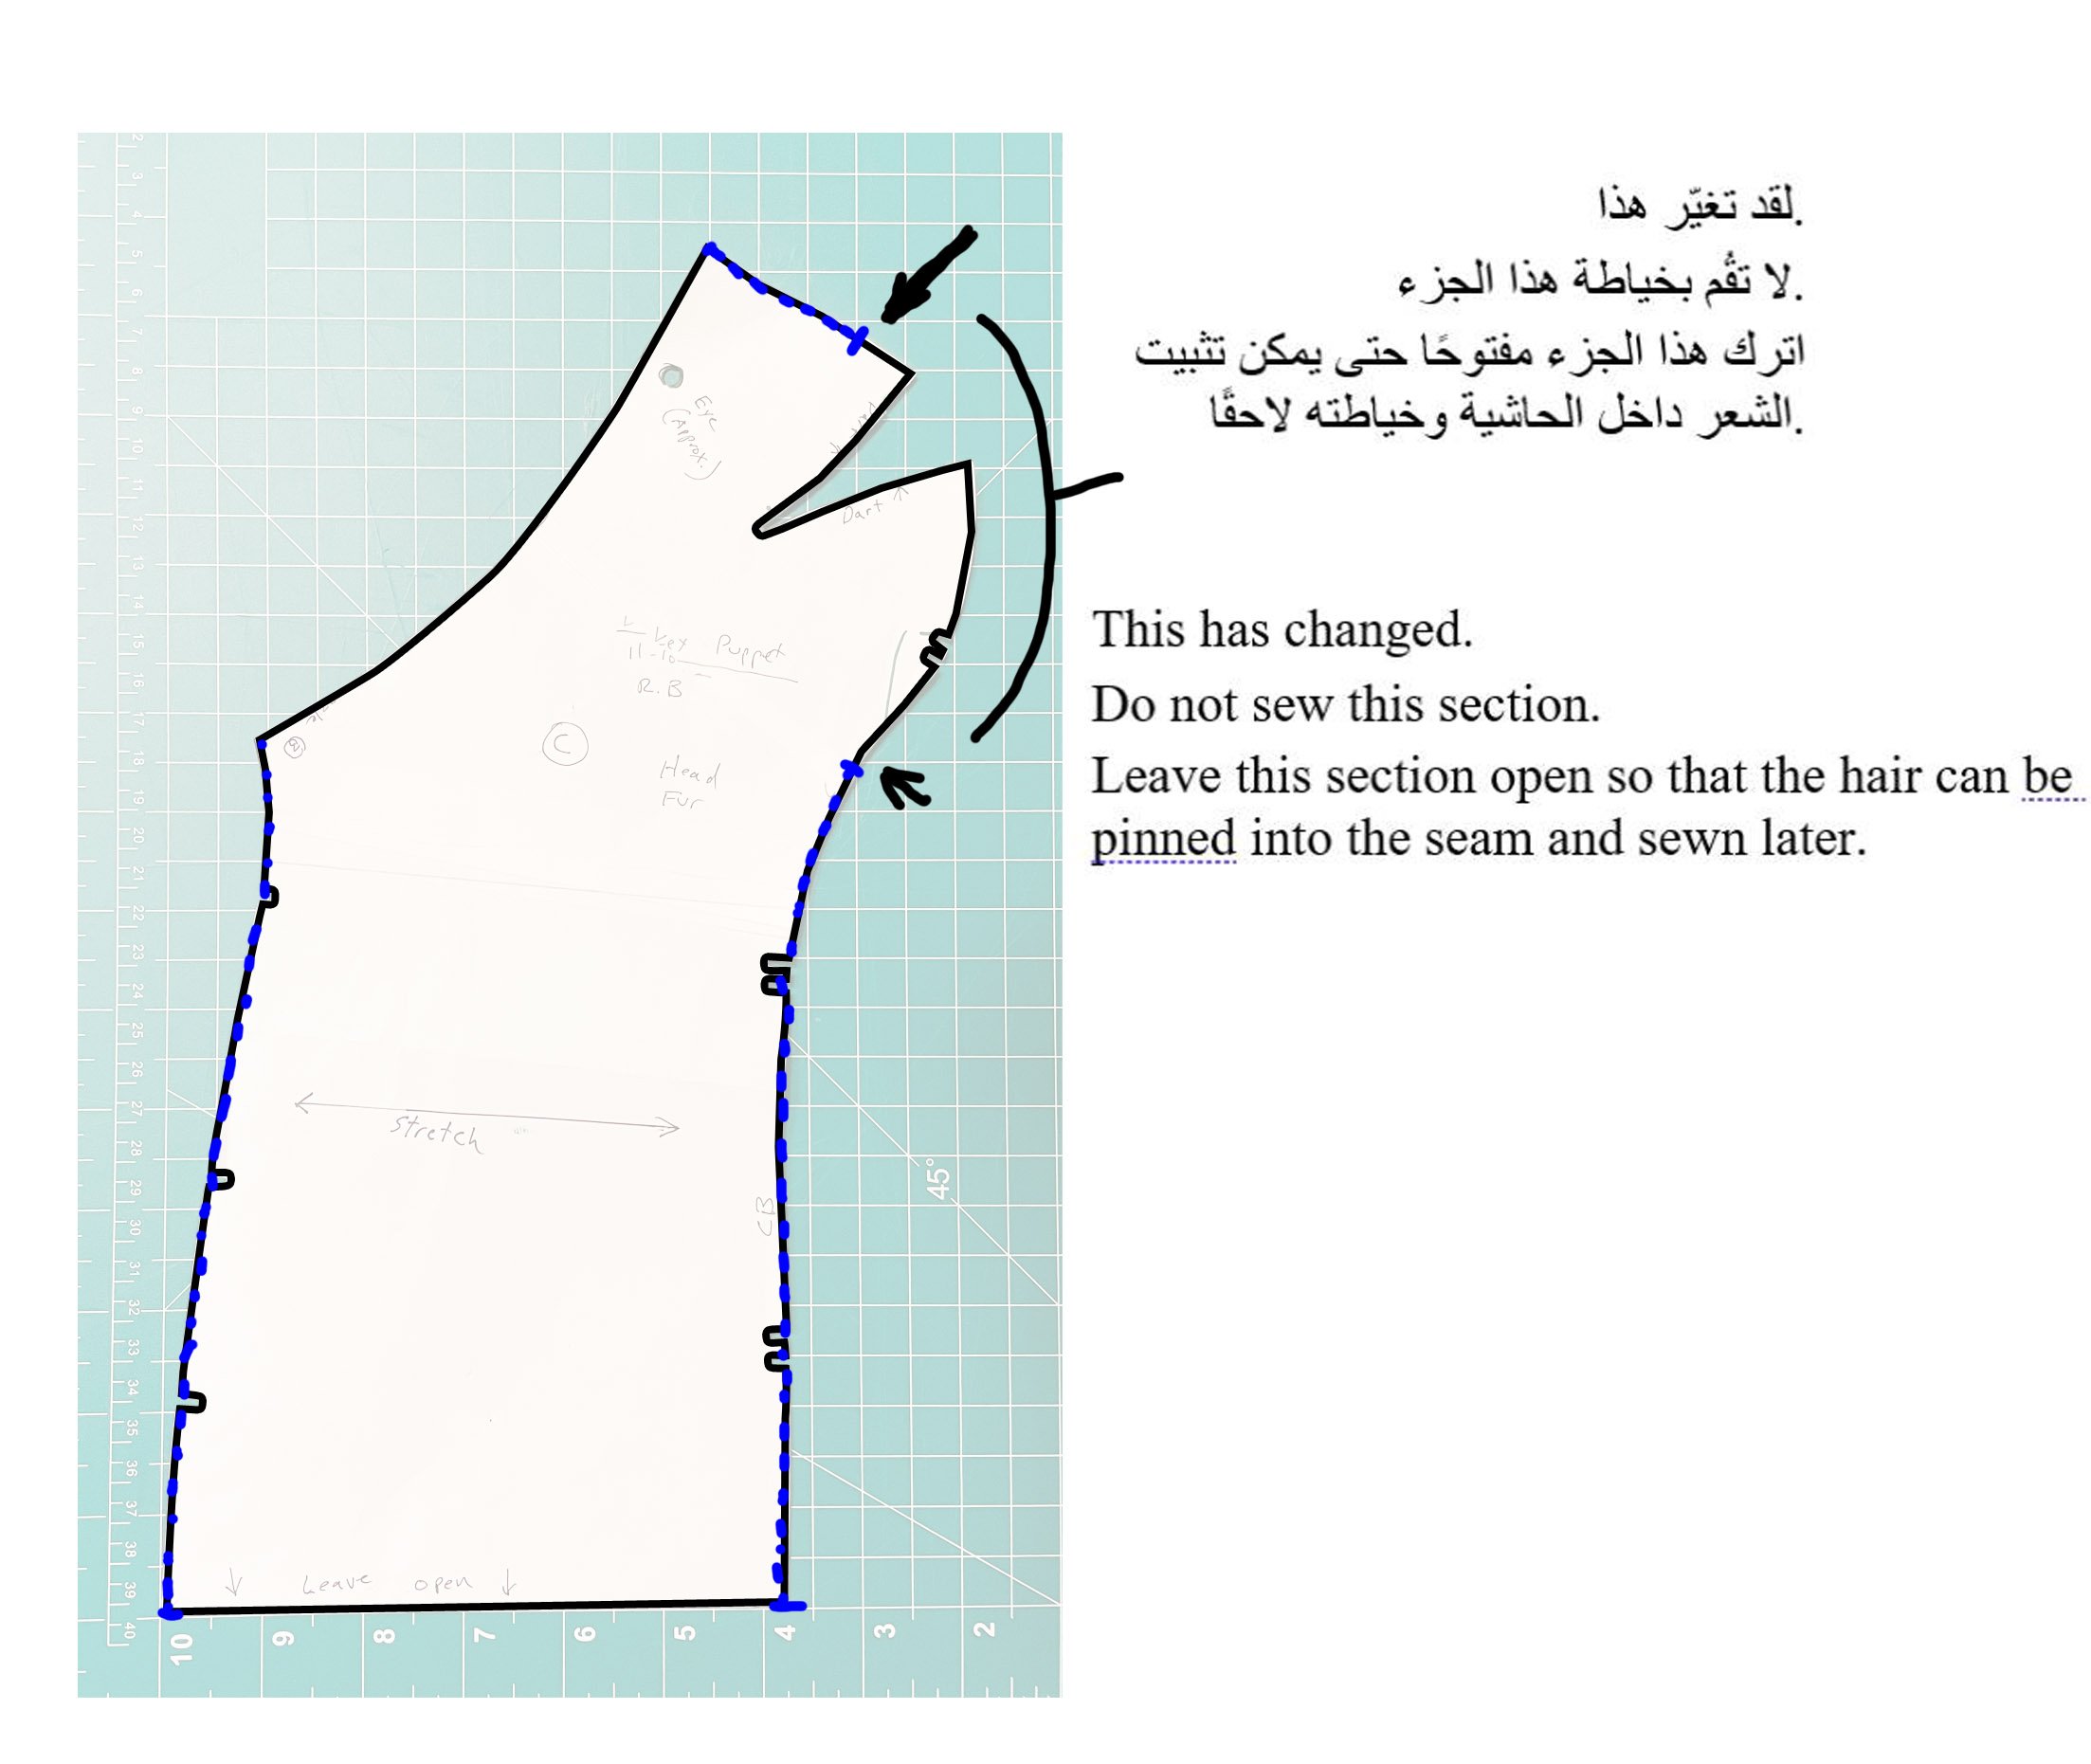
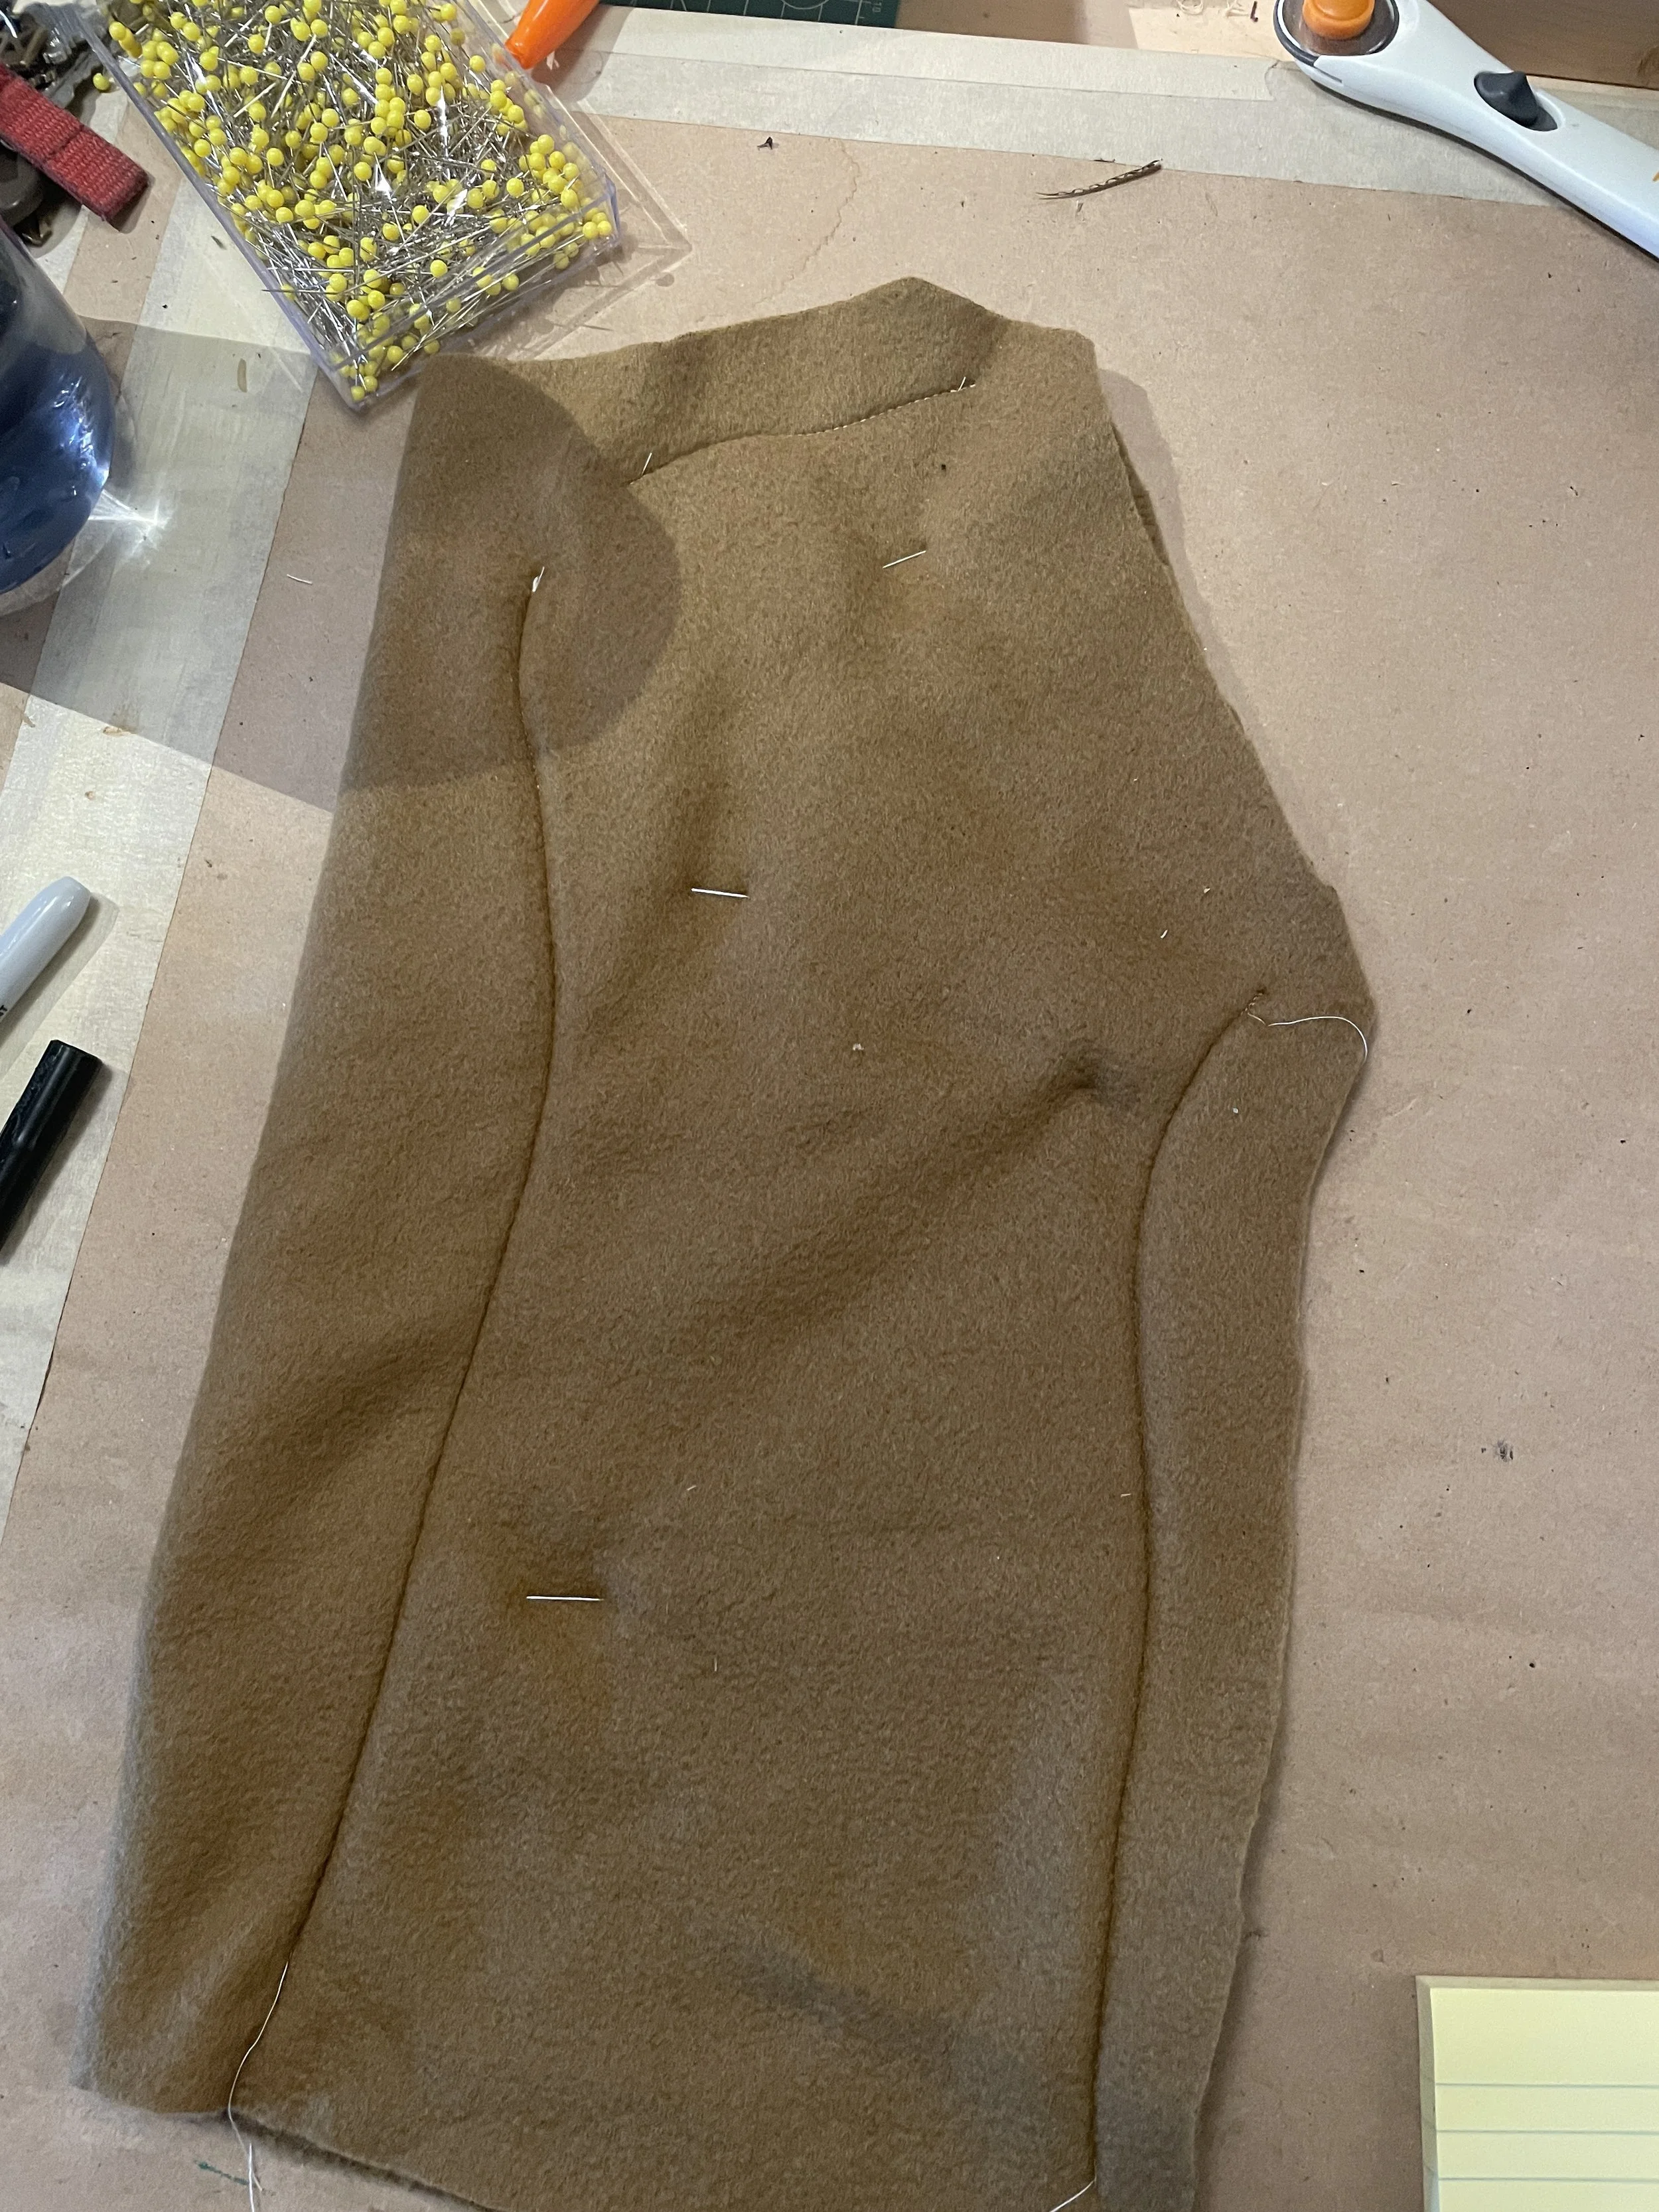
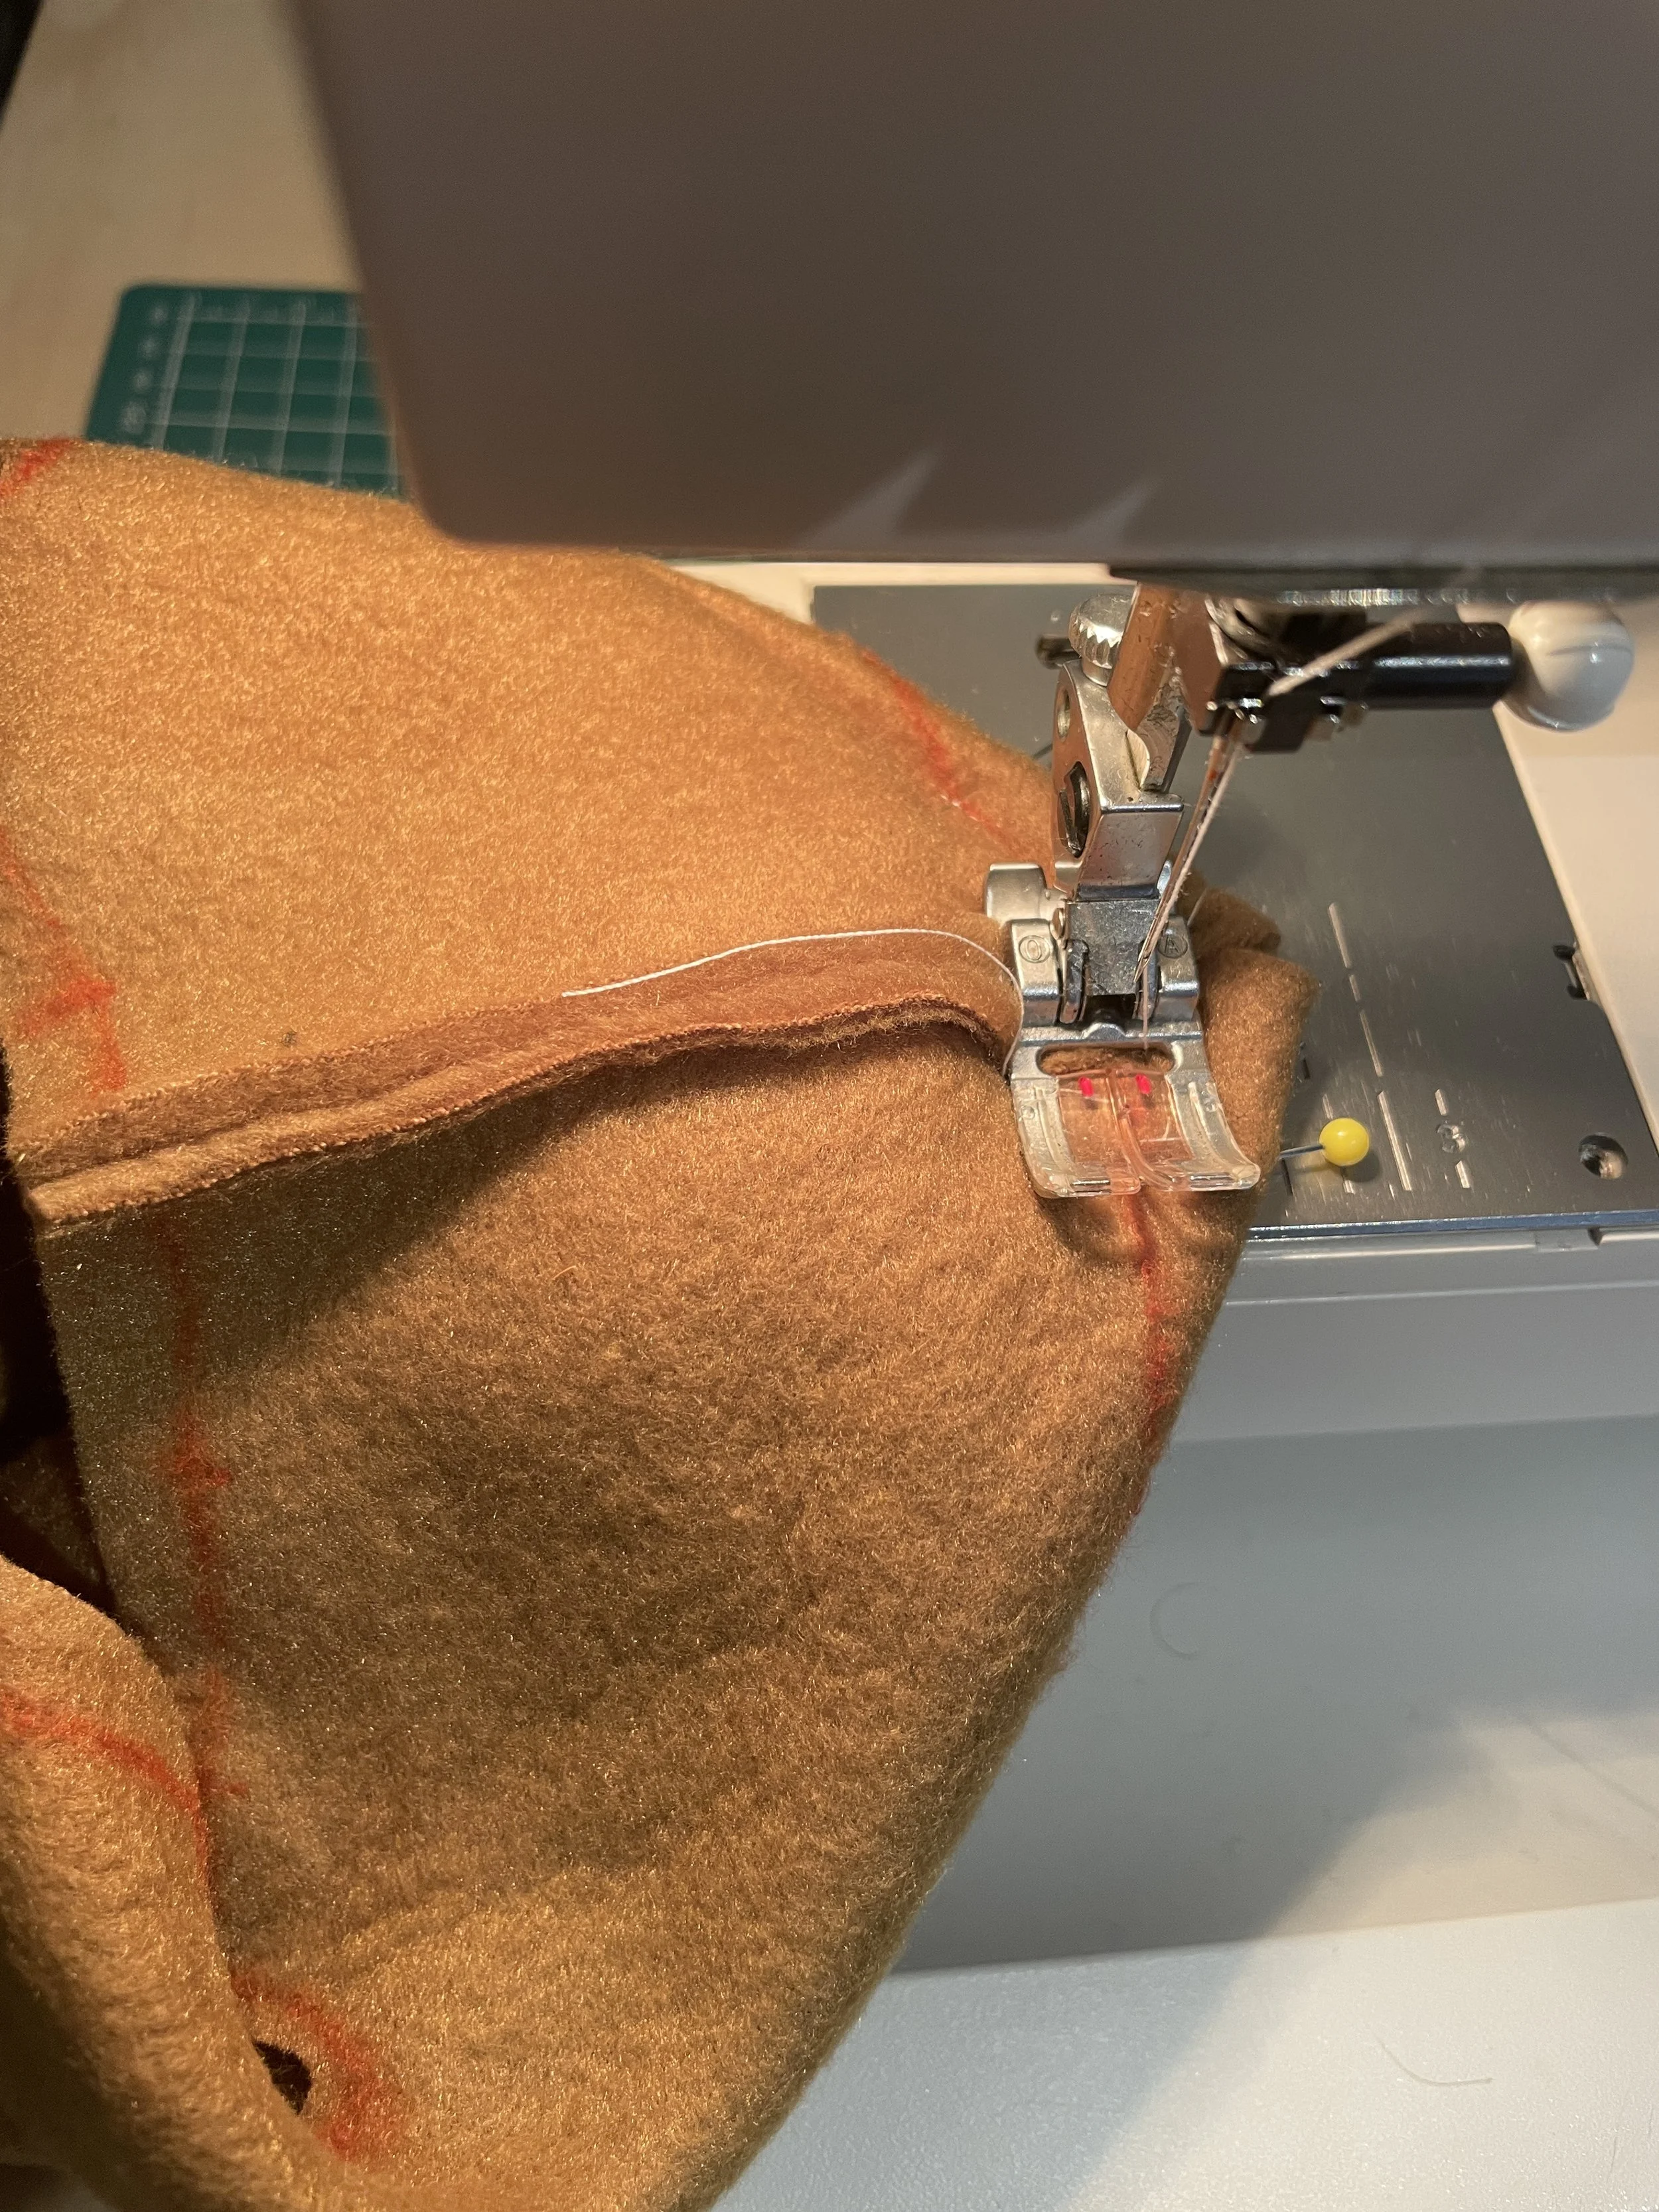
Sew the Center Front and Center Back seams.
Leave the opening at the top where the hair will be installed.
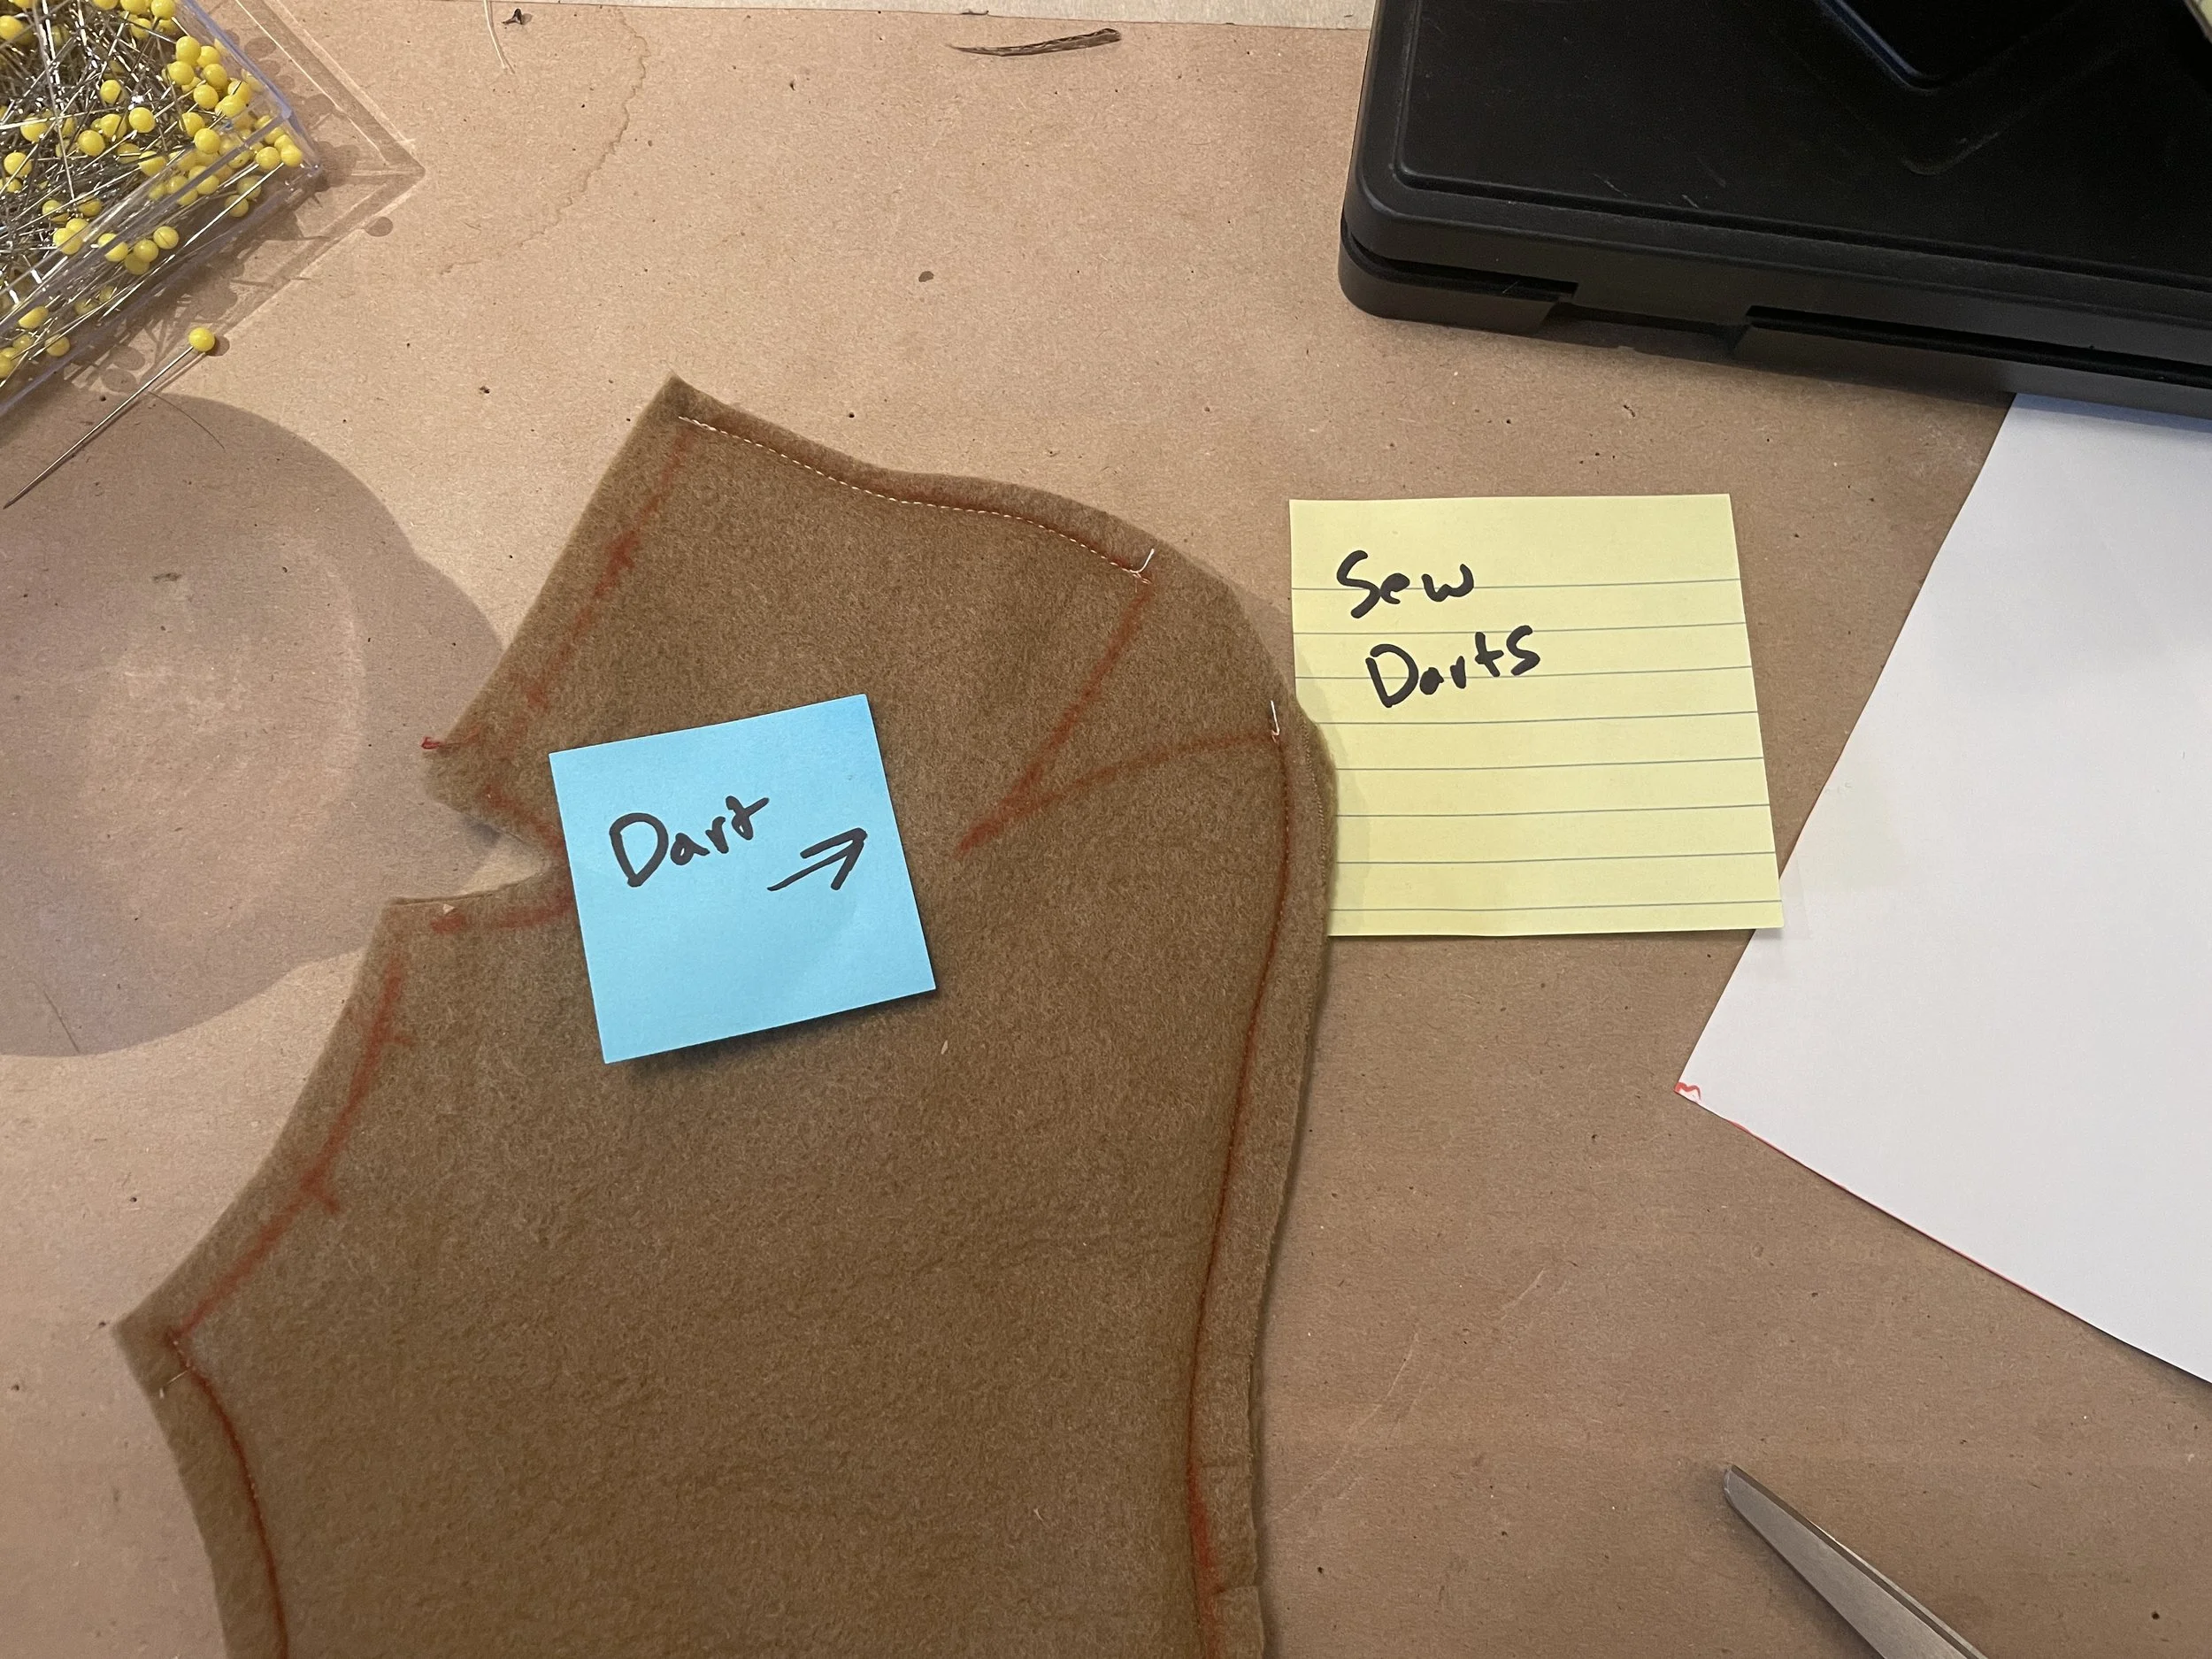
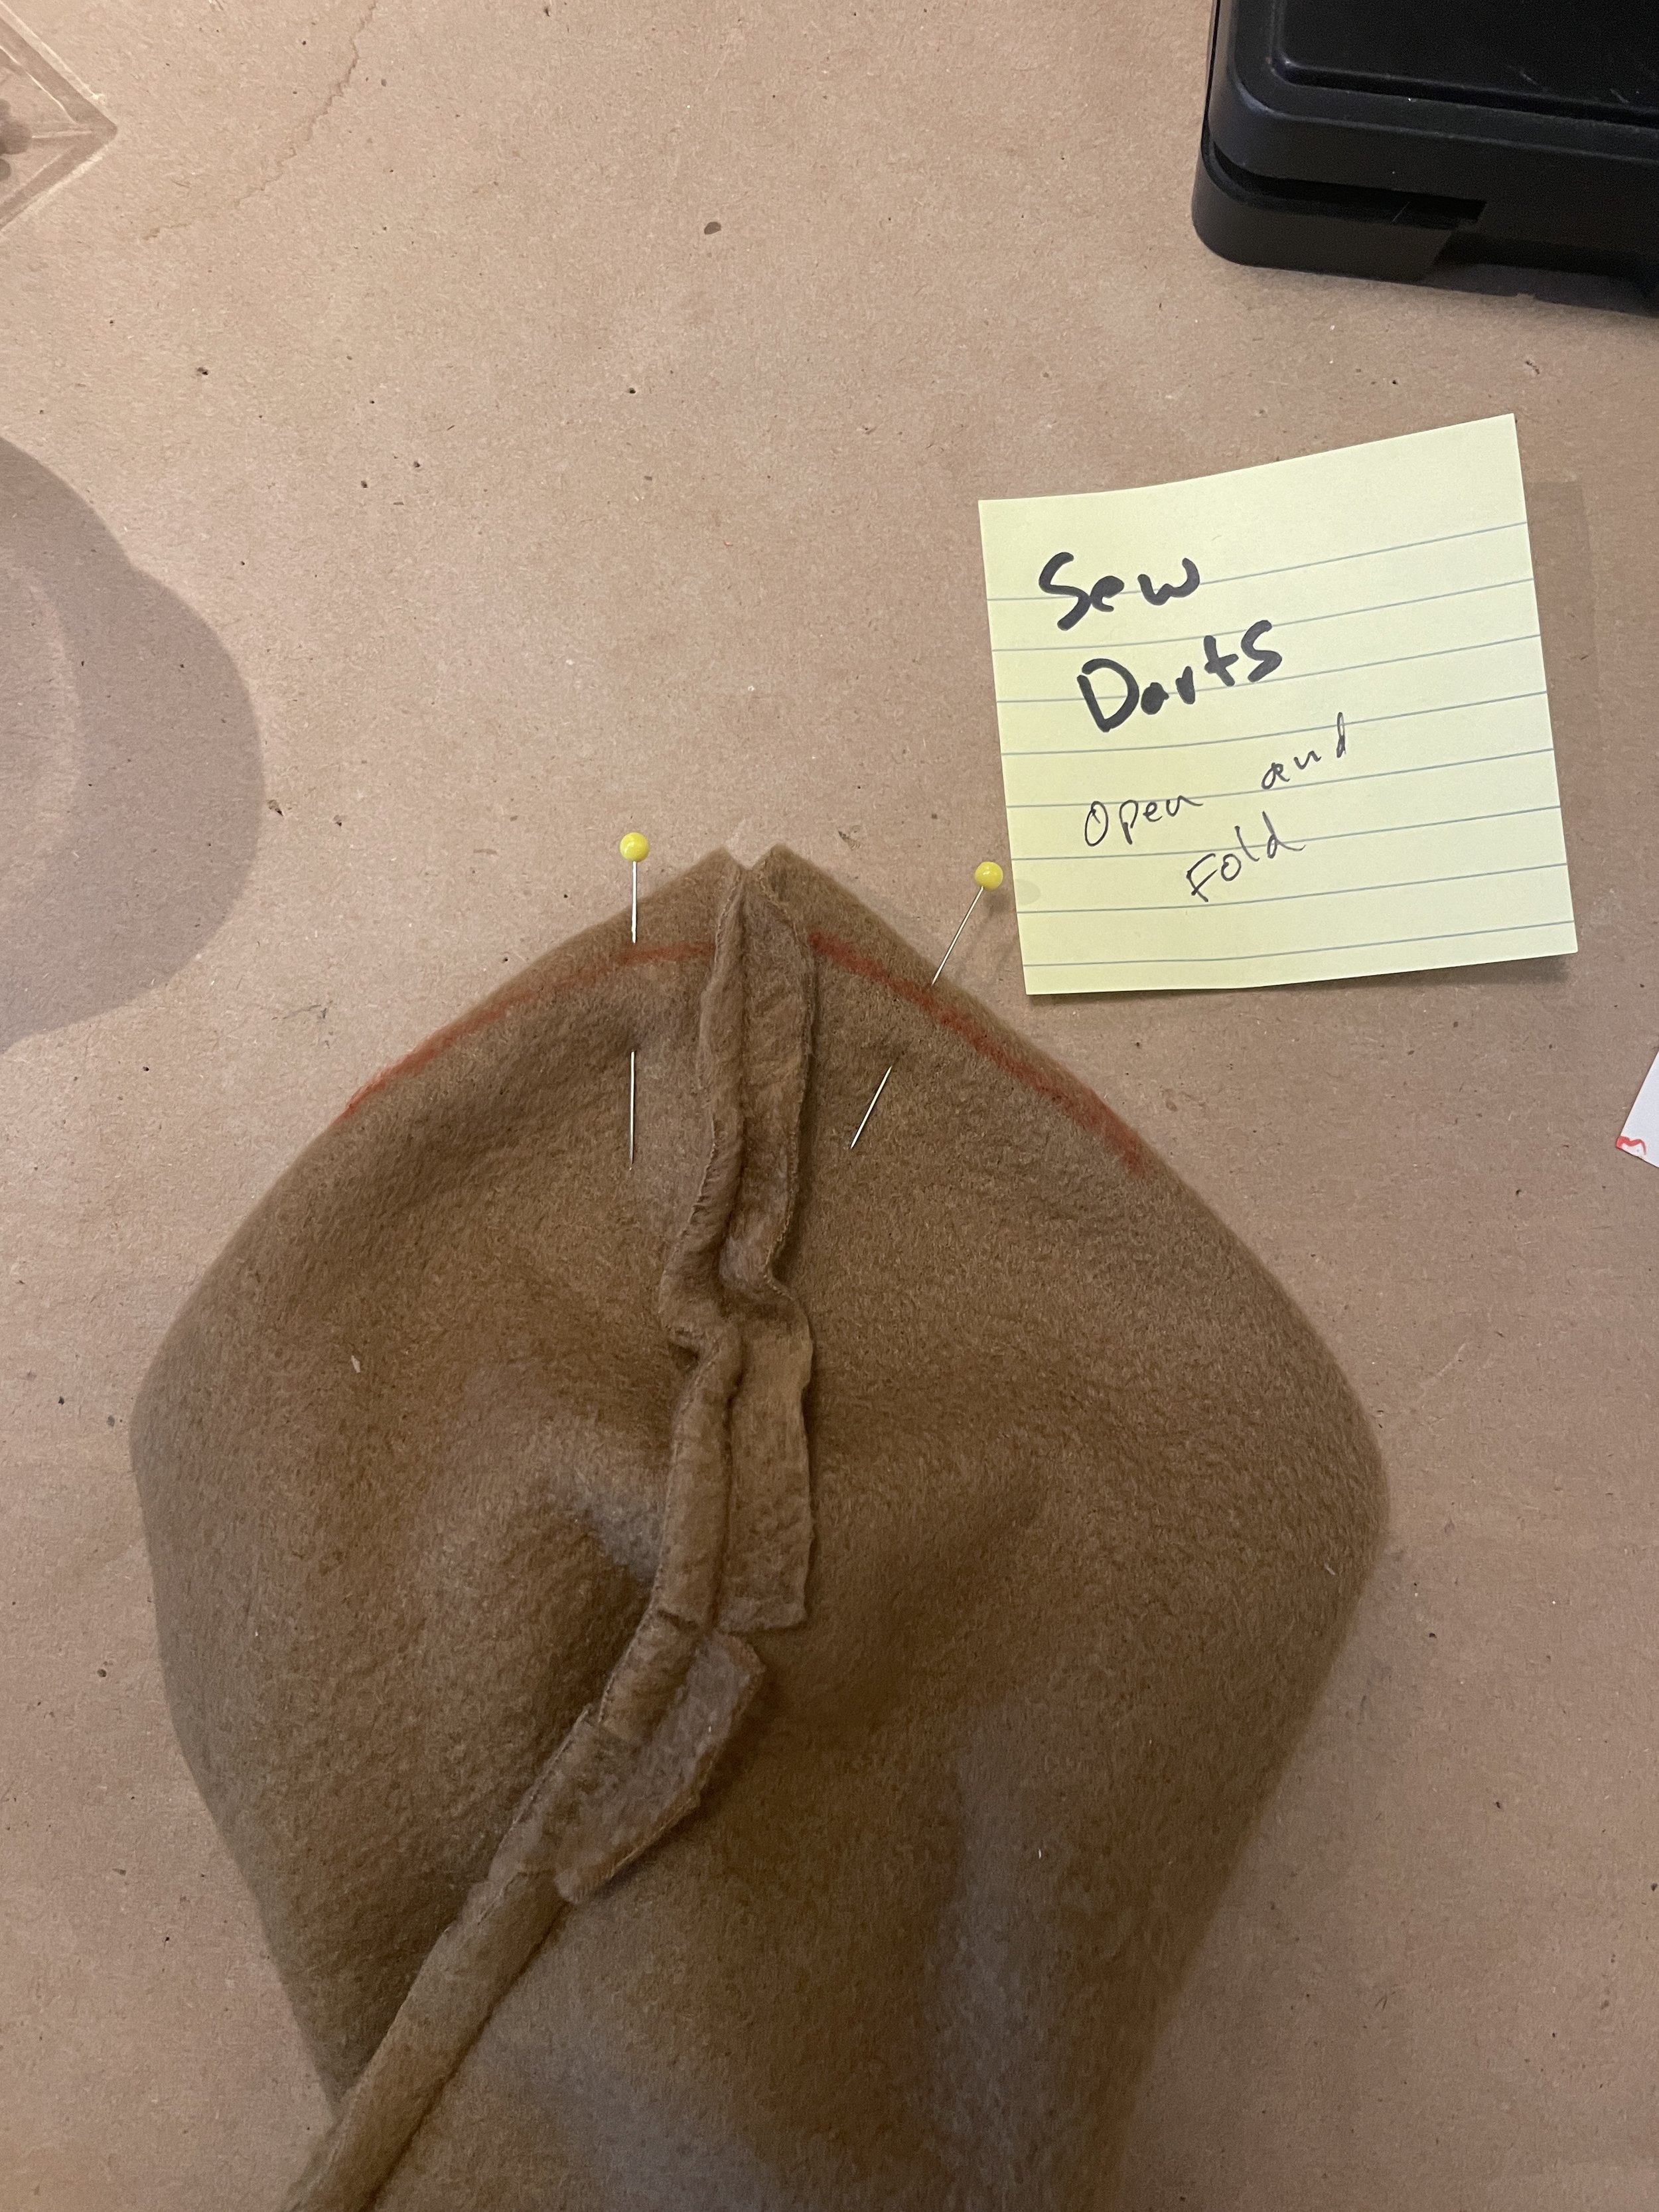
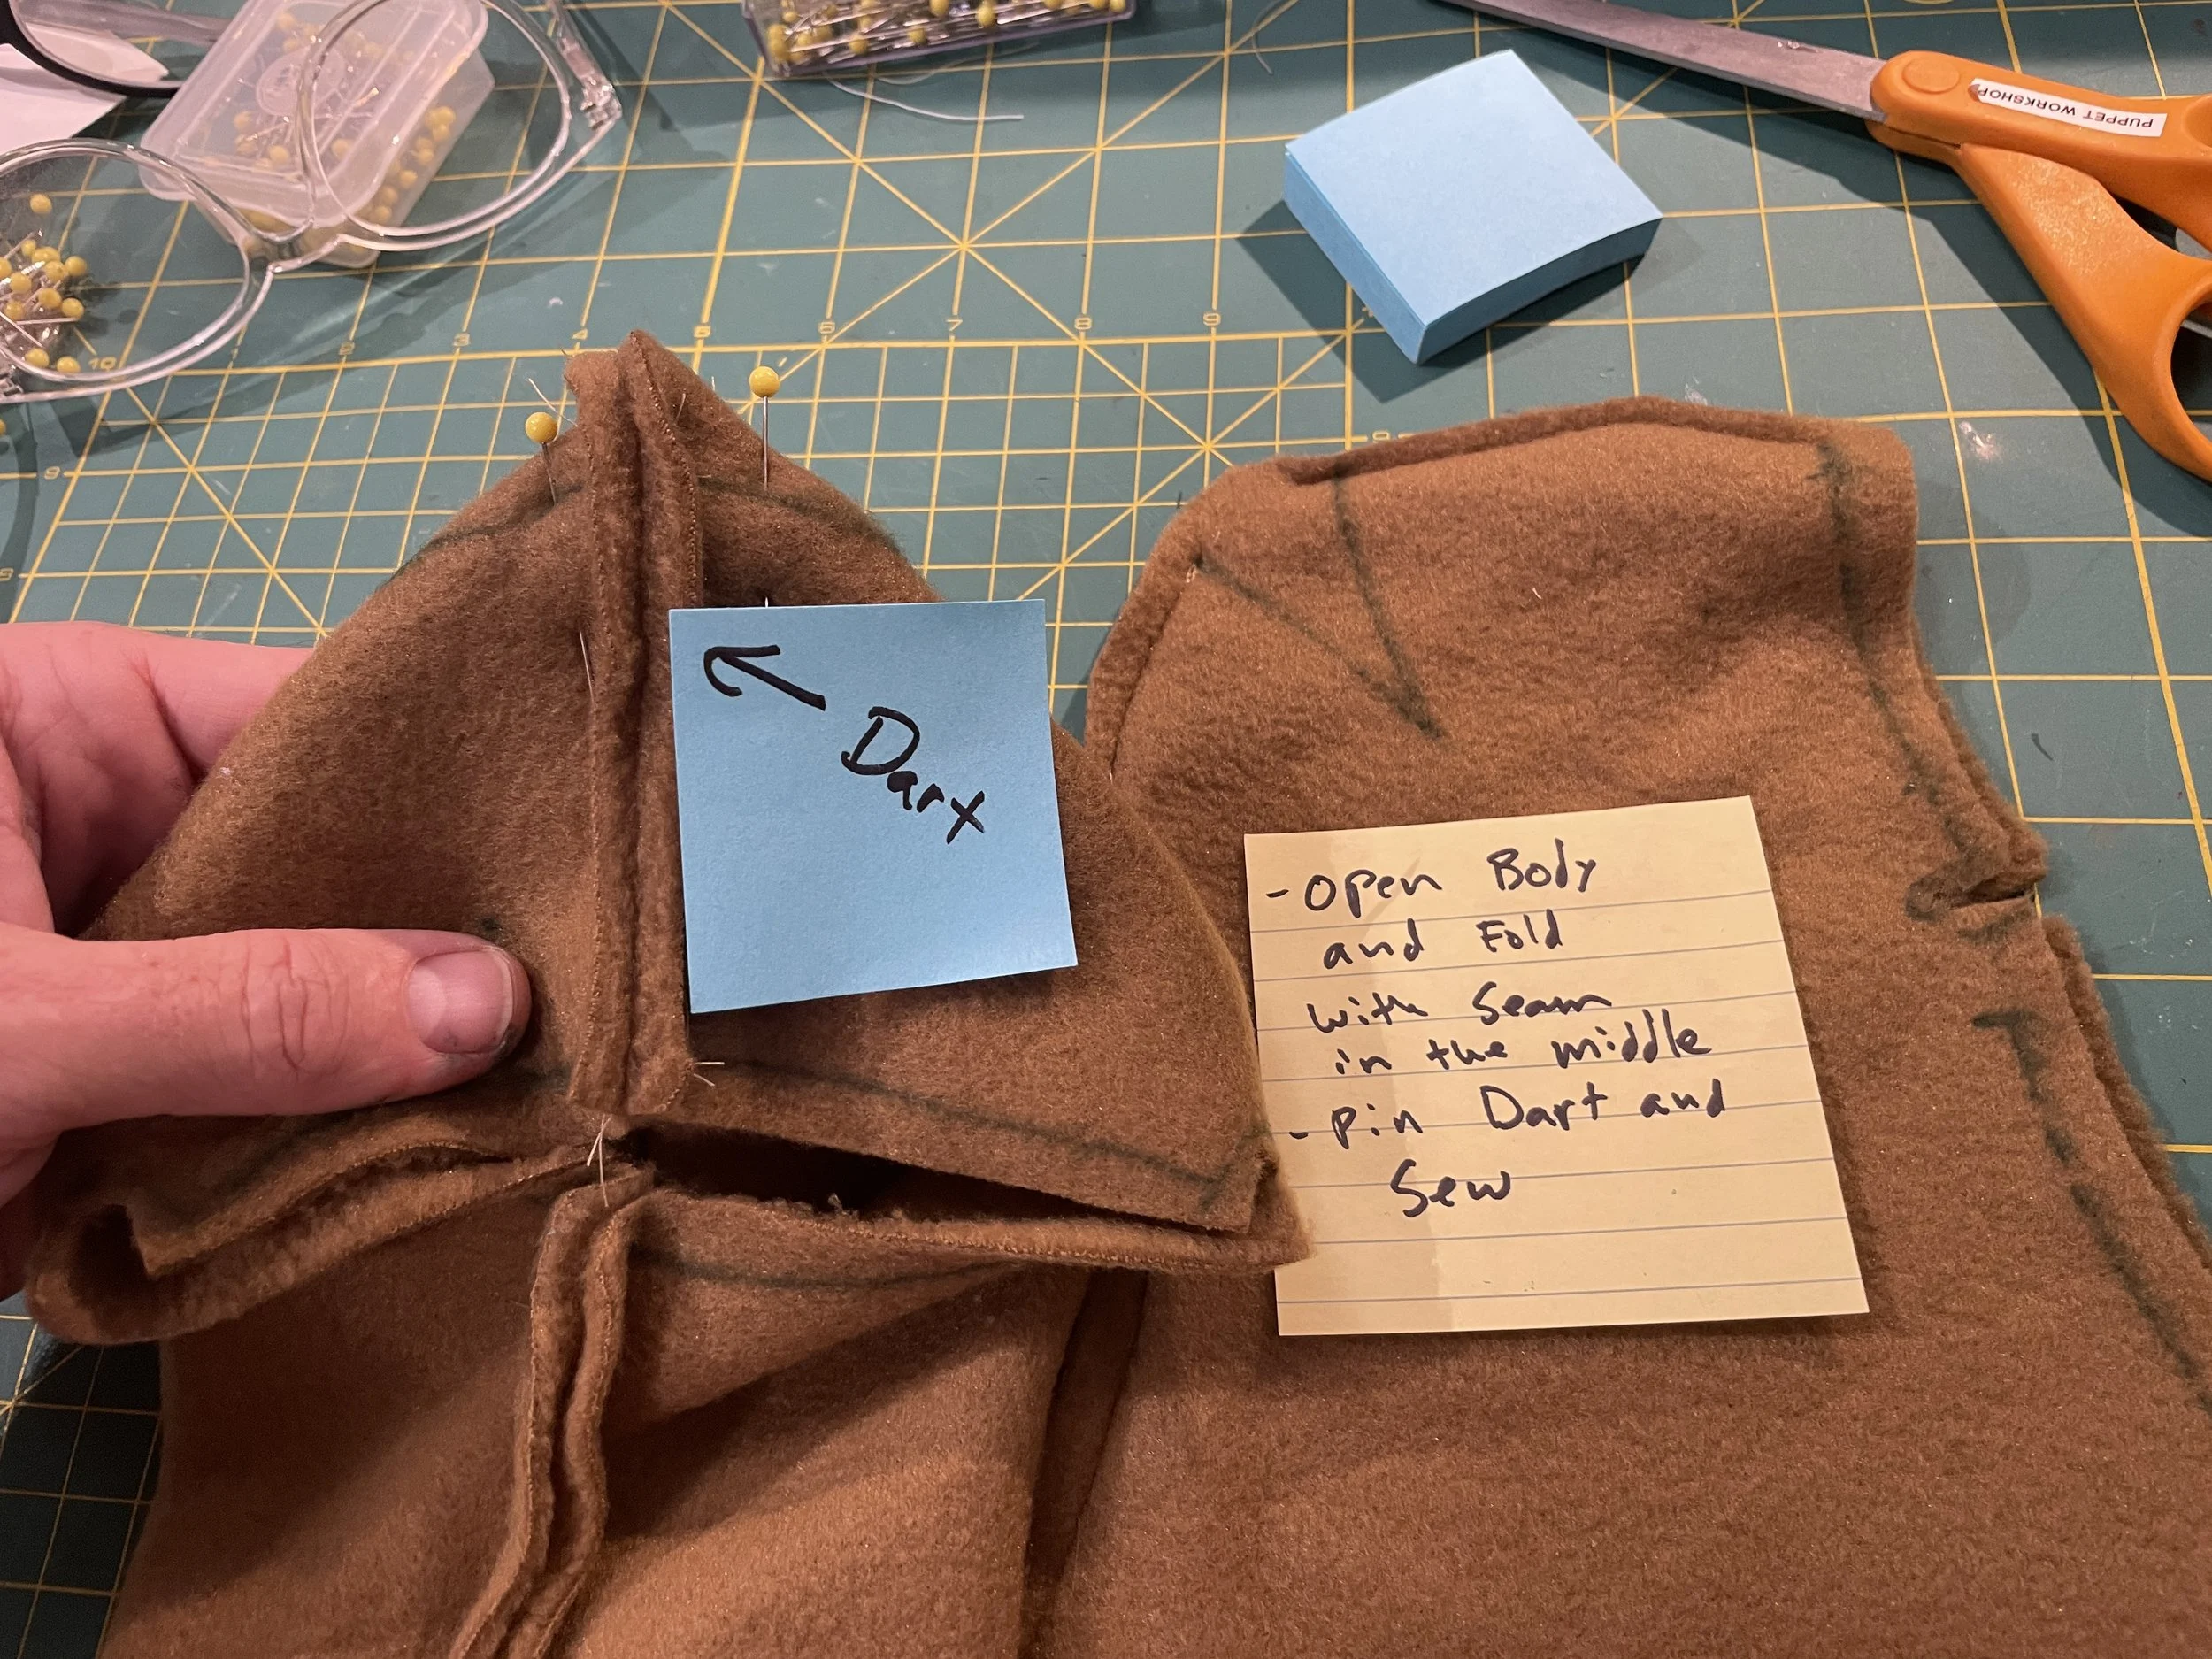
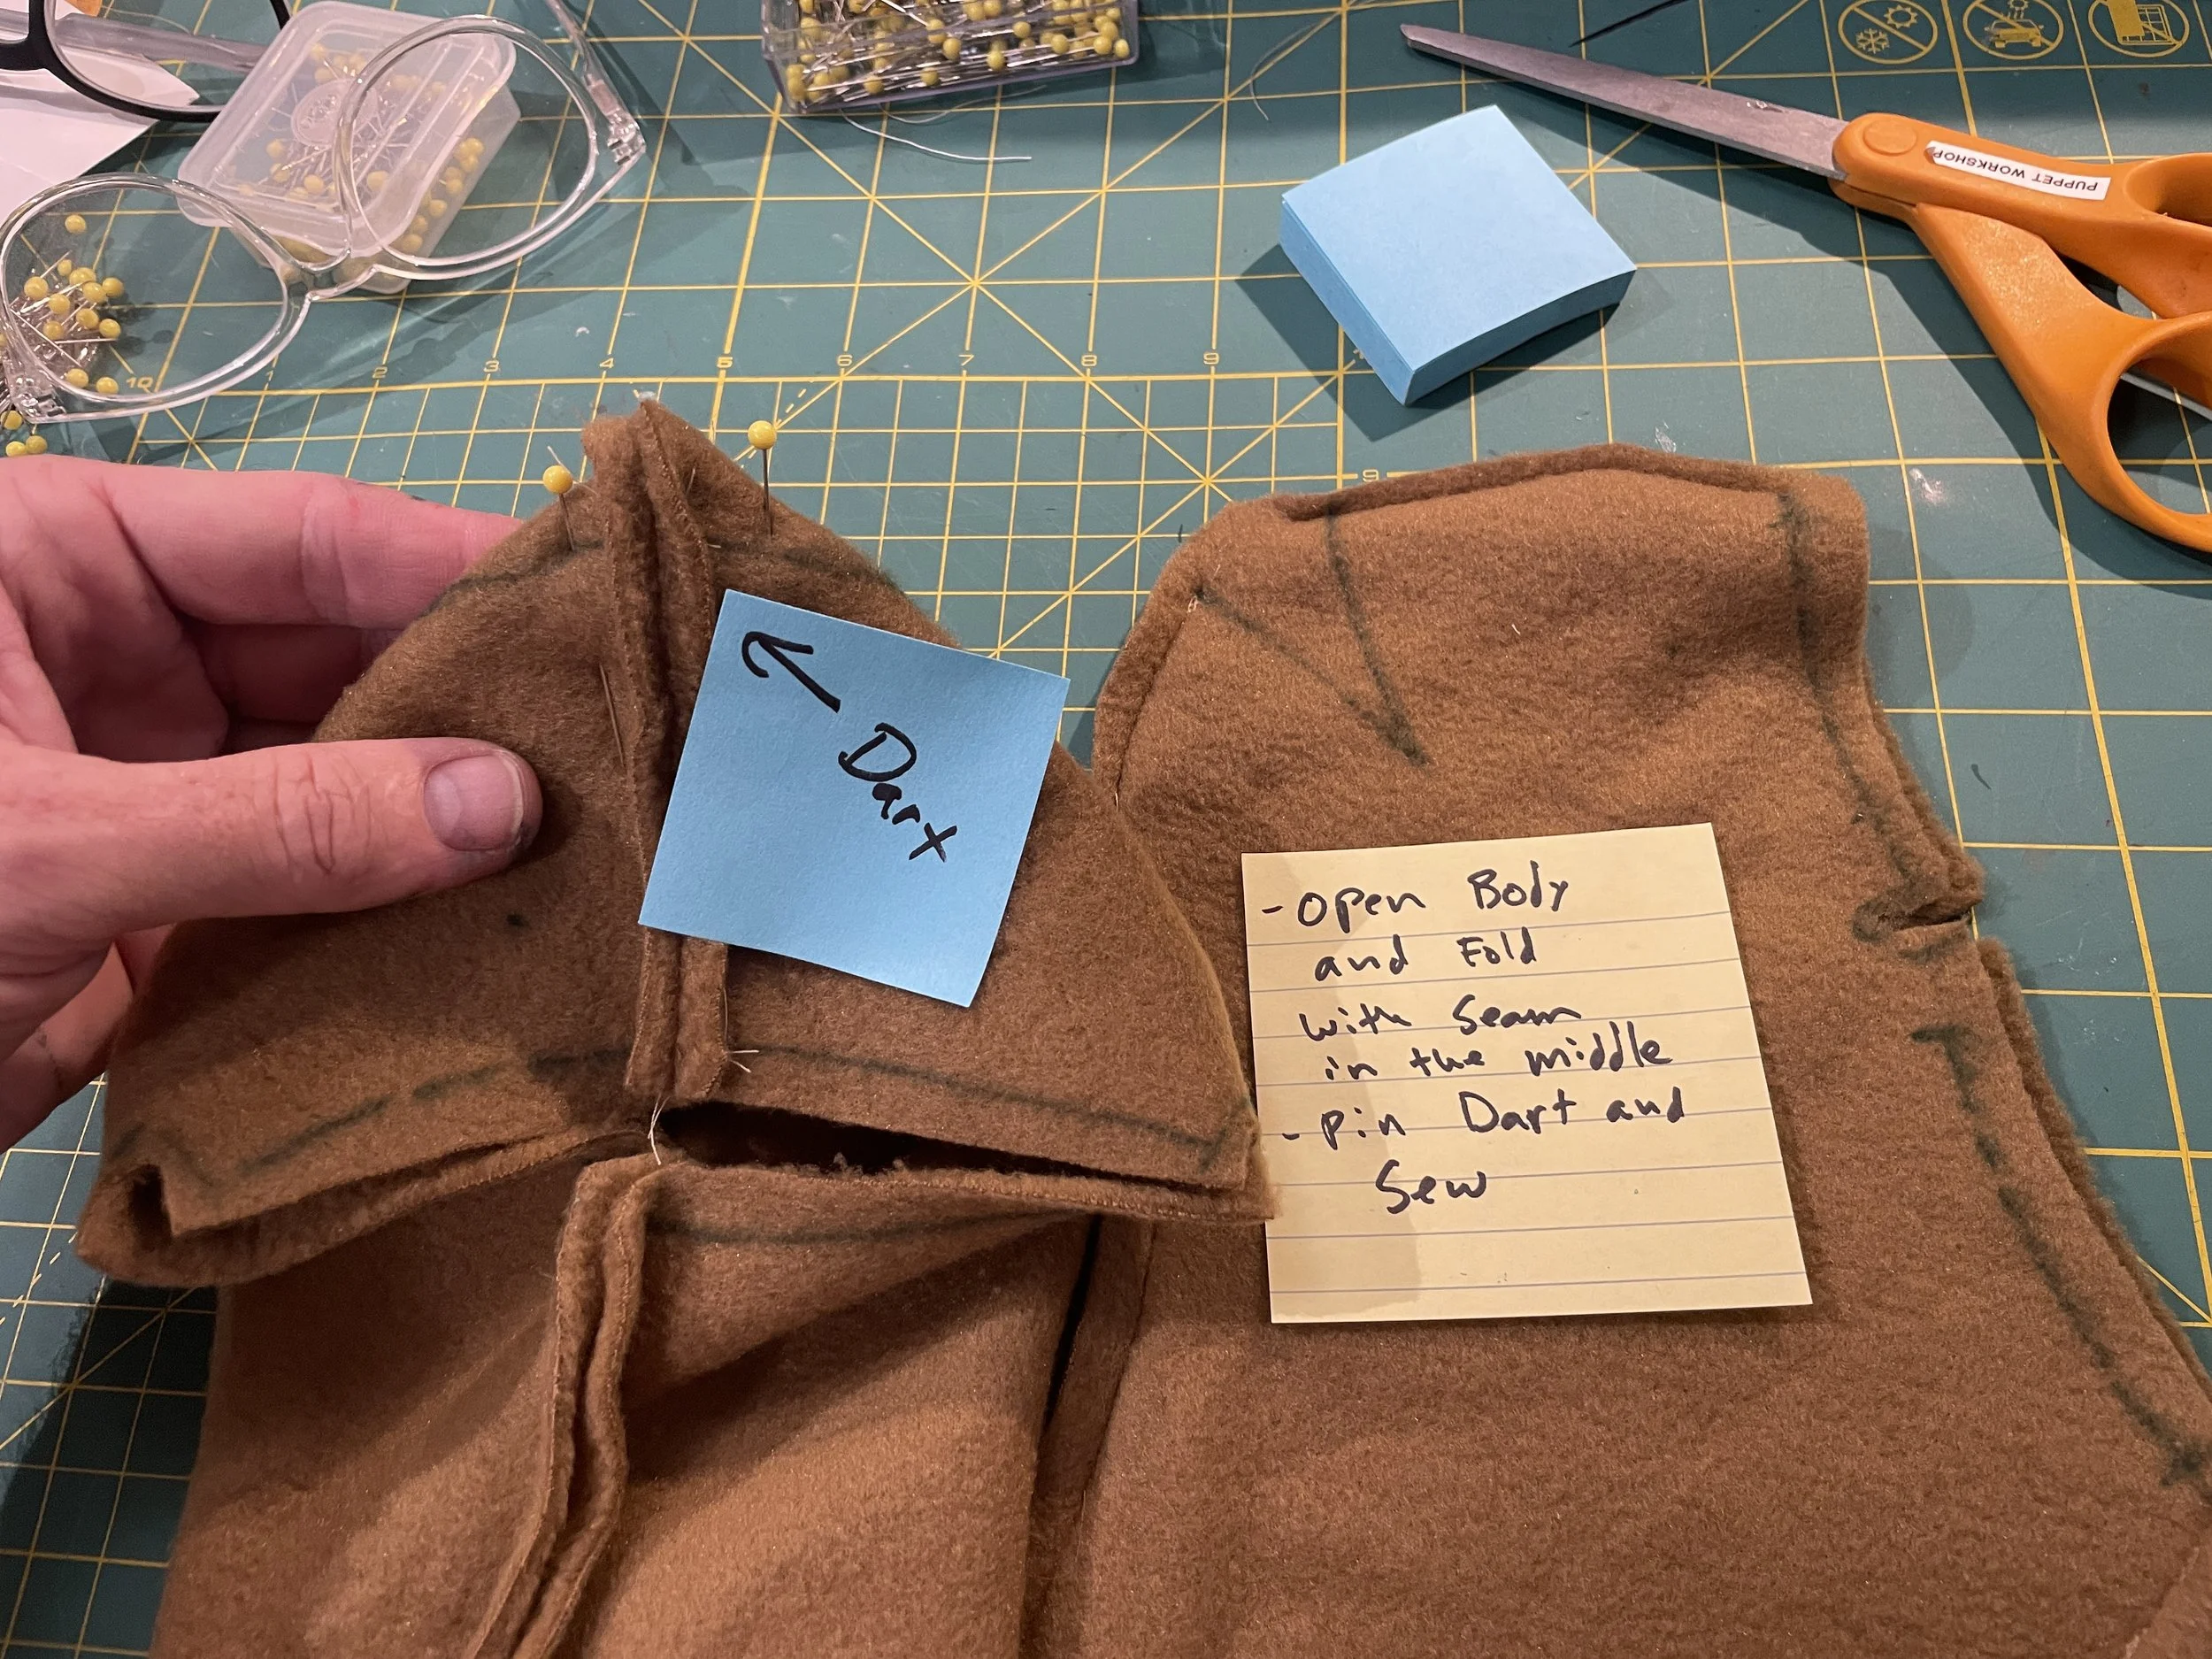
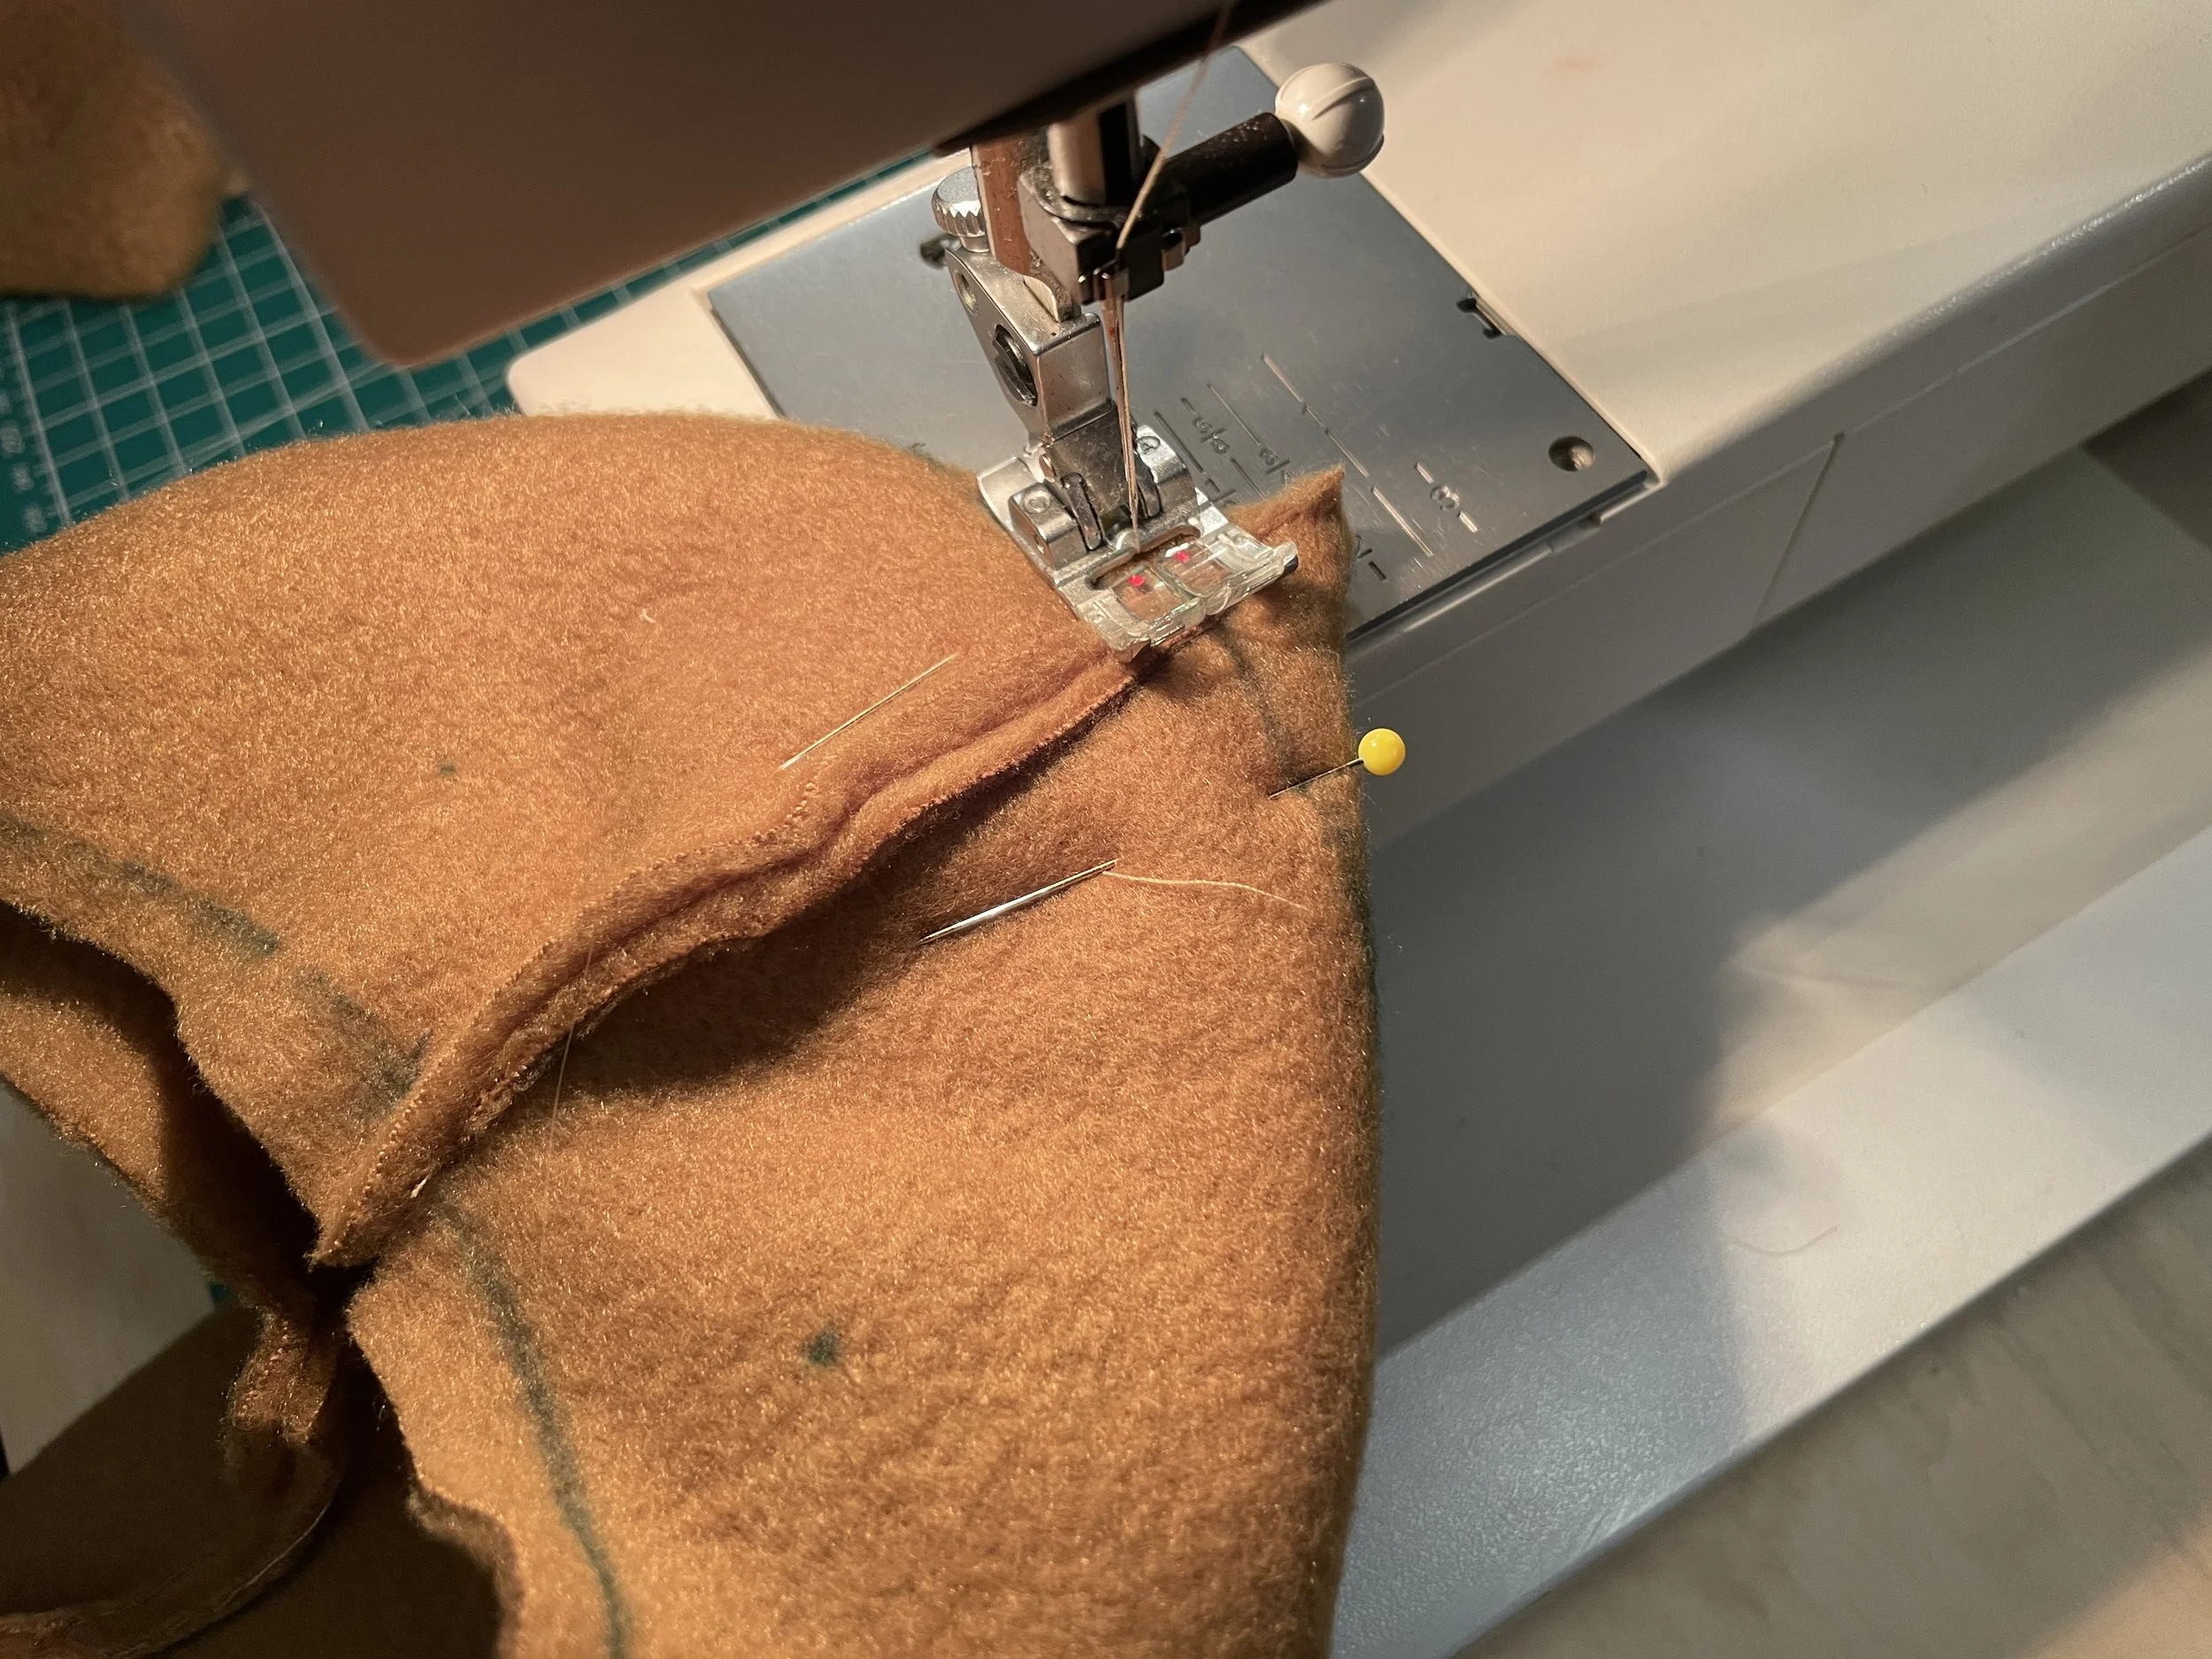
Mark and sew the dart on the top of the head (this creates a rounded shape).
Trim seam allowances to about 8 mm.
Install the Hair
Place the hair between the two layers of the Center Back seam.
Stitch the hair into the seam.
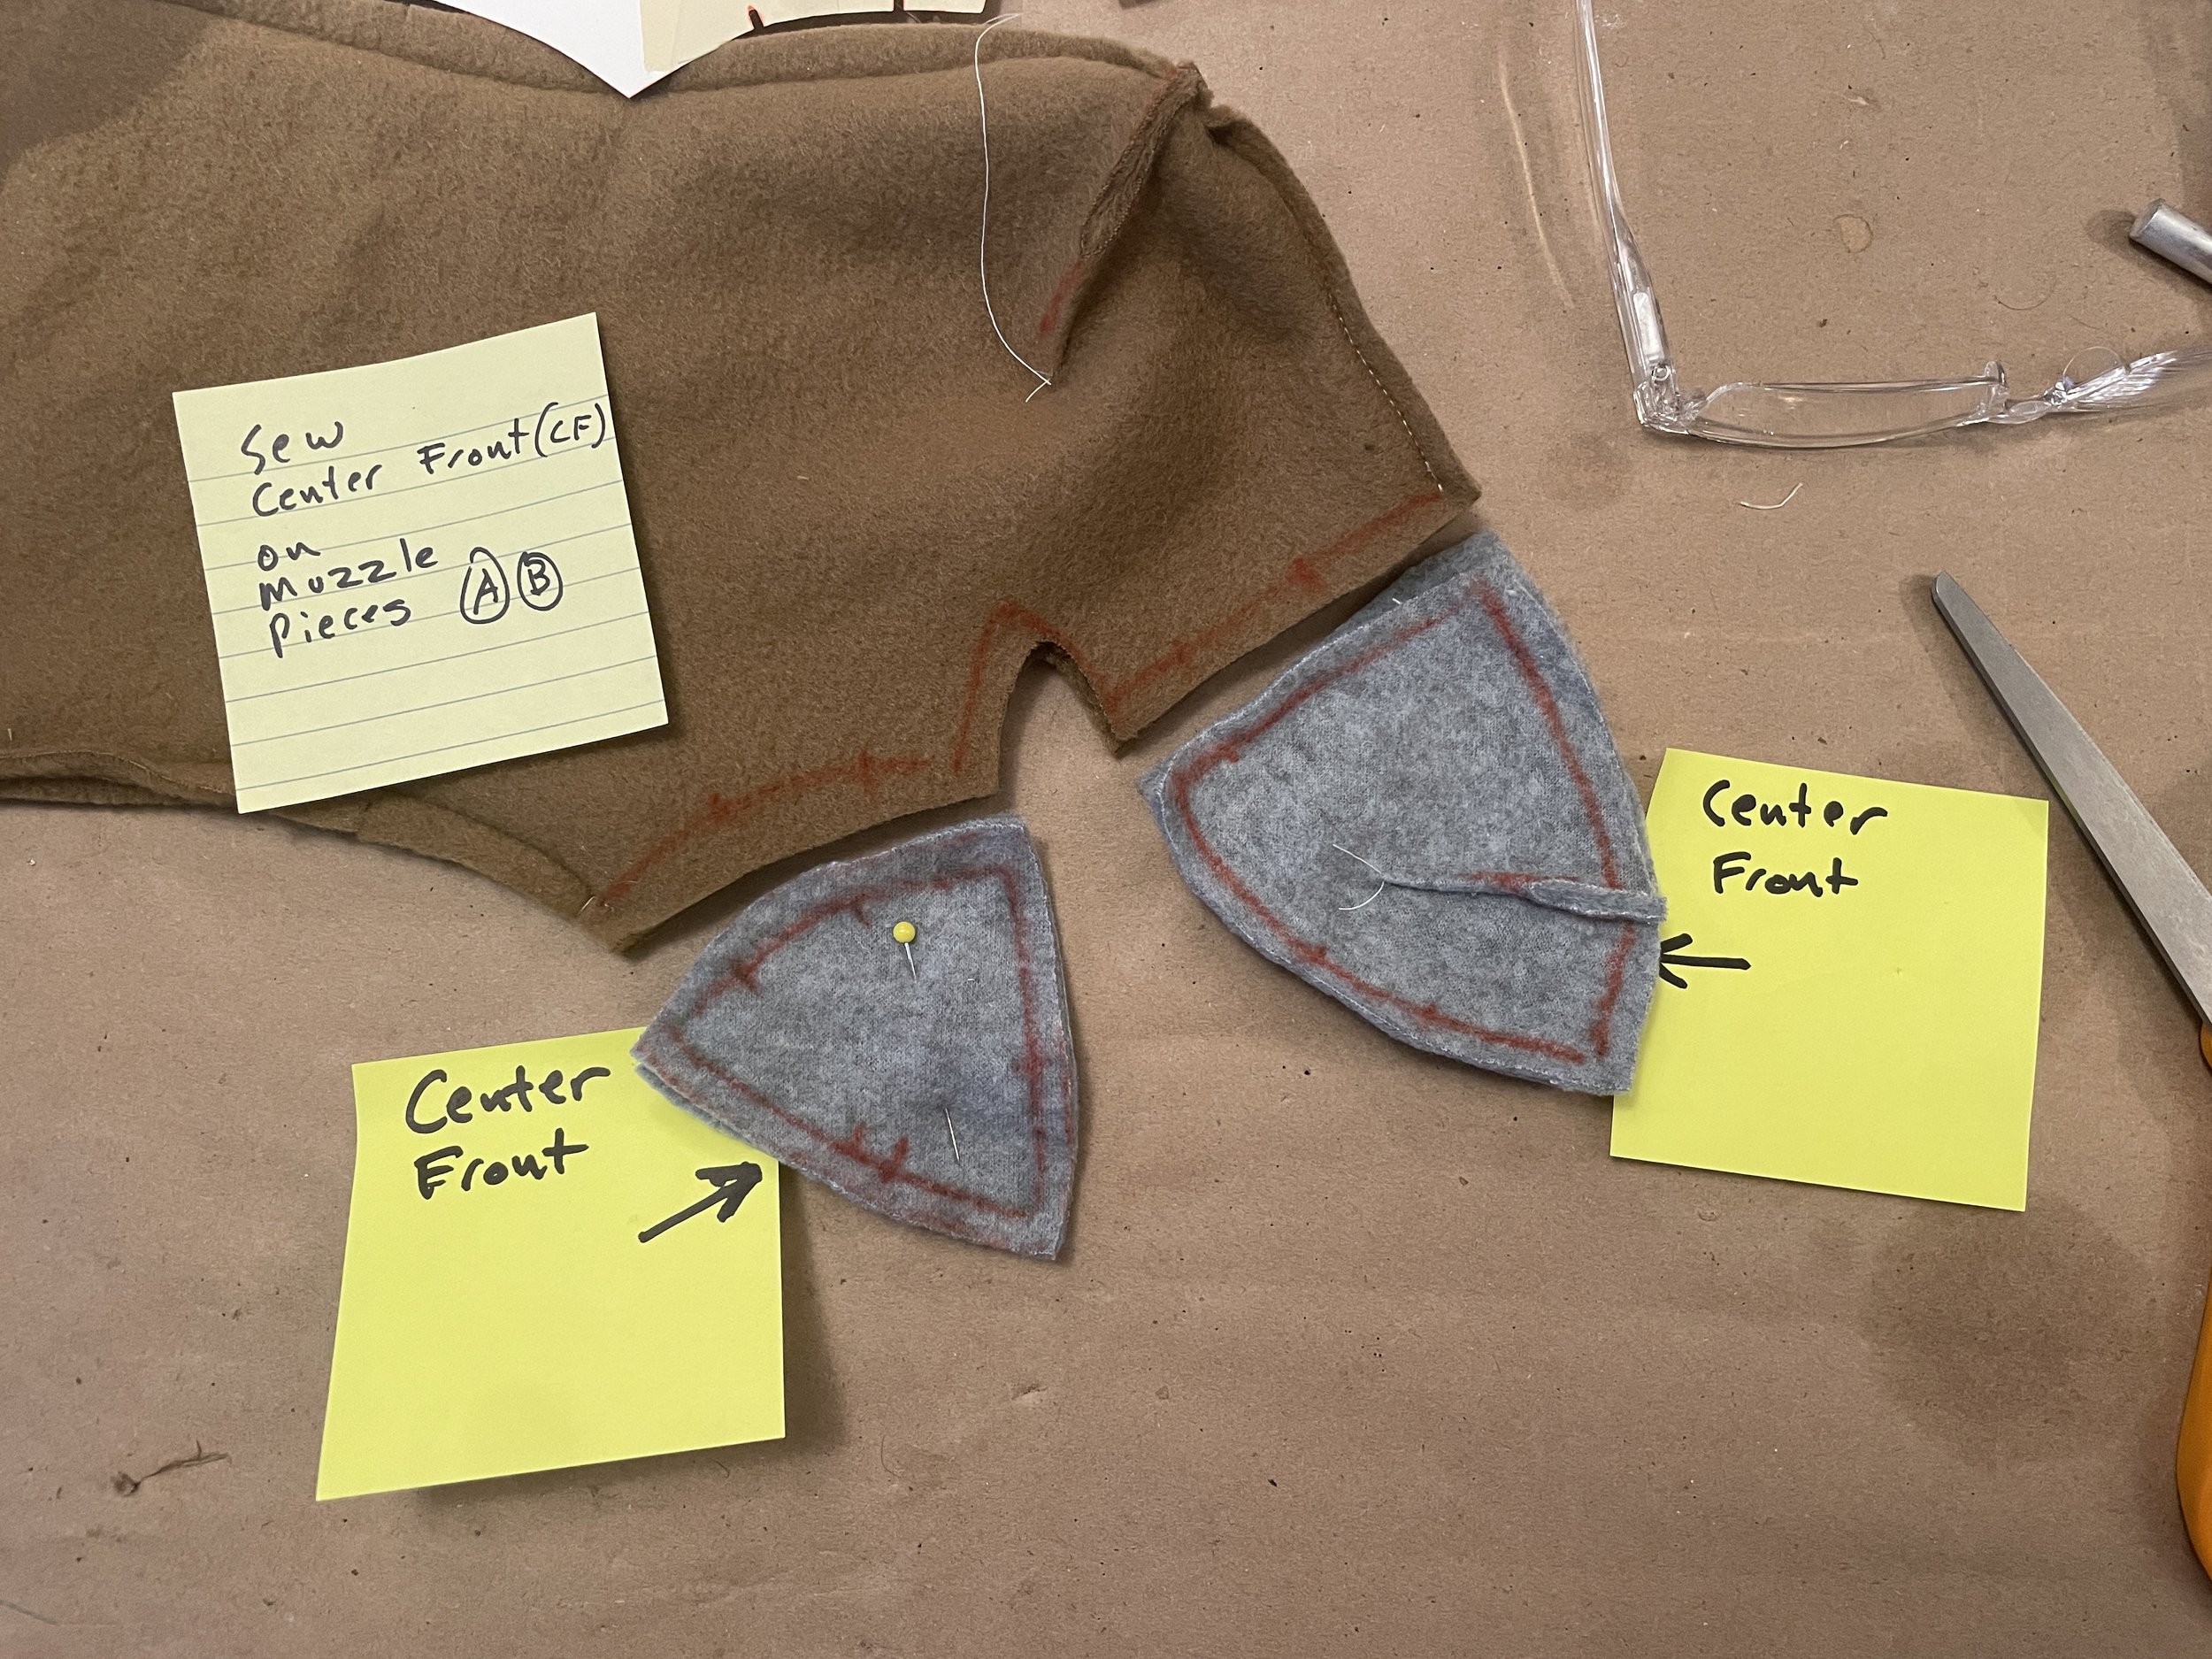
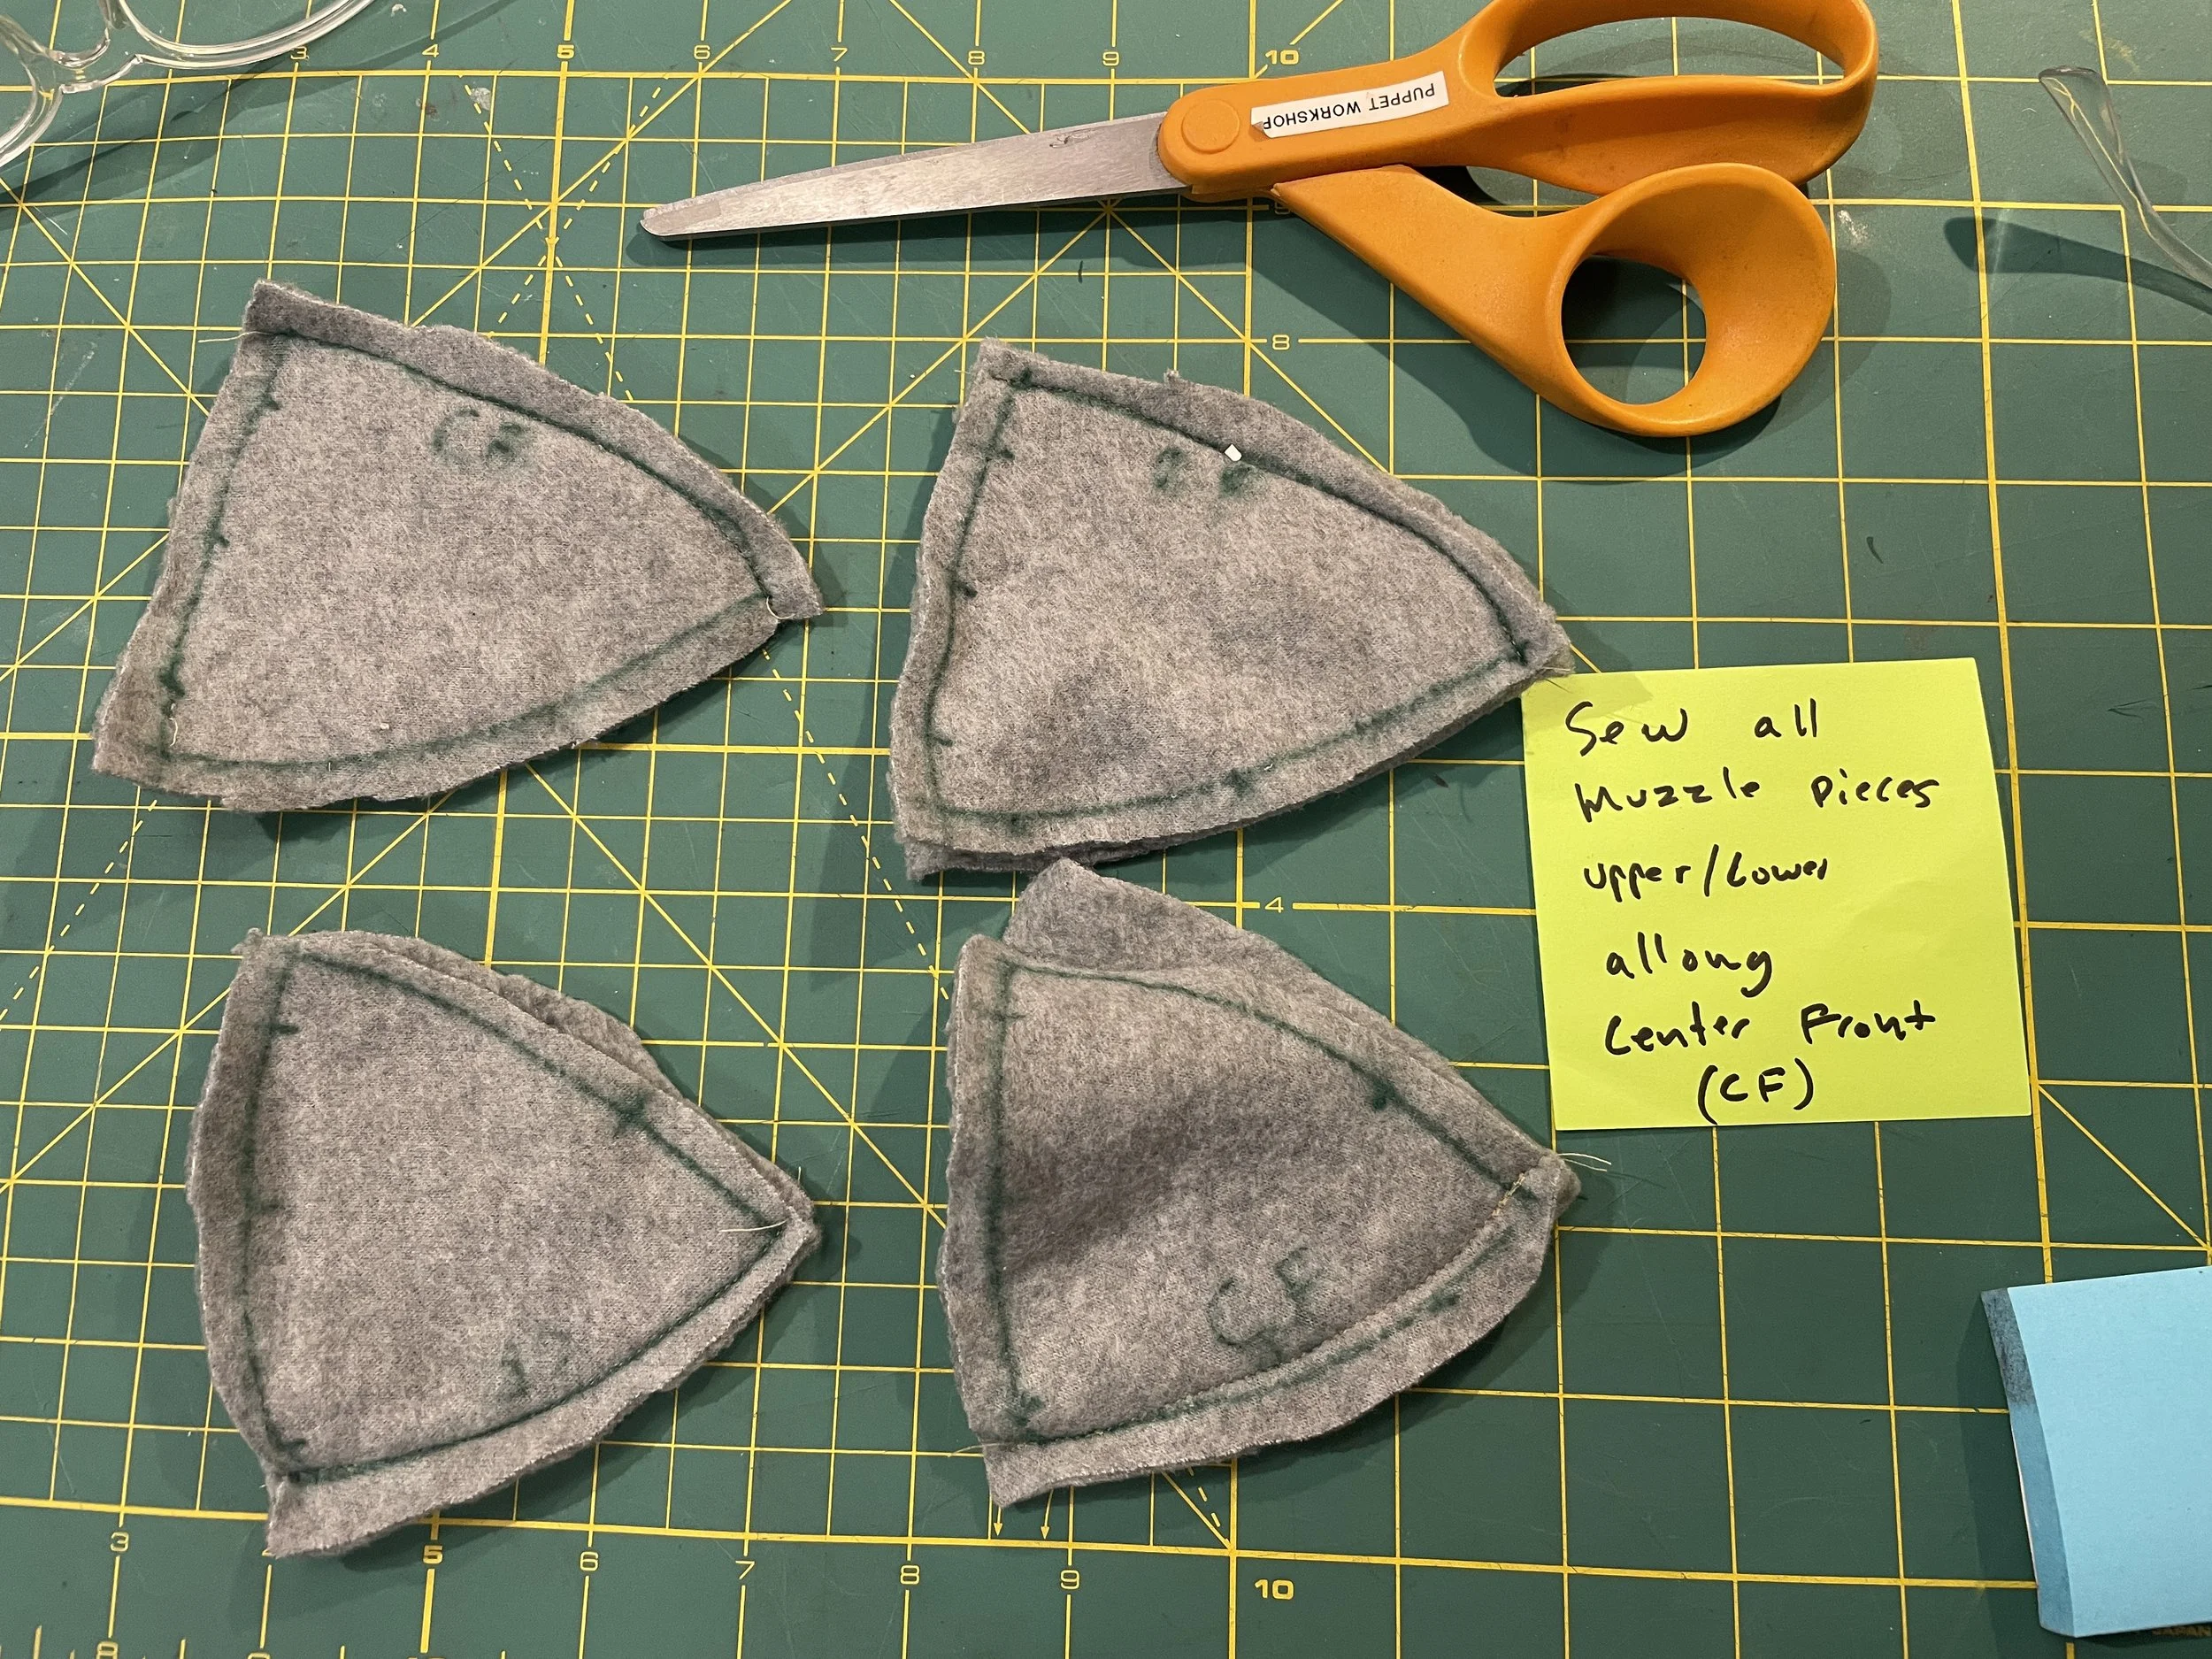
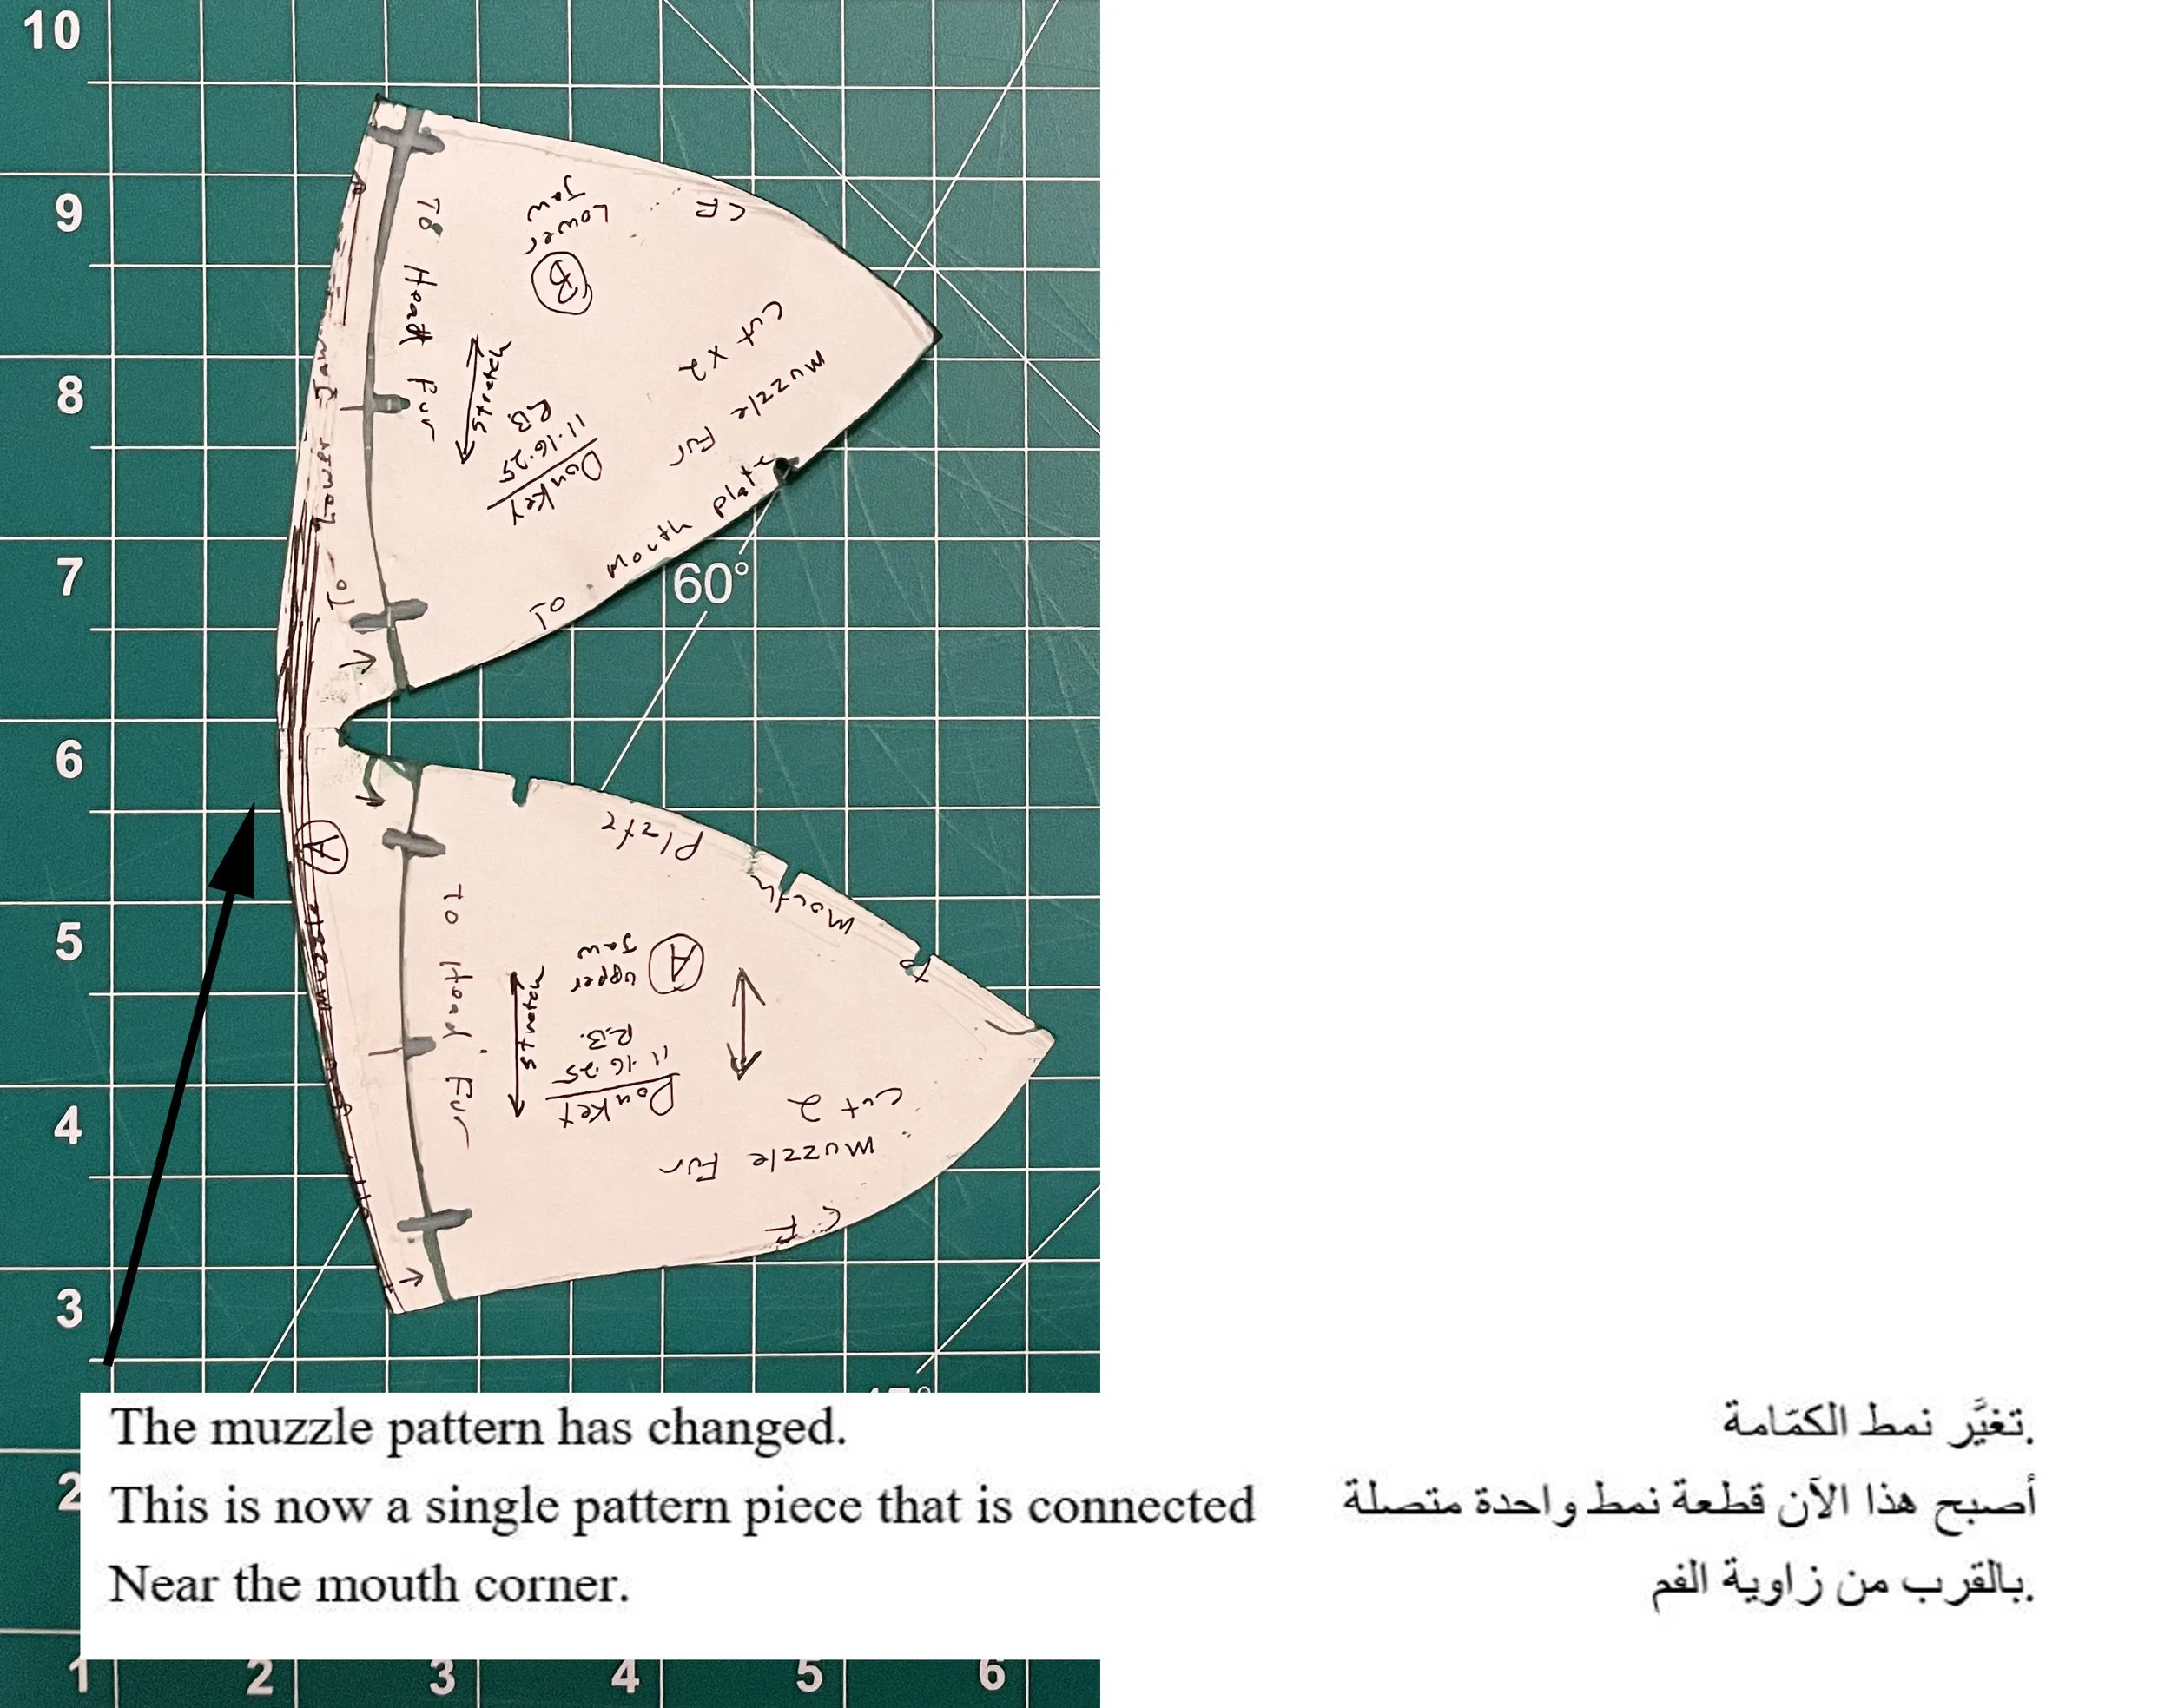
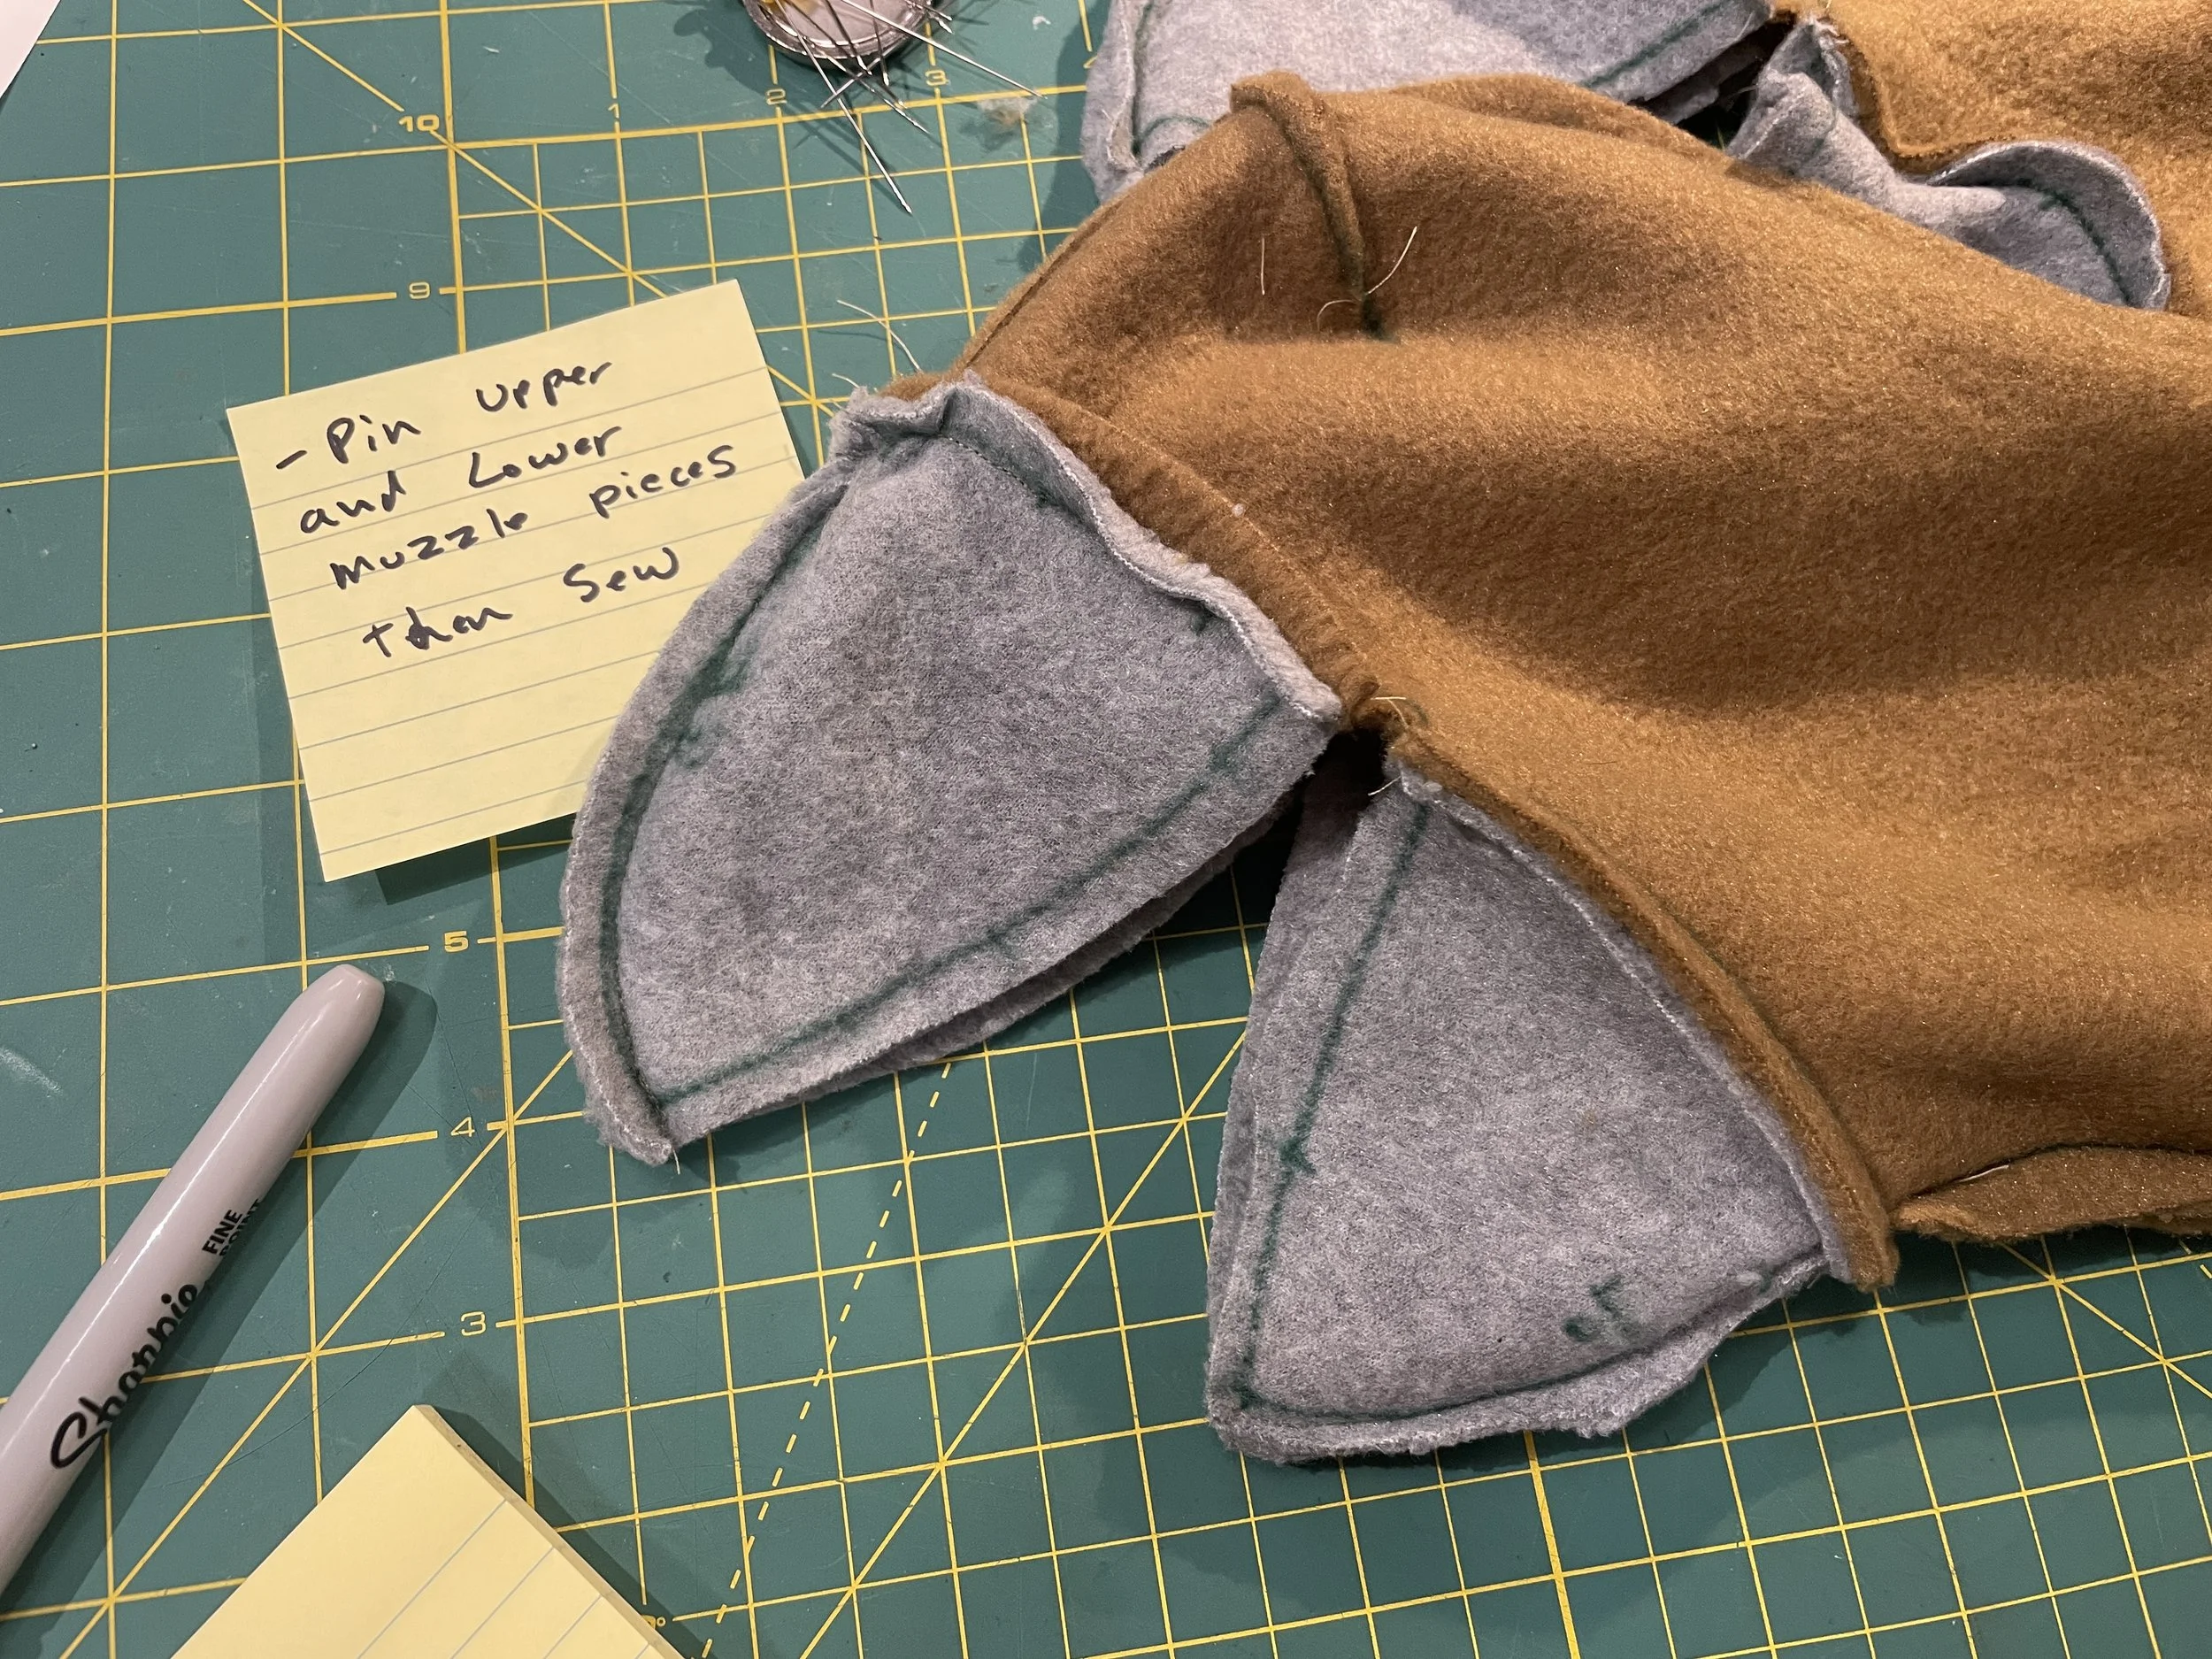
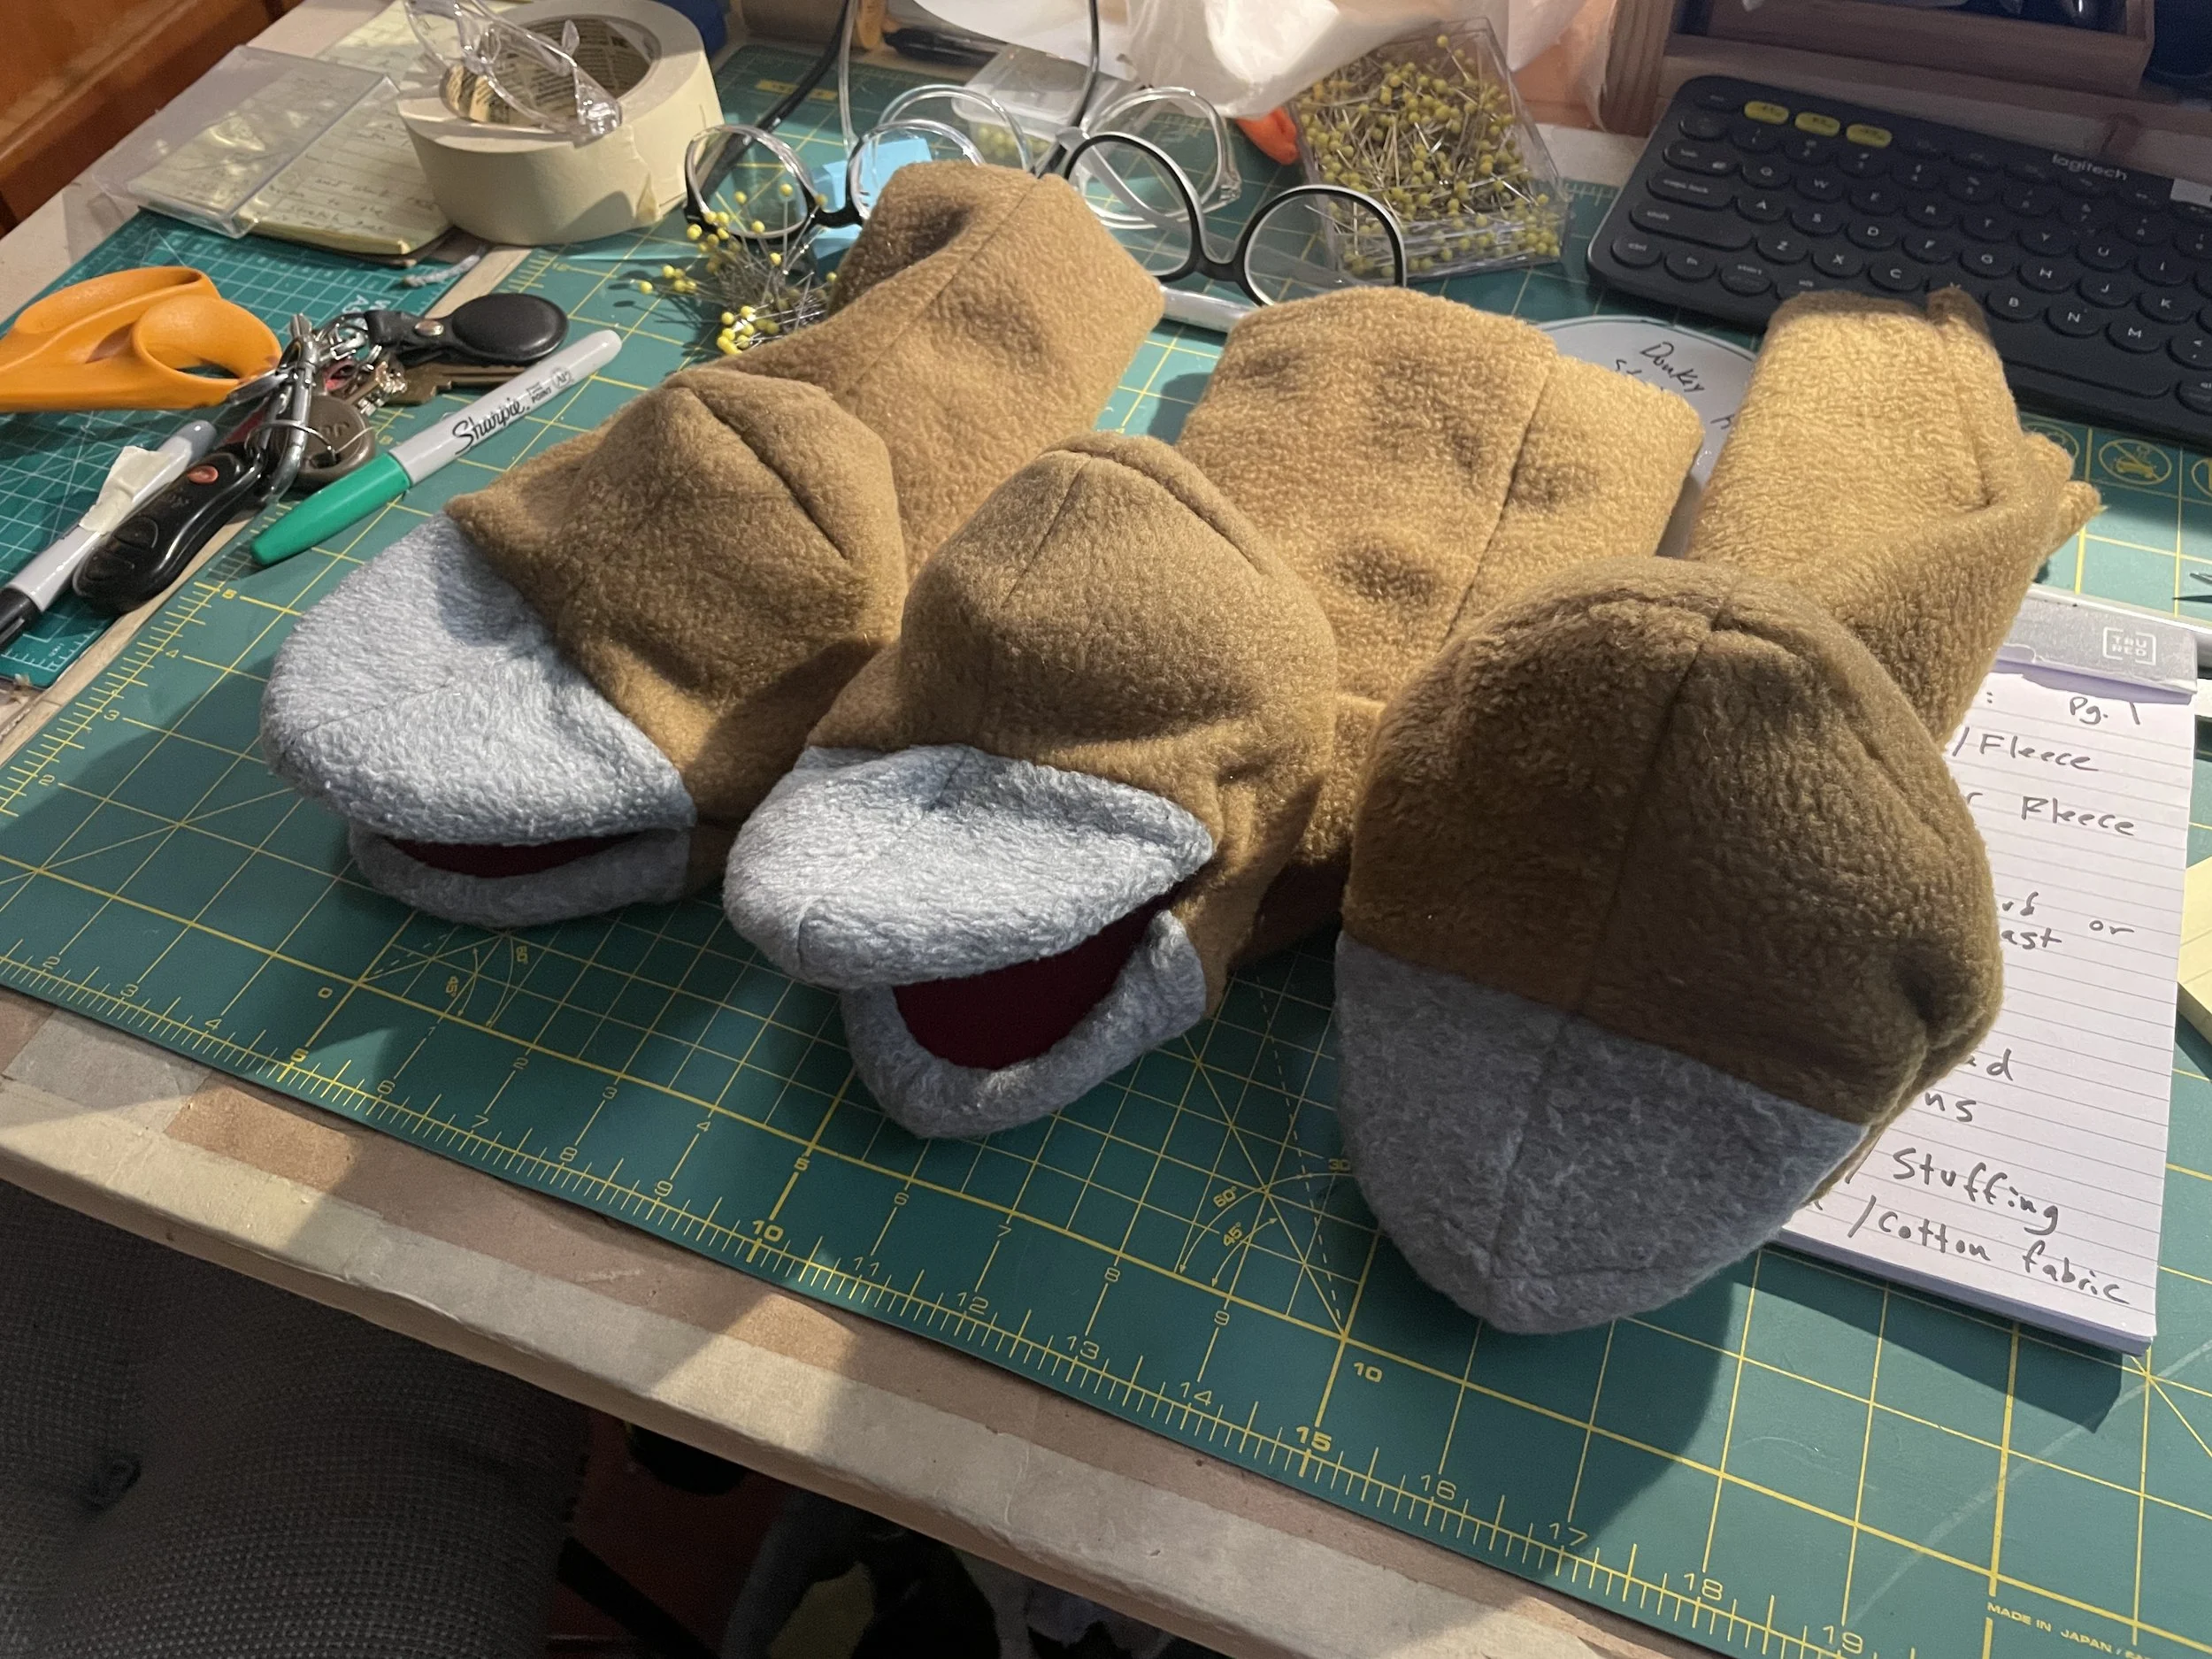
Step 4 – Make the Muzzle
Fold gray fleece in half. Align the stretch direction with the pattern.
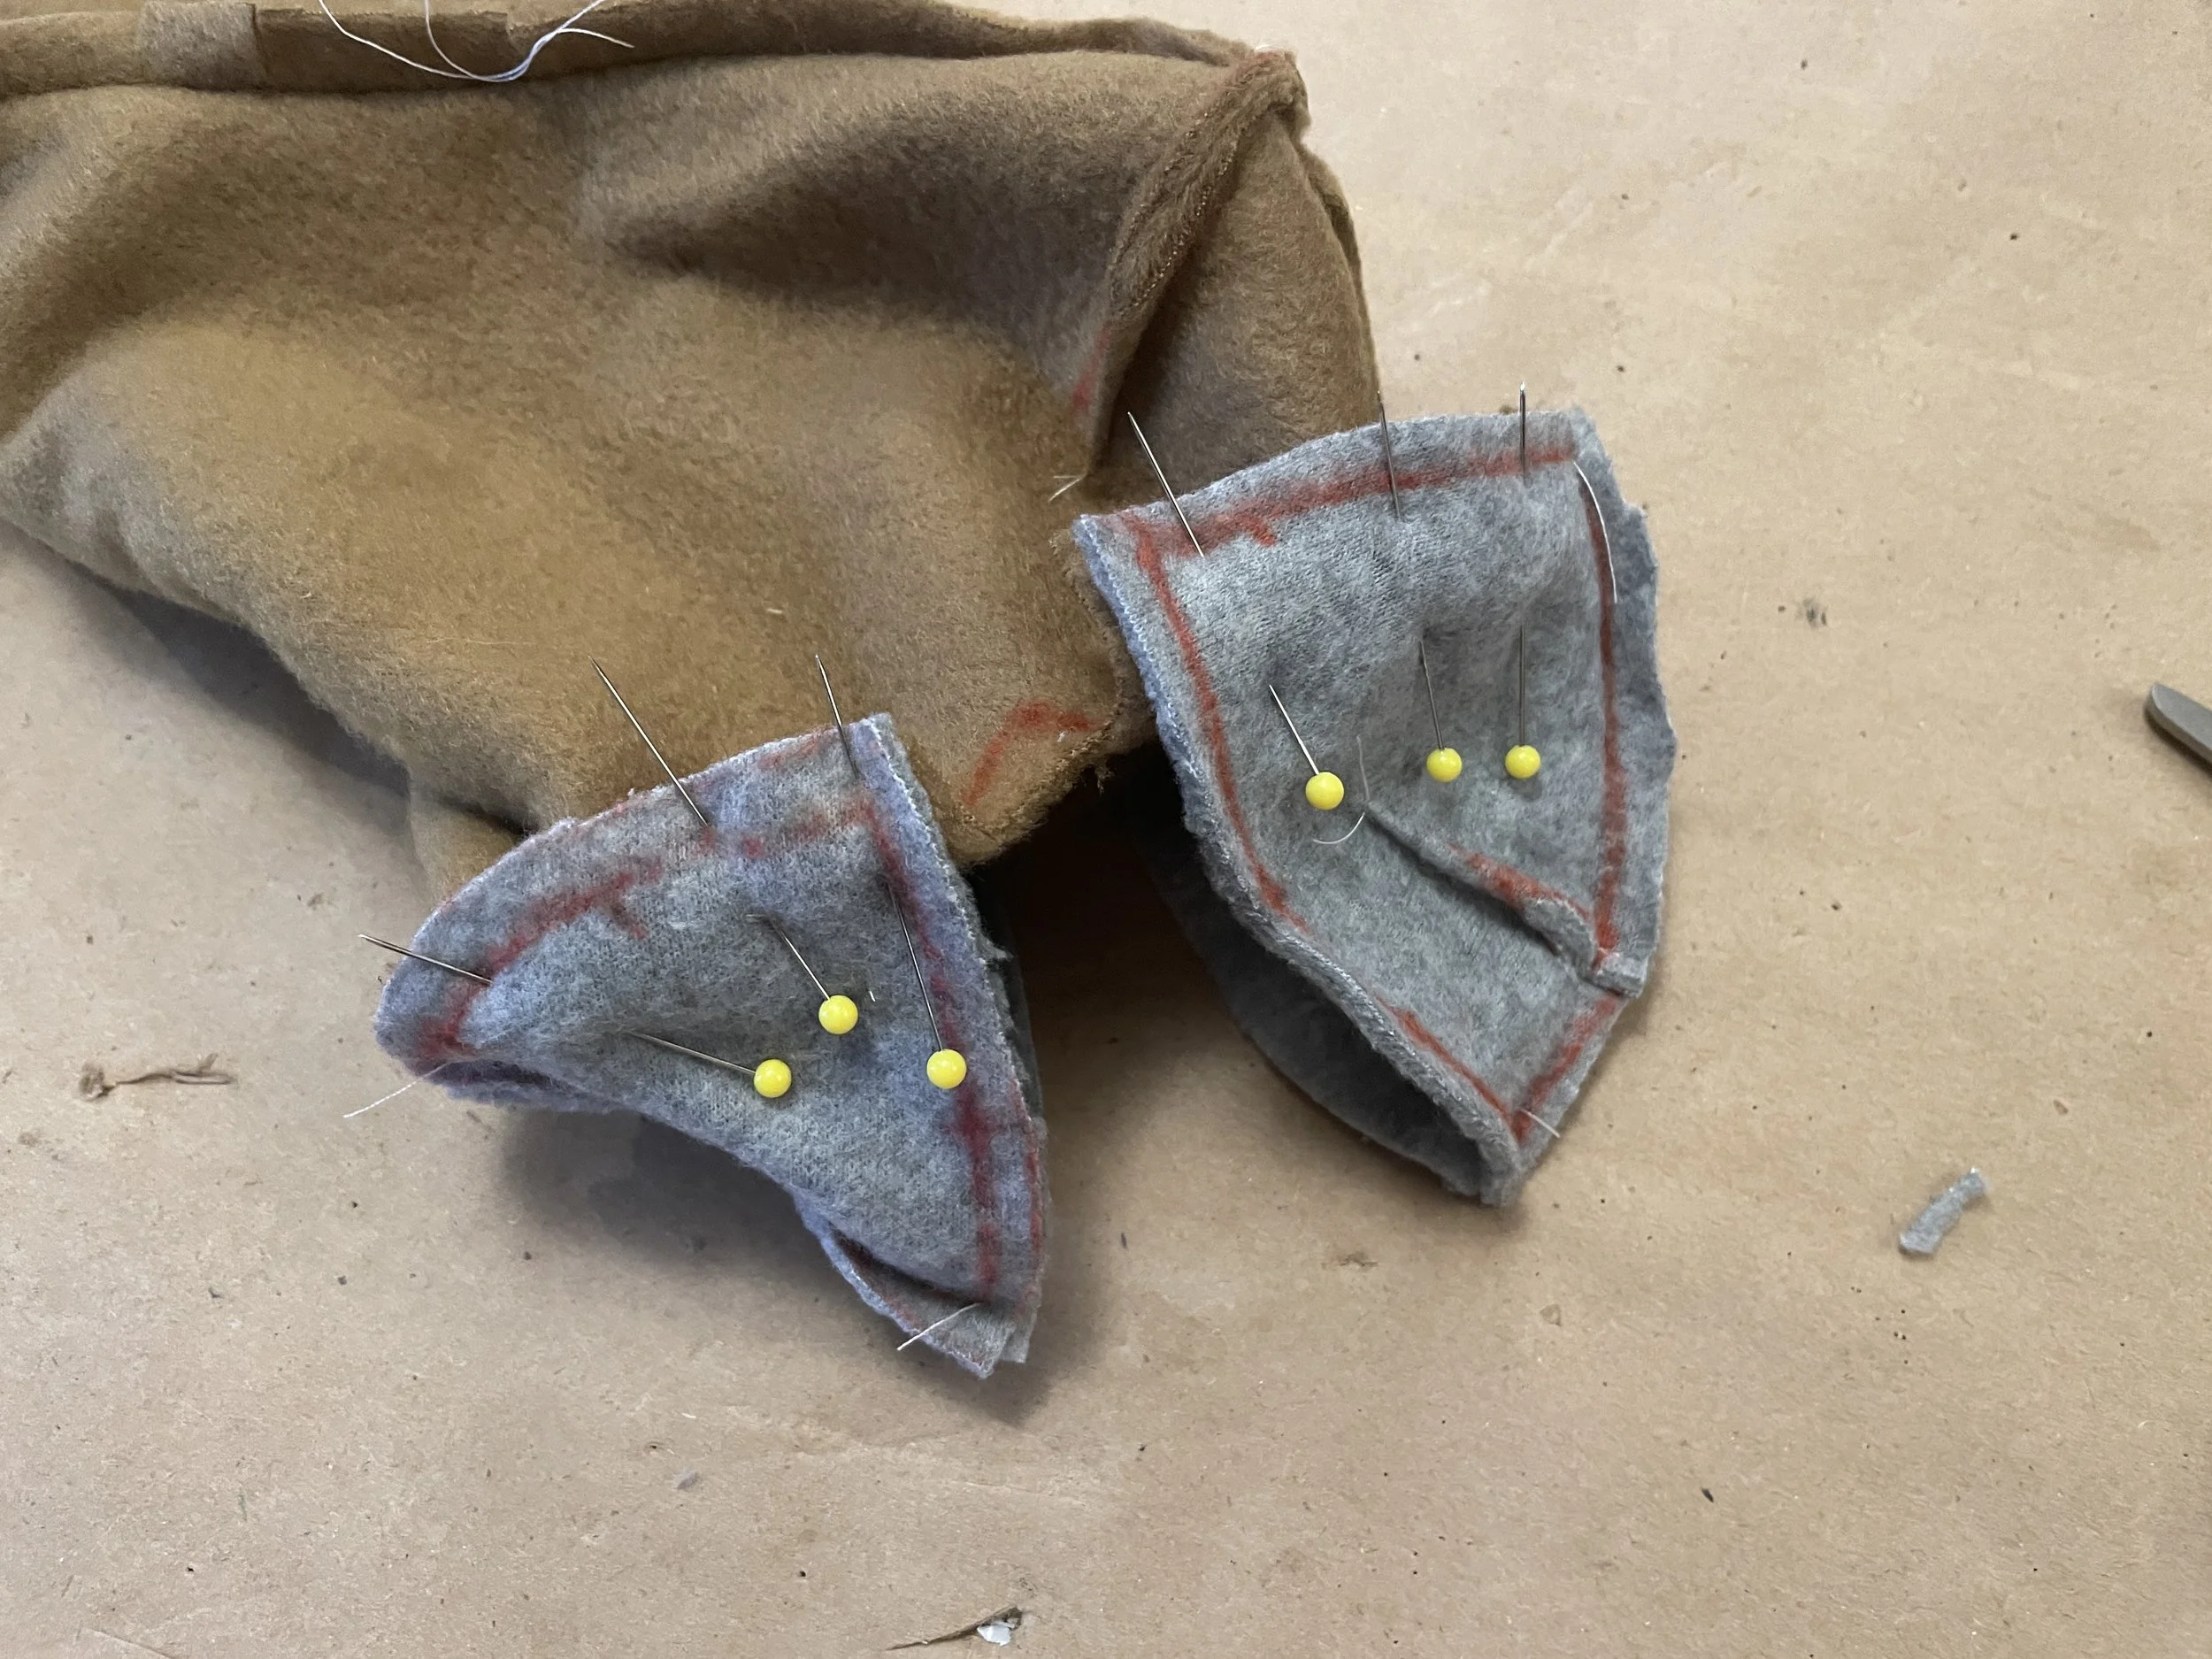
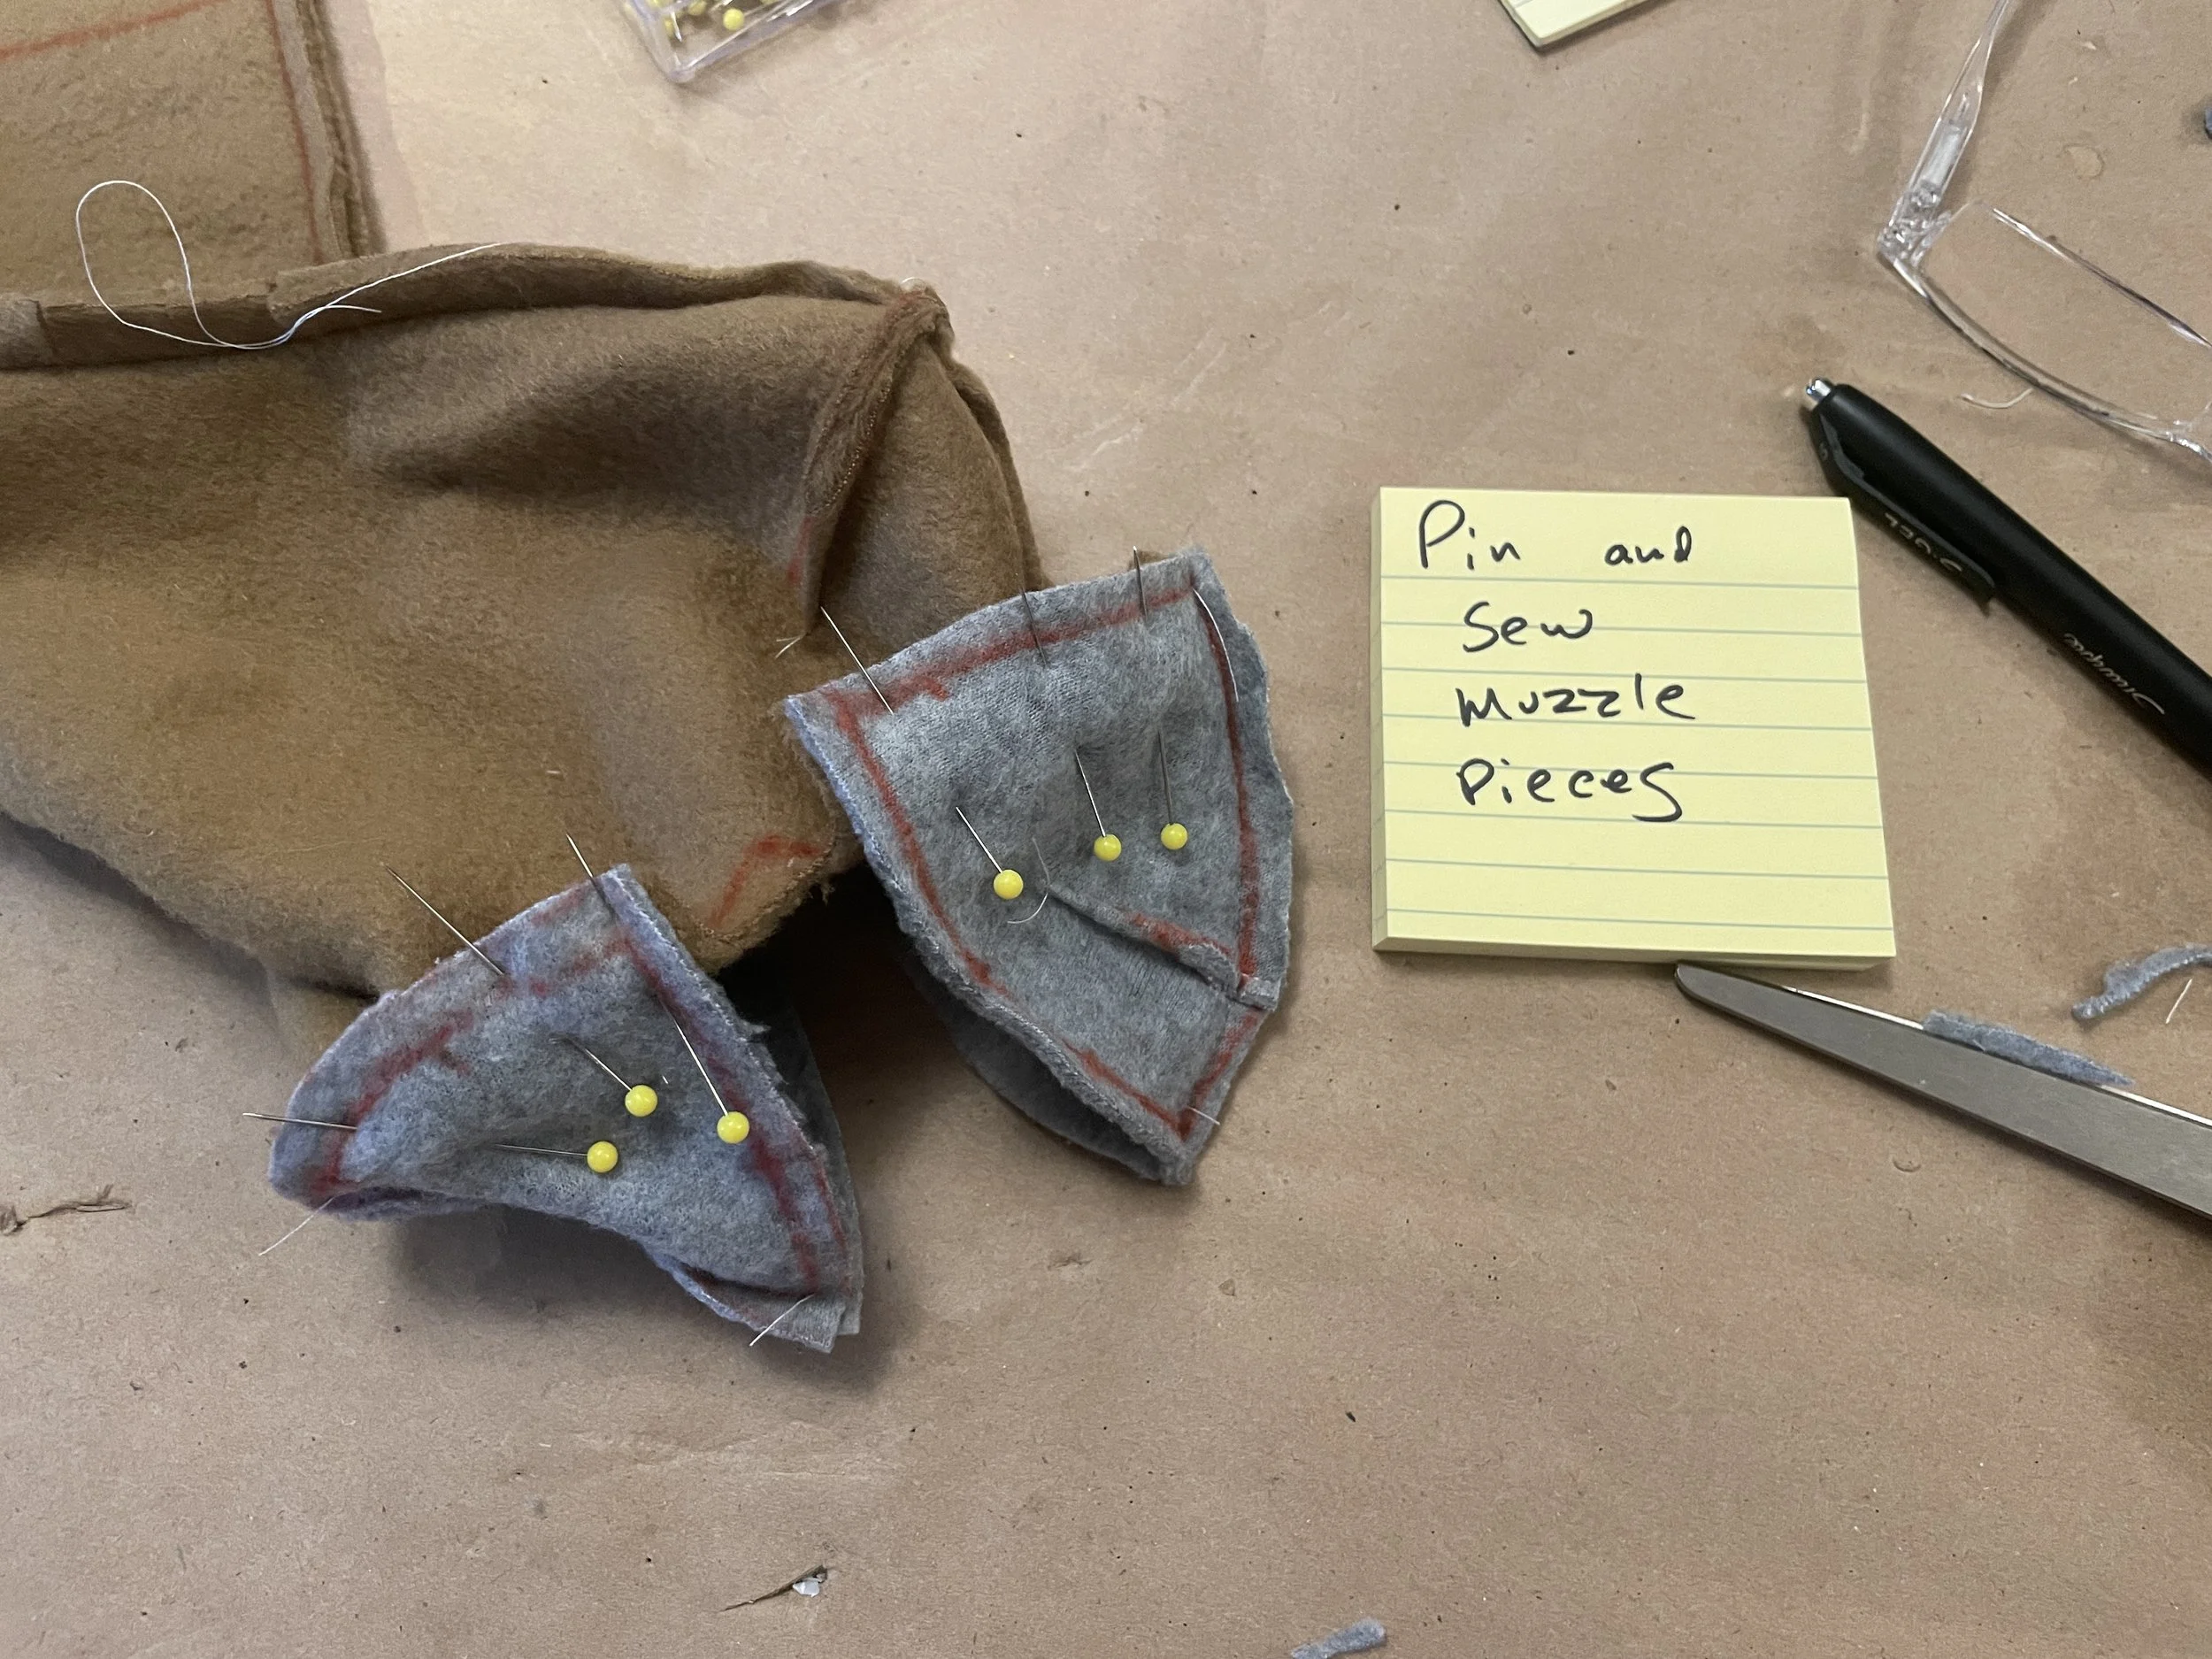
Pin the fabric and mark the pattern and notches.
Rough-cut around the shape.
Sew the Center Front and Center Back seams.
Leave the mouth opening and neck opening unsewn.
Turn the muzzle right-side out.
Use the pattern to re-mark the stitch lines on the second side if needed.
Trim seam allowances to about 8 mm.
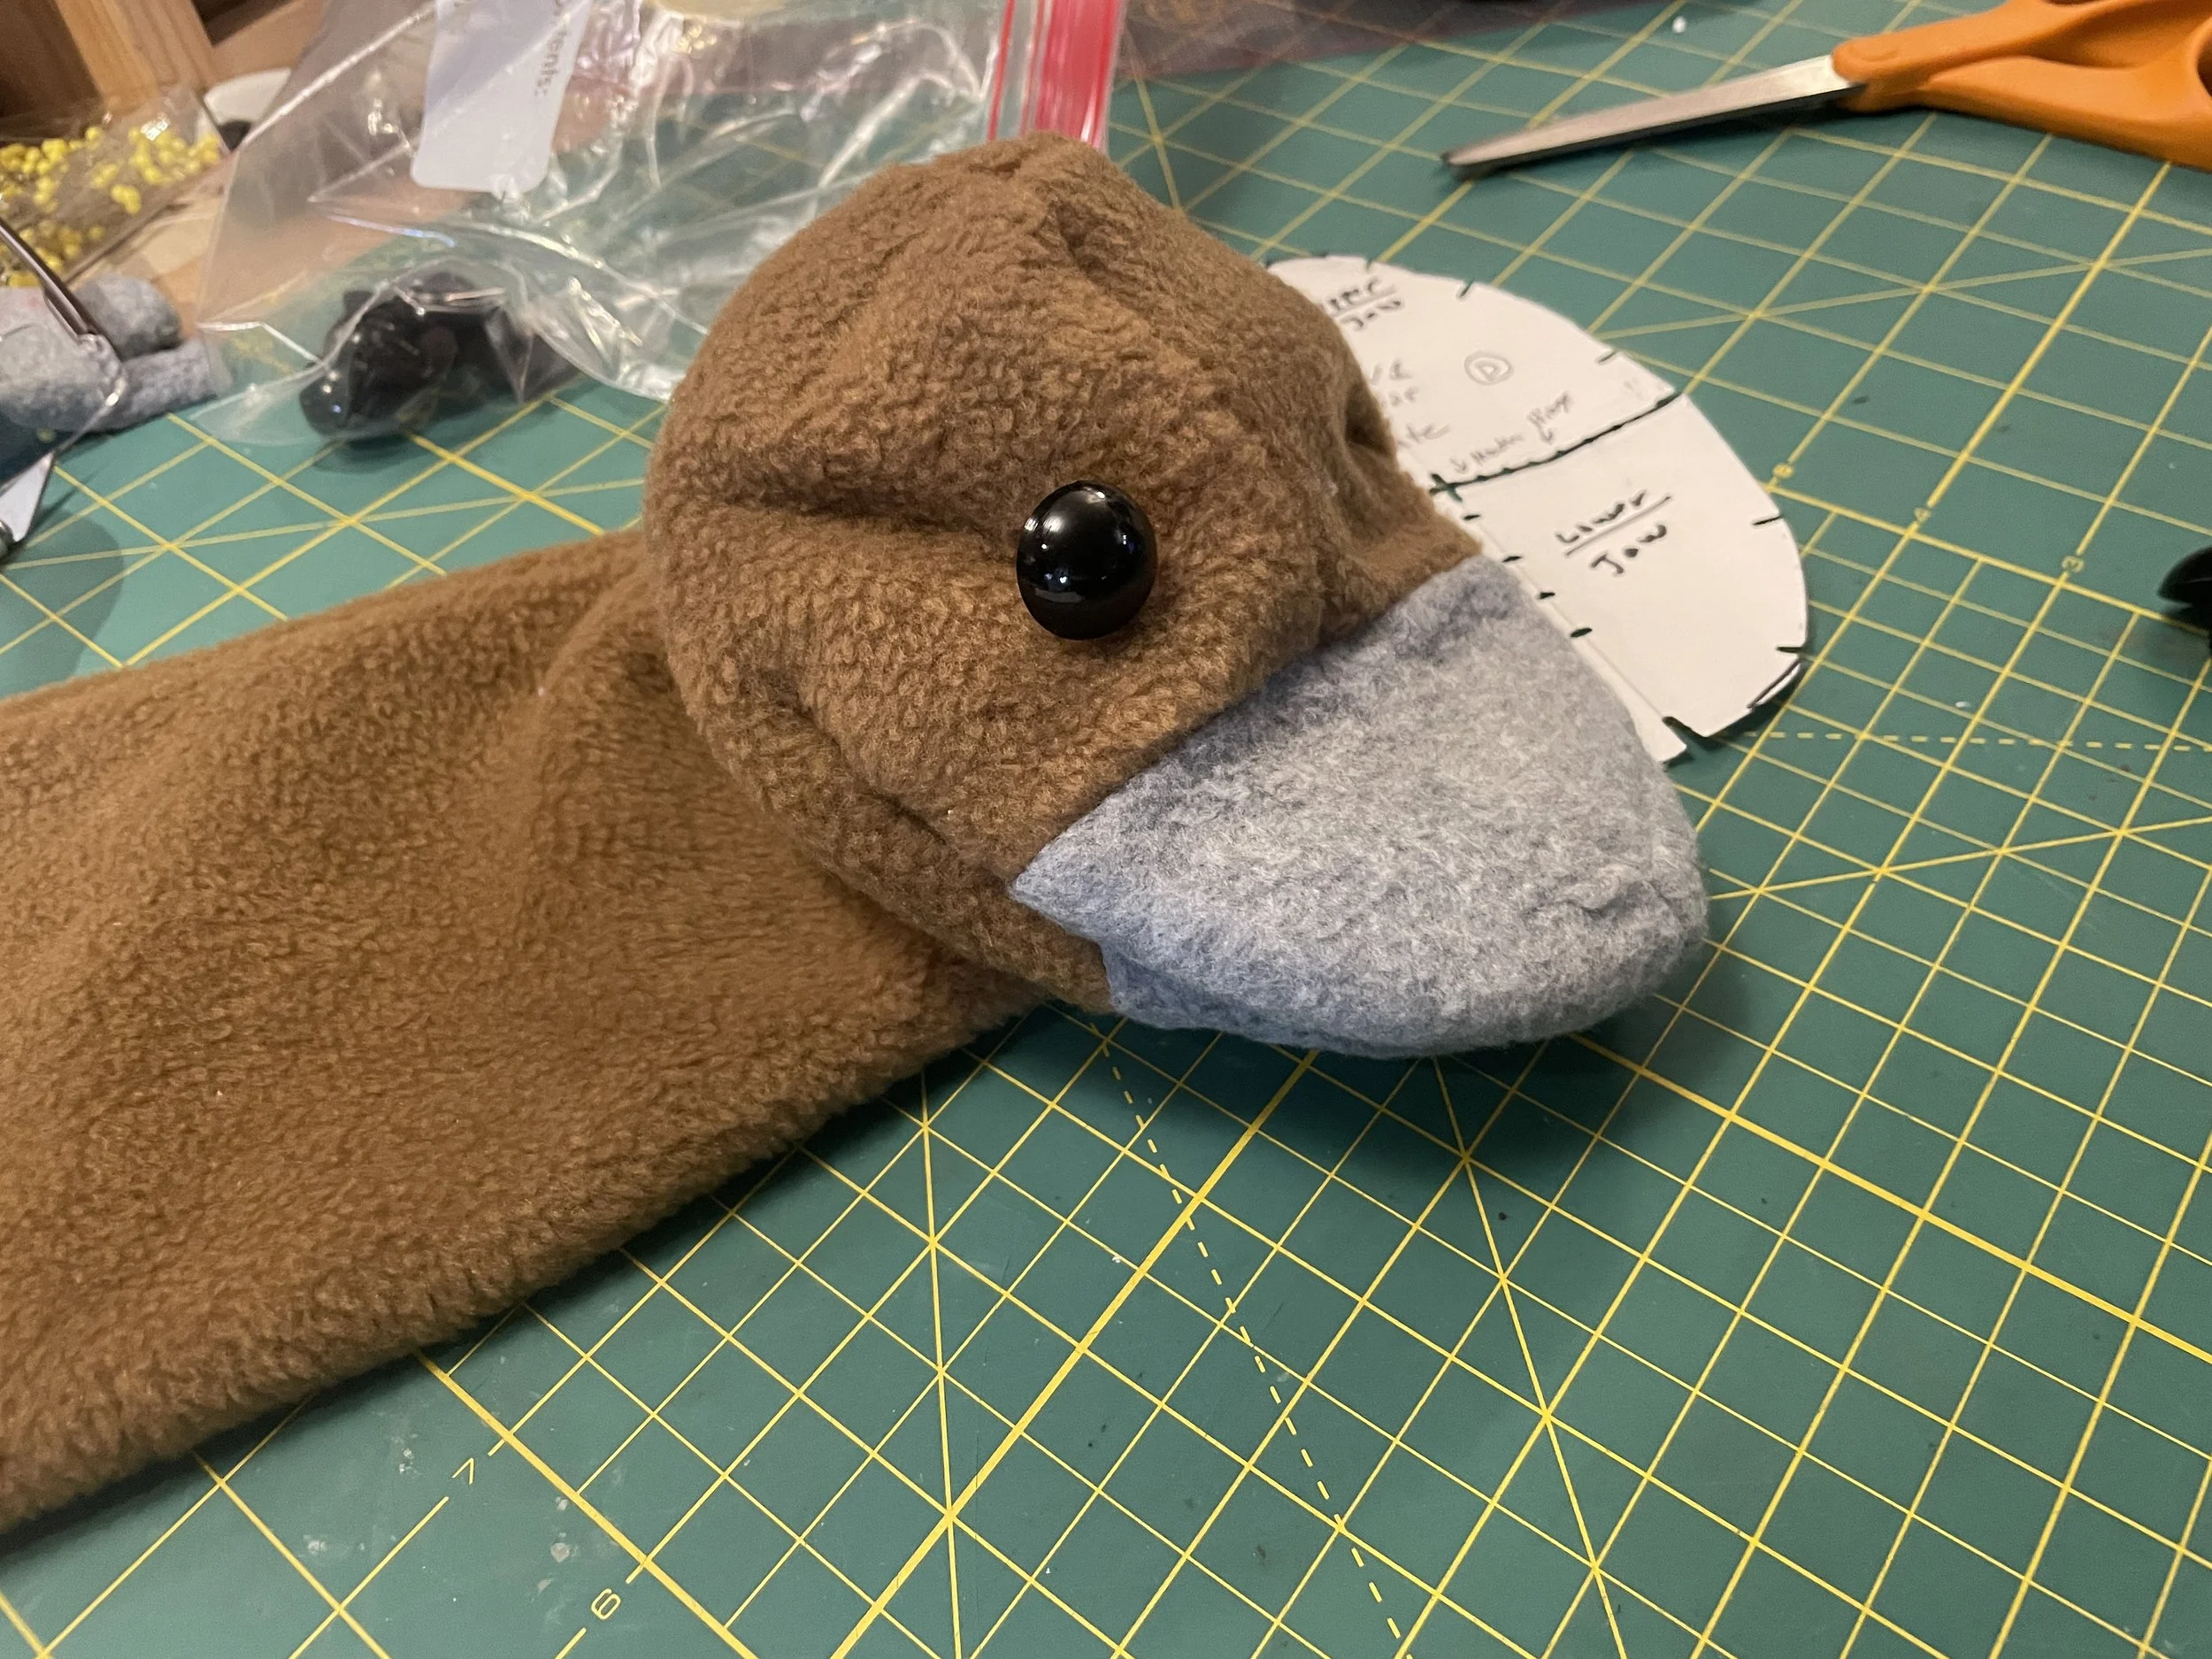
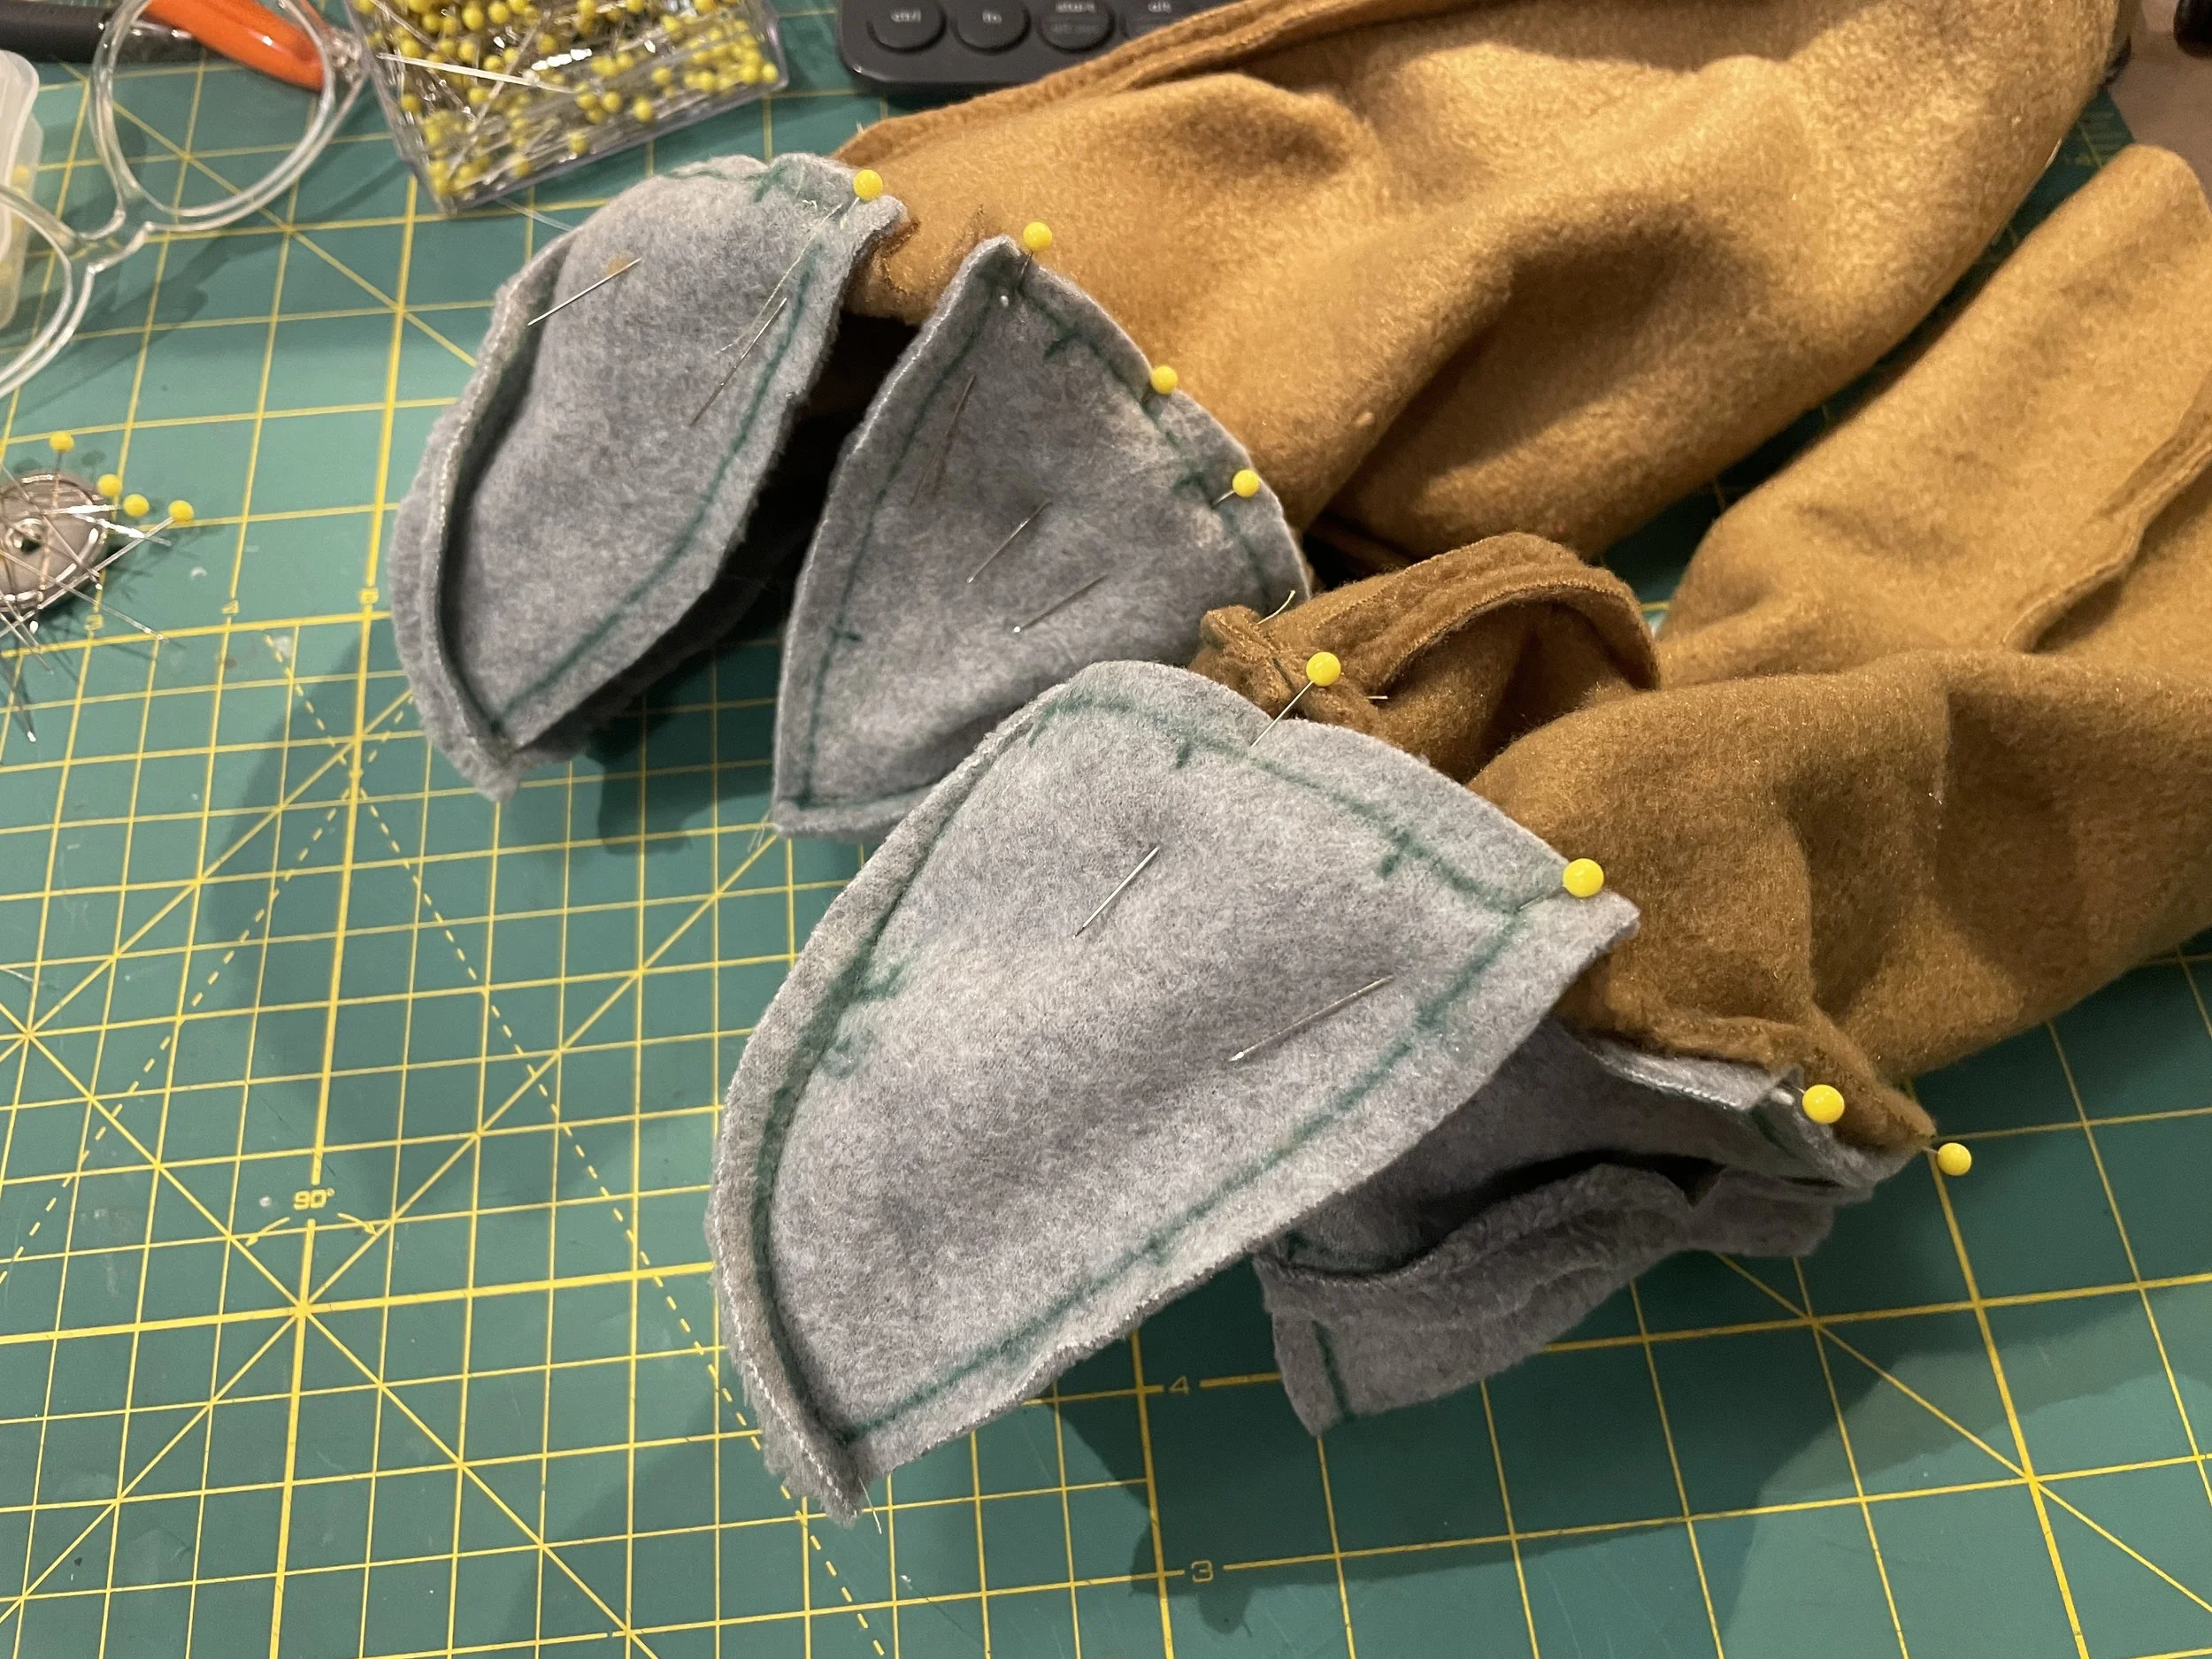
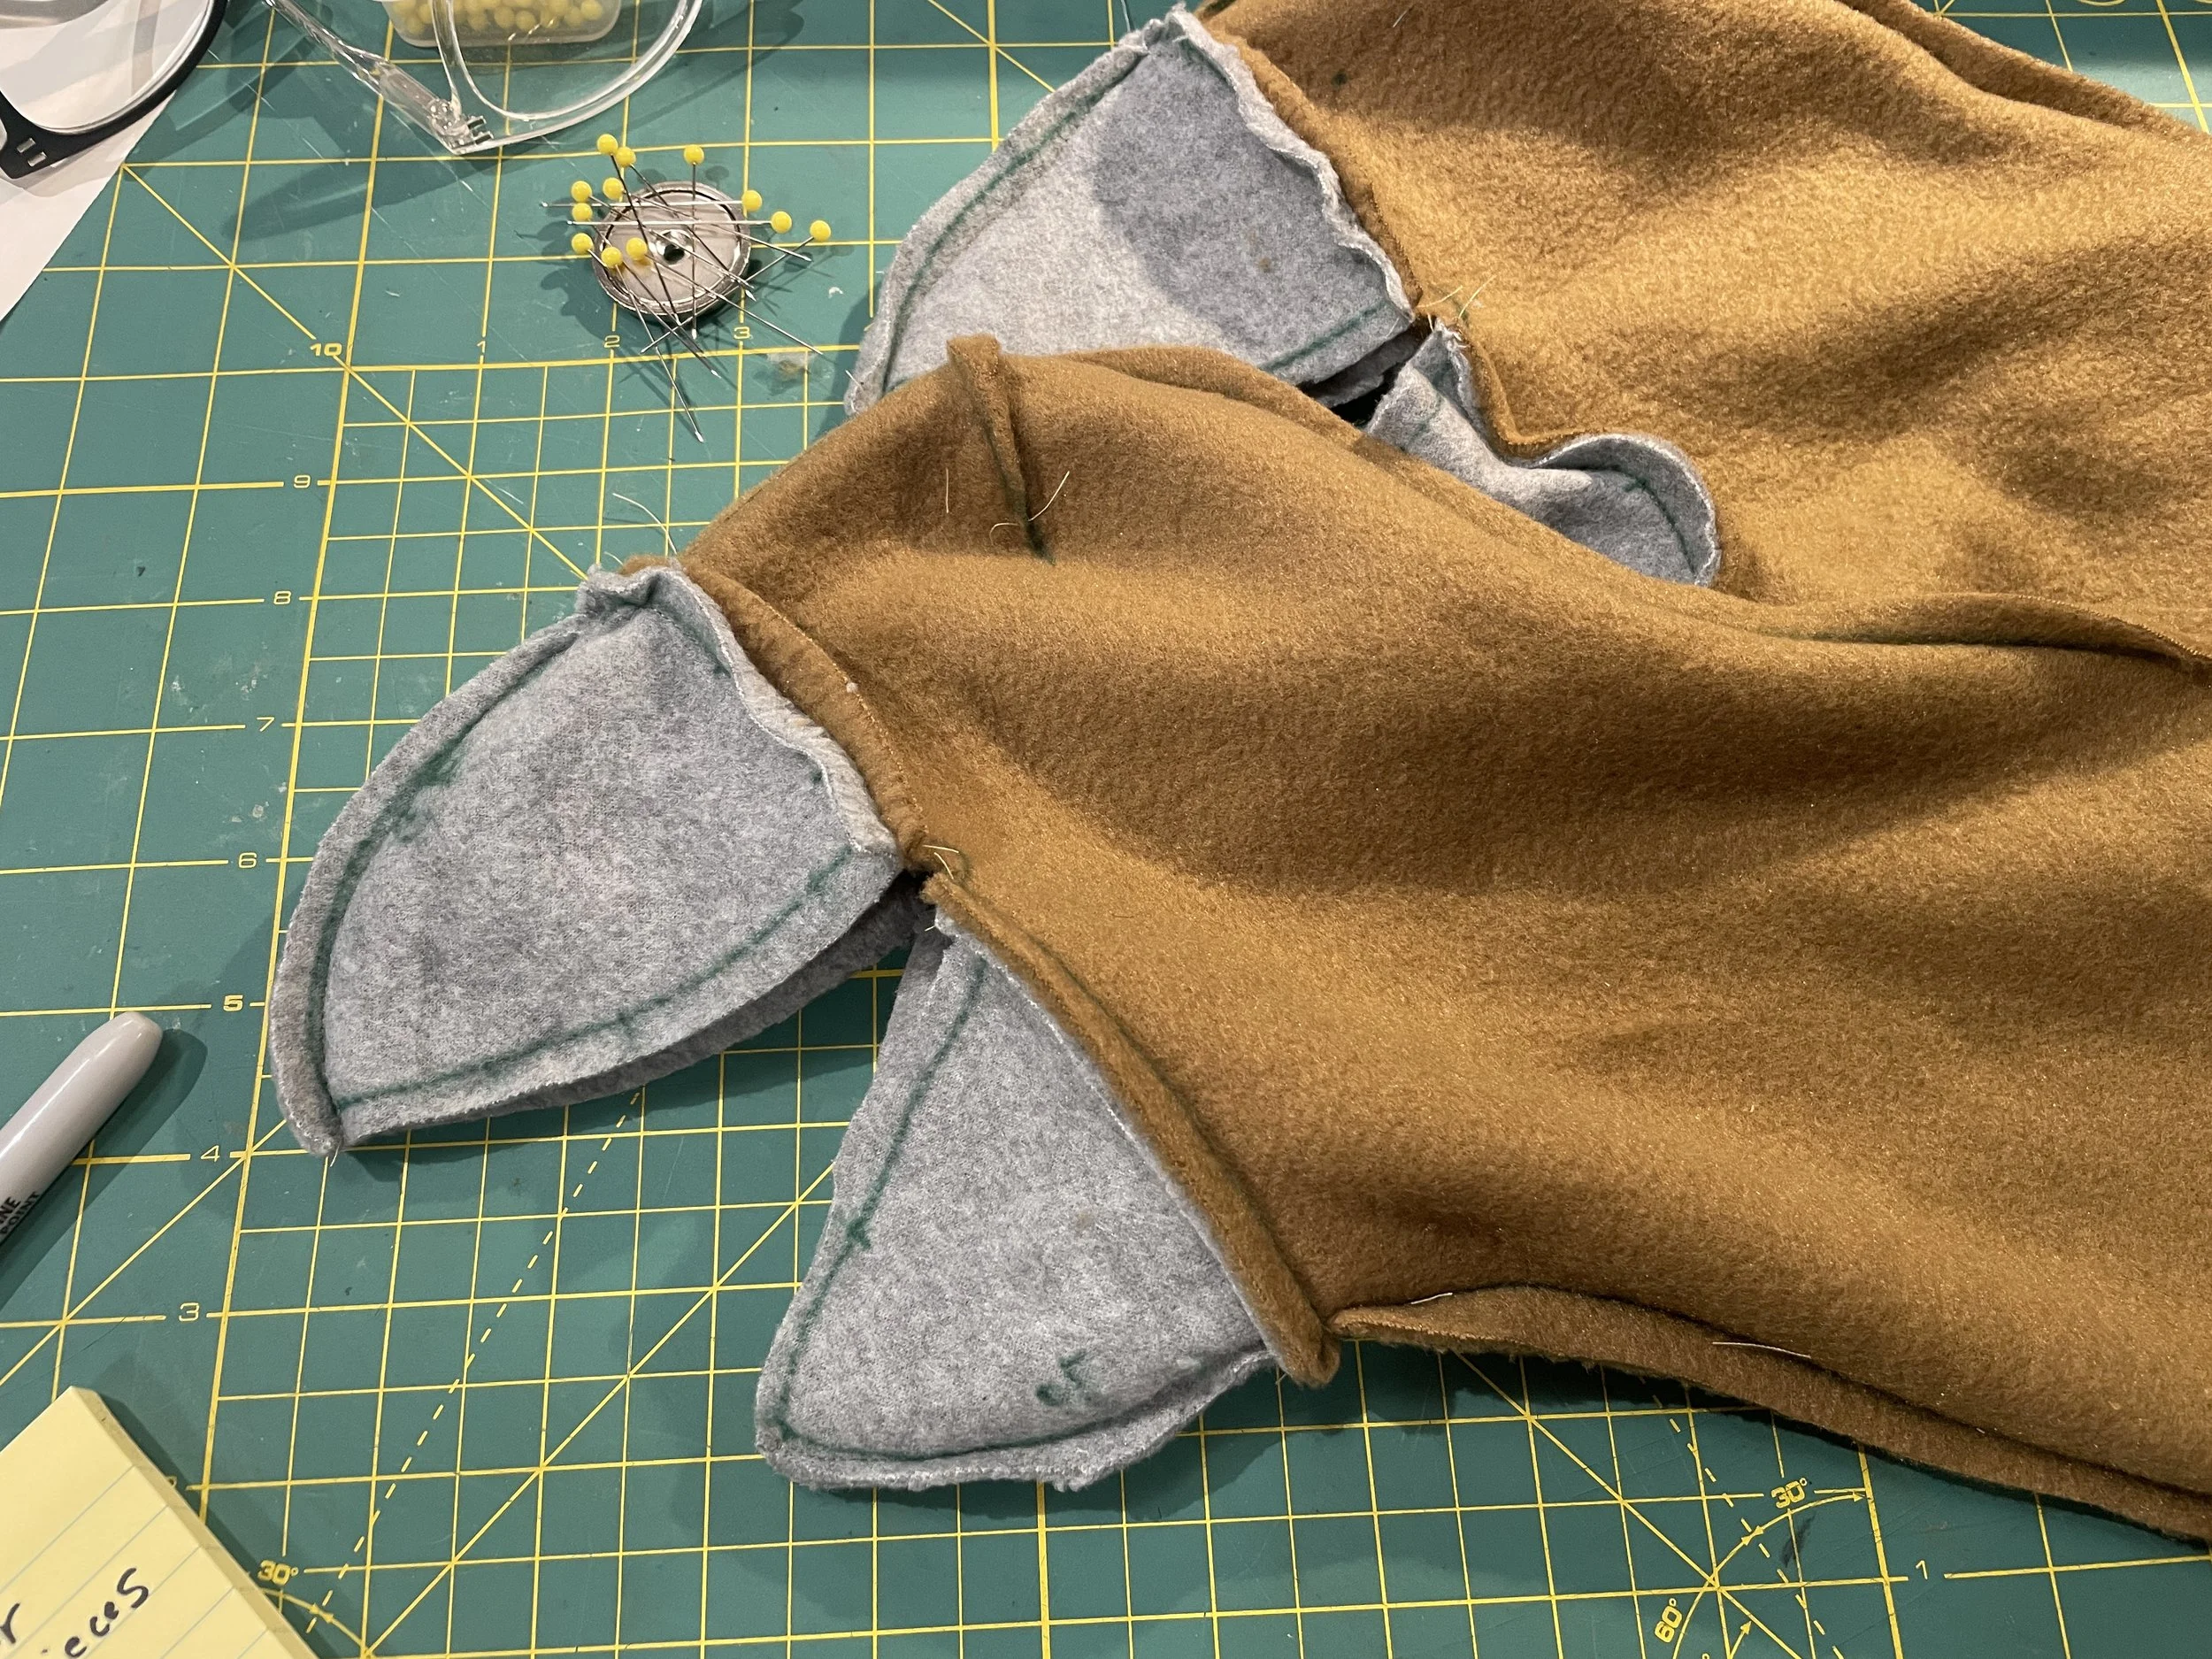
Attach Muzzle to Body
Turn the muzzle inside out and place it inside the main body.
Match the seam lines and notches.
Pin all around.
Sew the muzzle to the body.
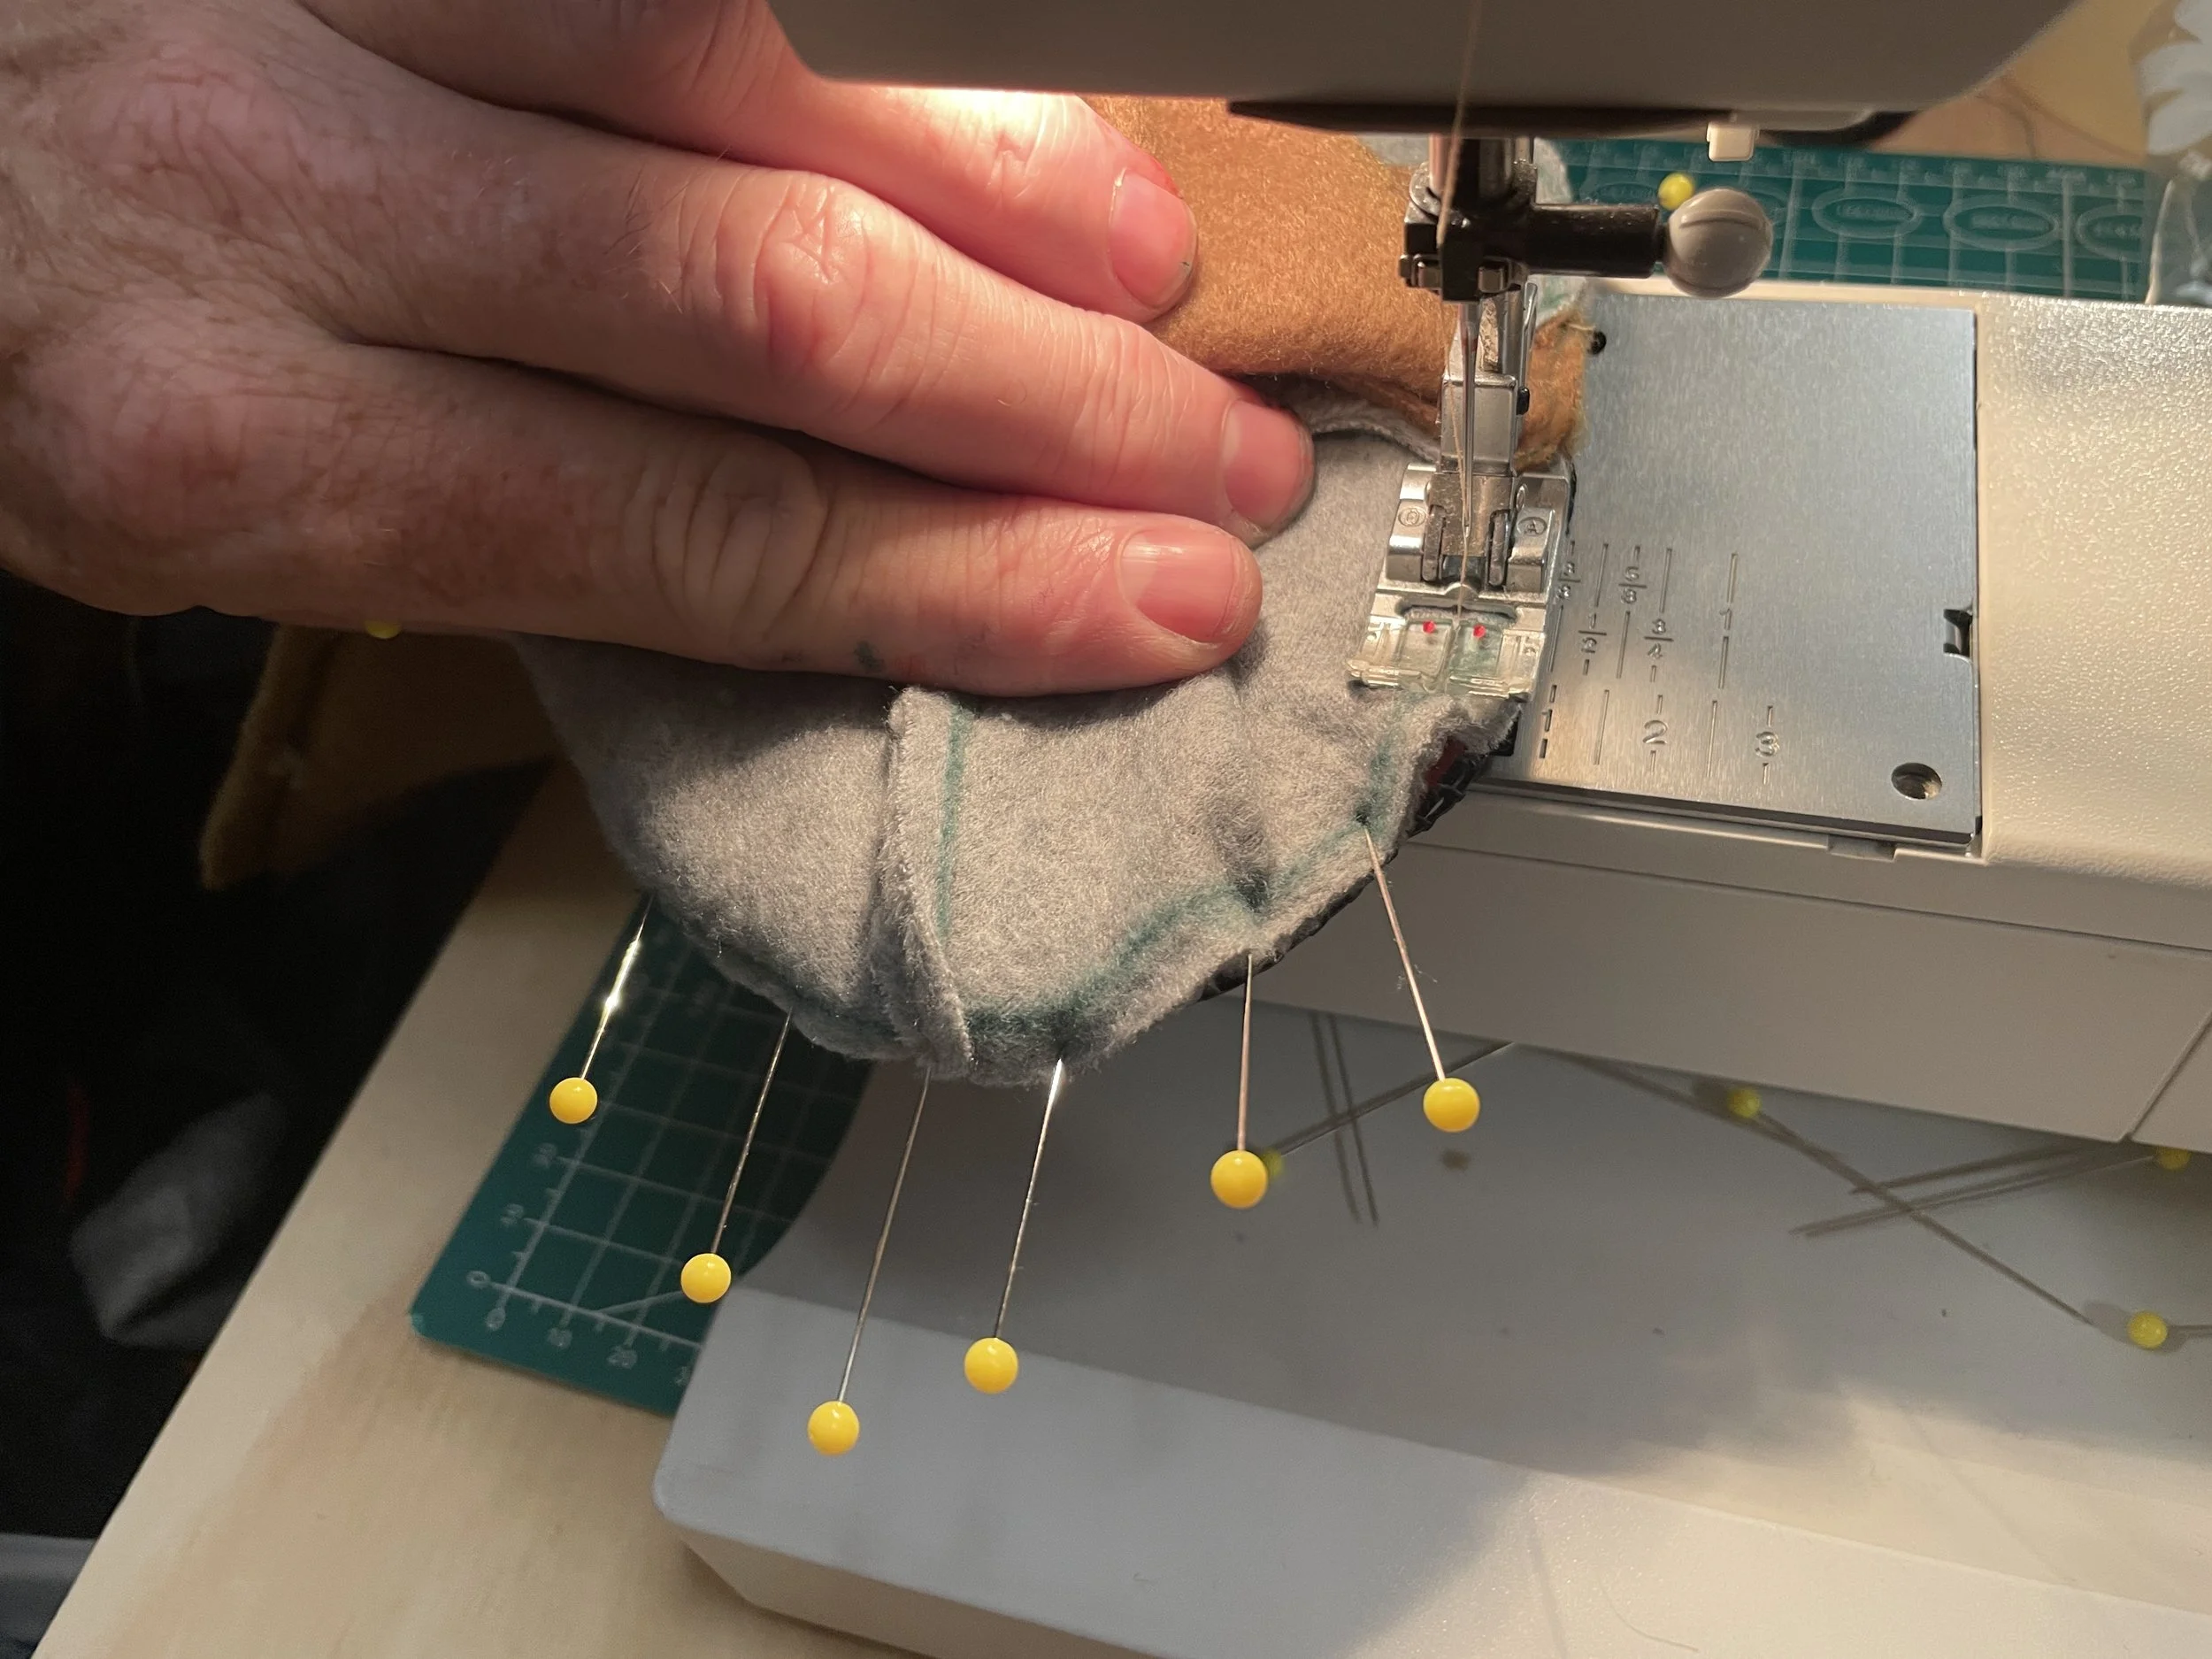
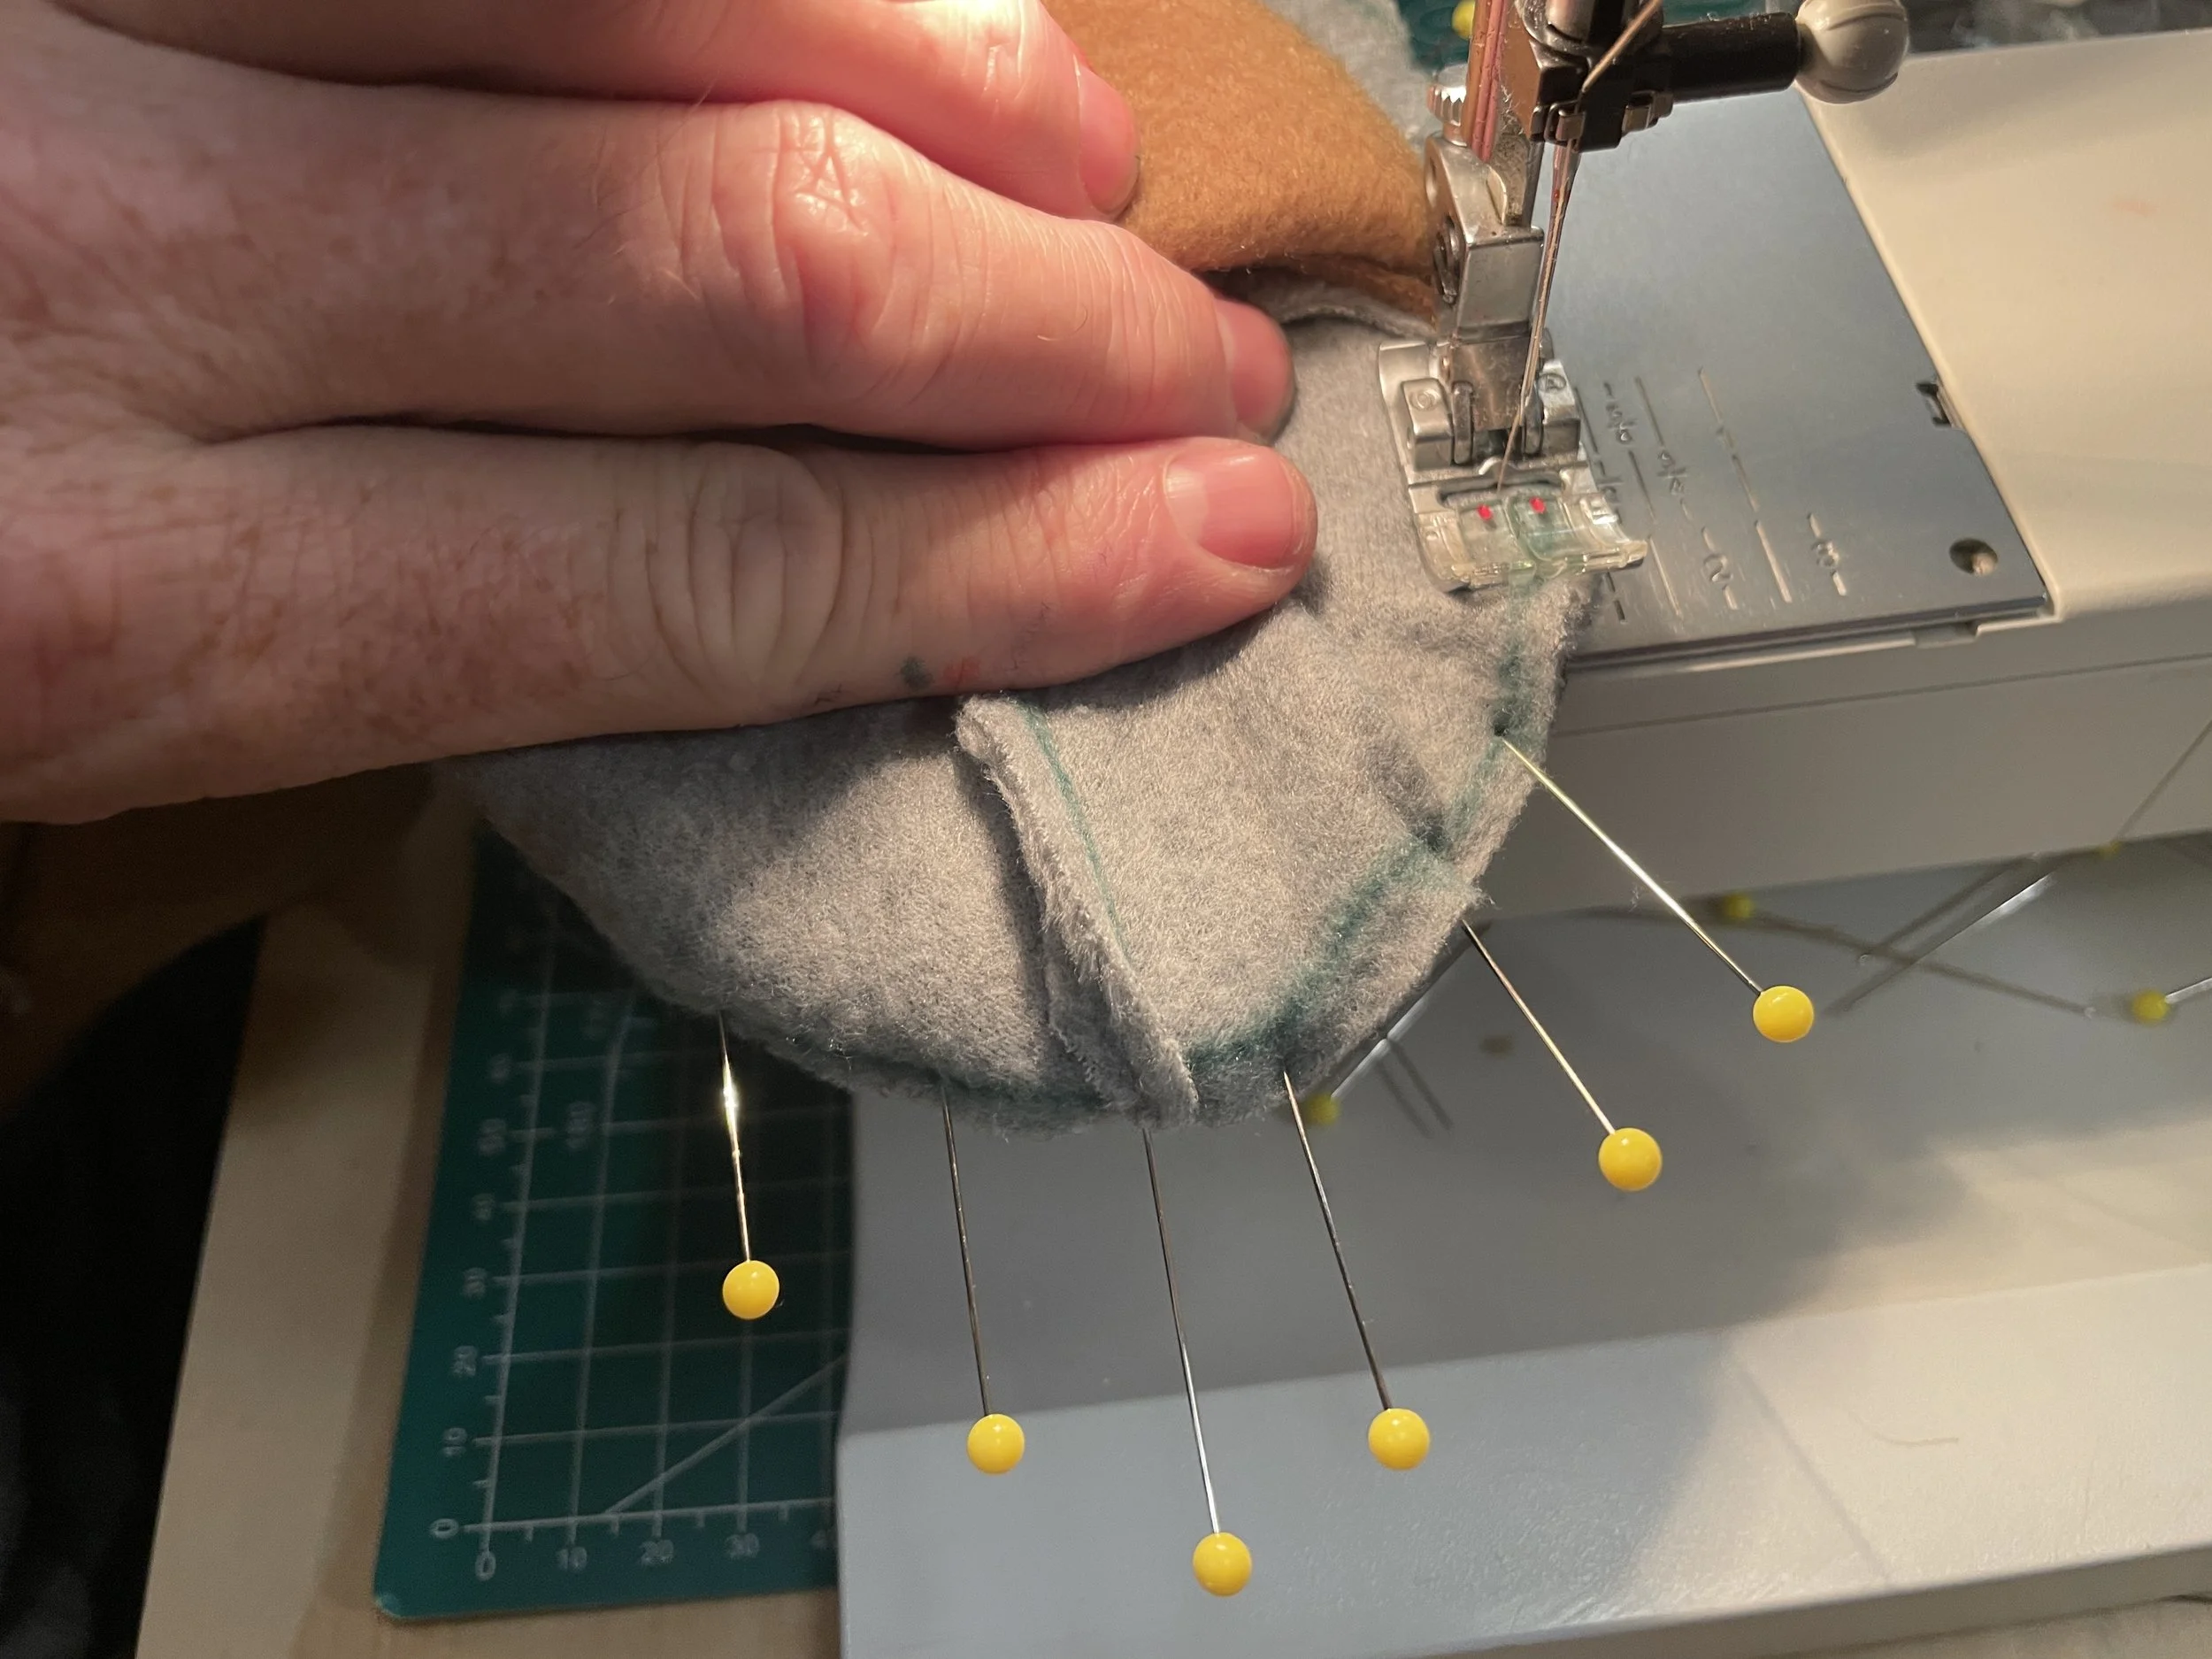
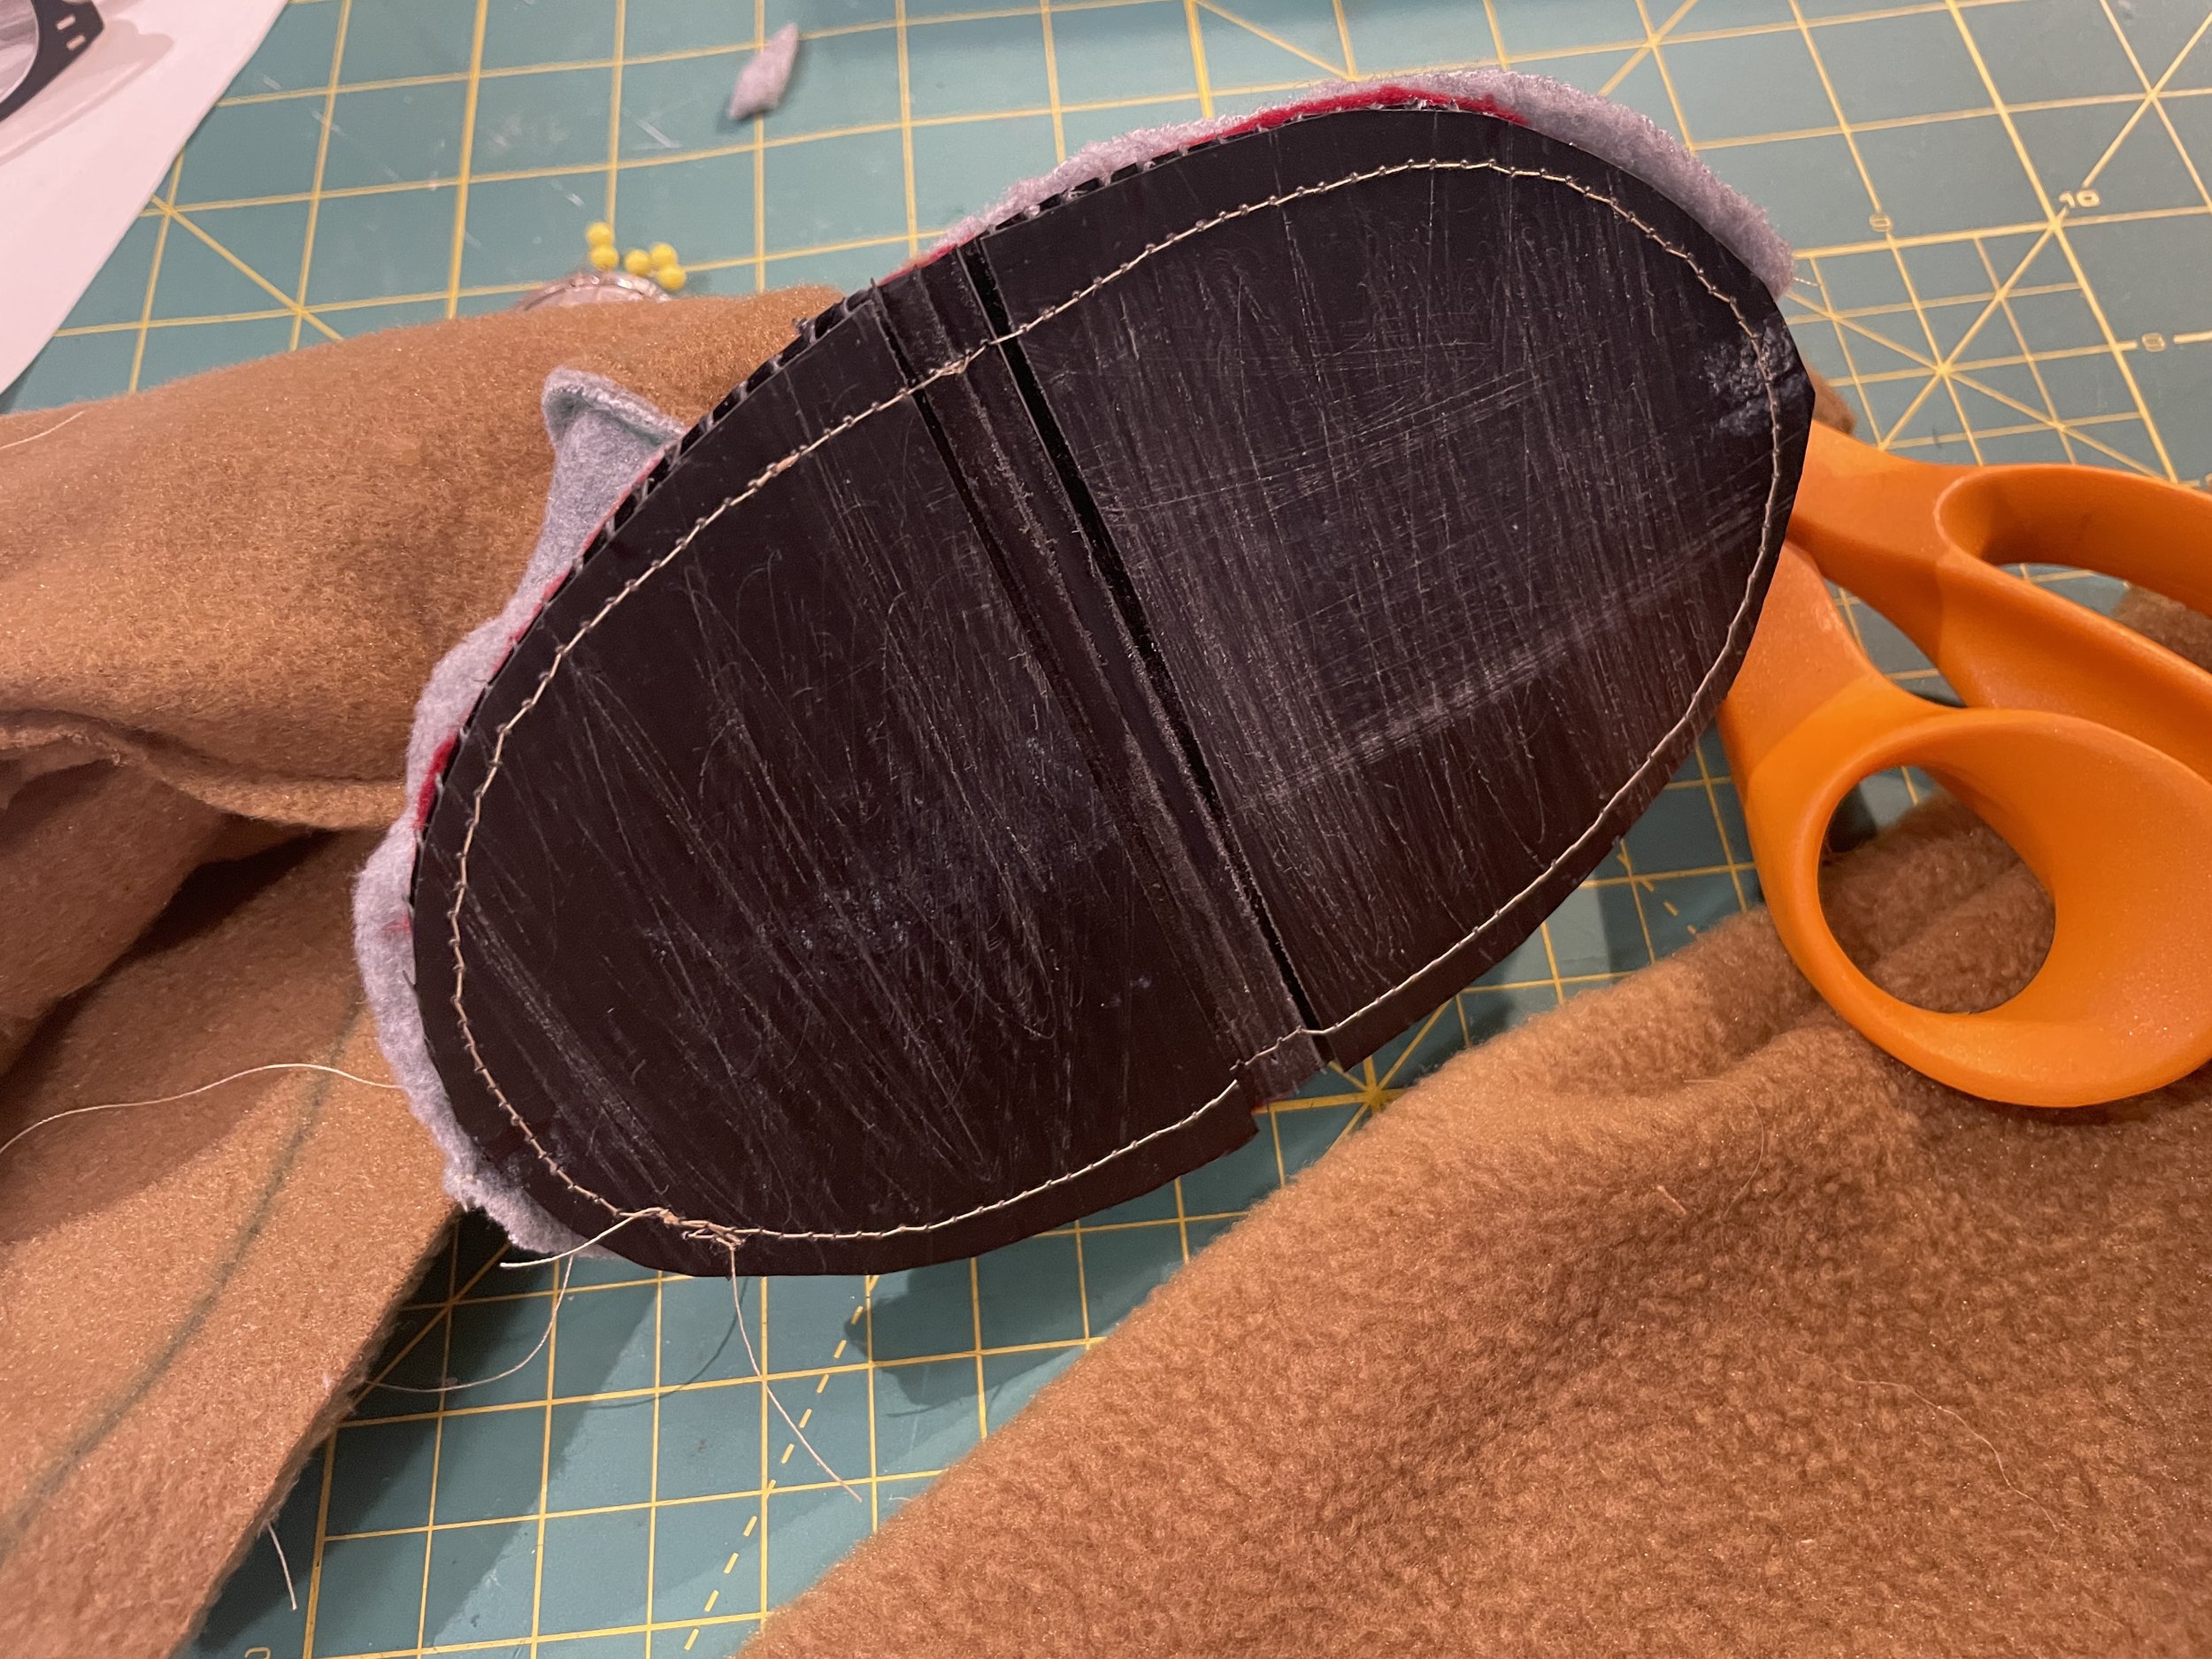
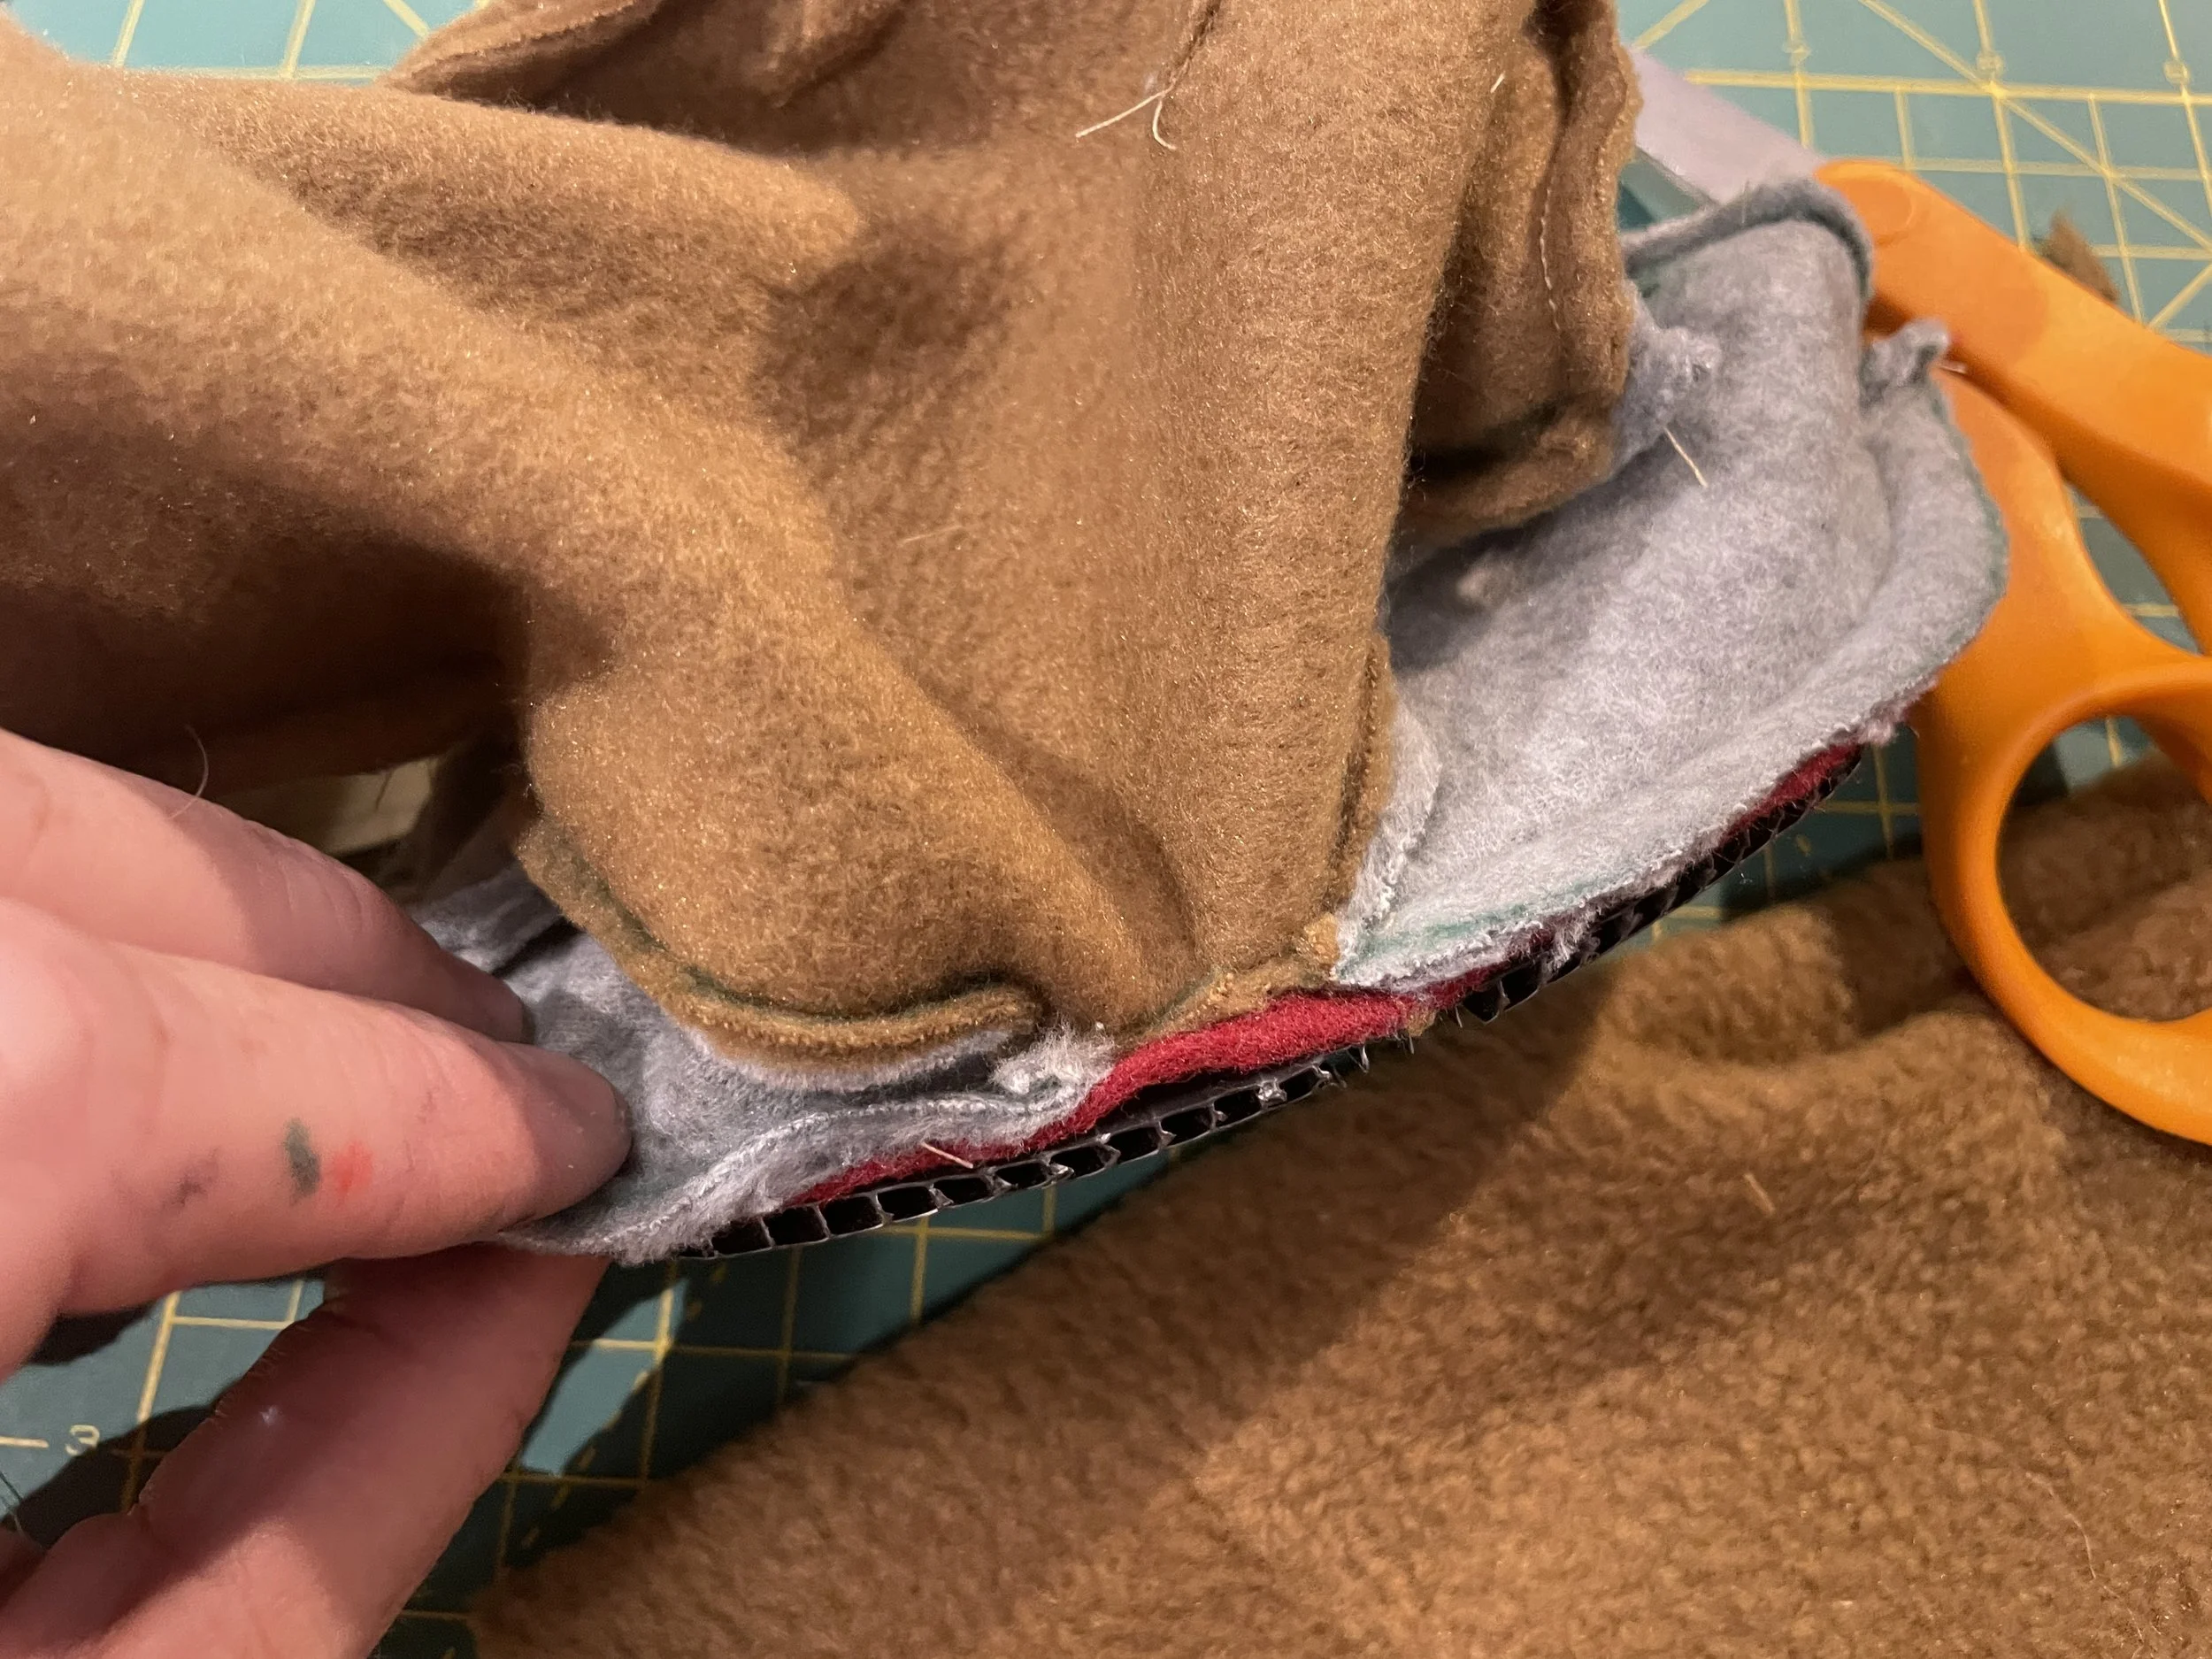
Step 5 – Attach the Mouth Plate
(This is the most difficult step. Work slowly.)
Check that the felt lining is fully glued to the mouth plate.
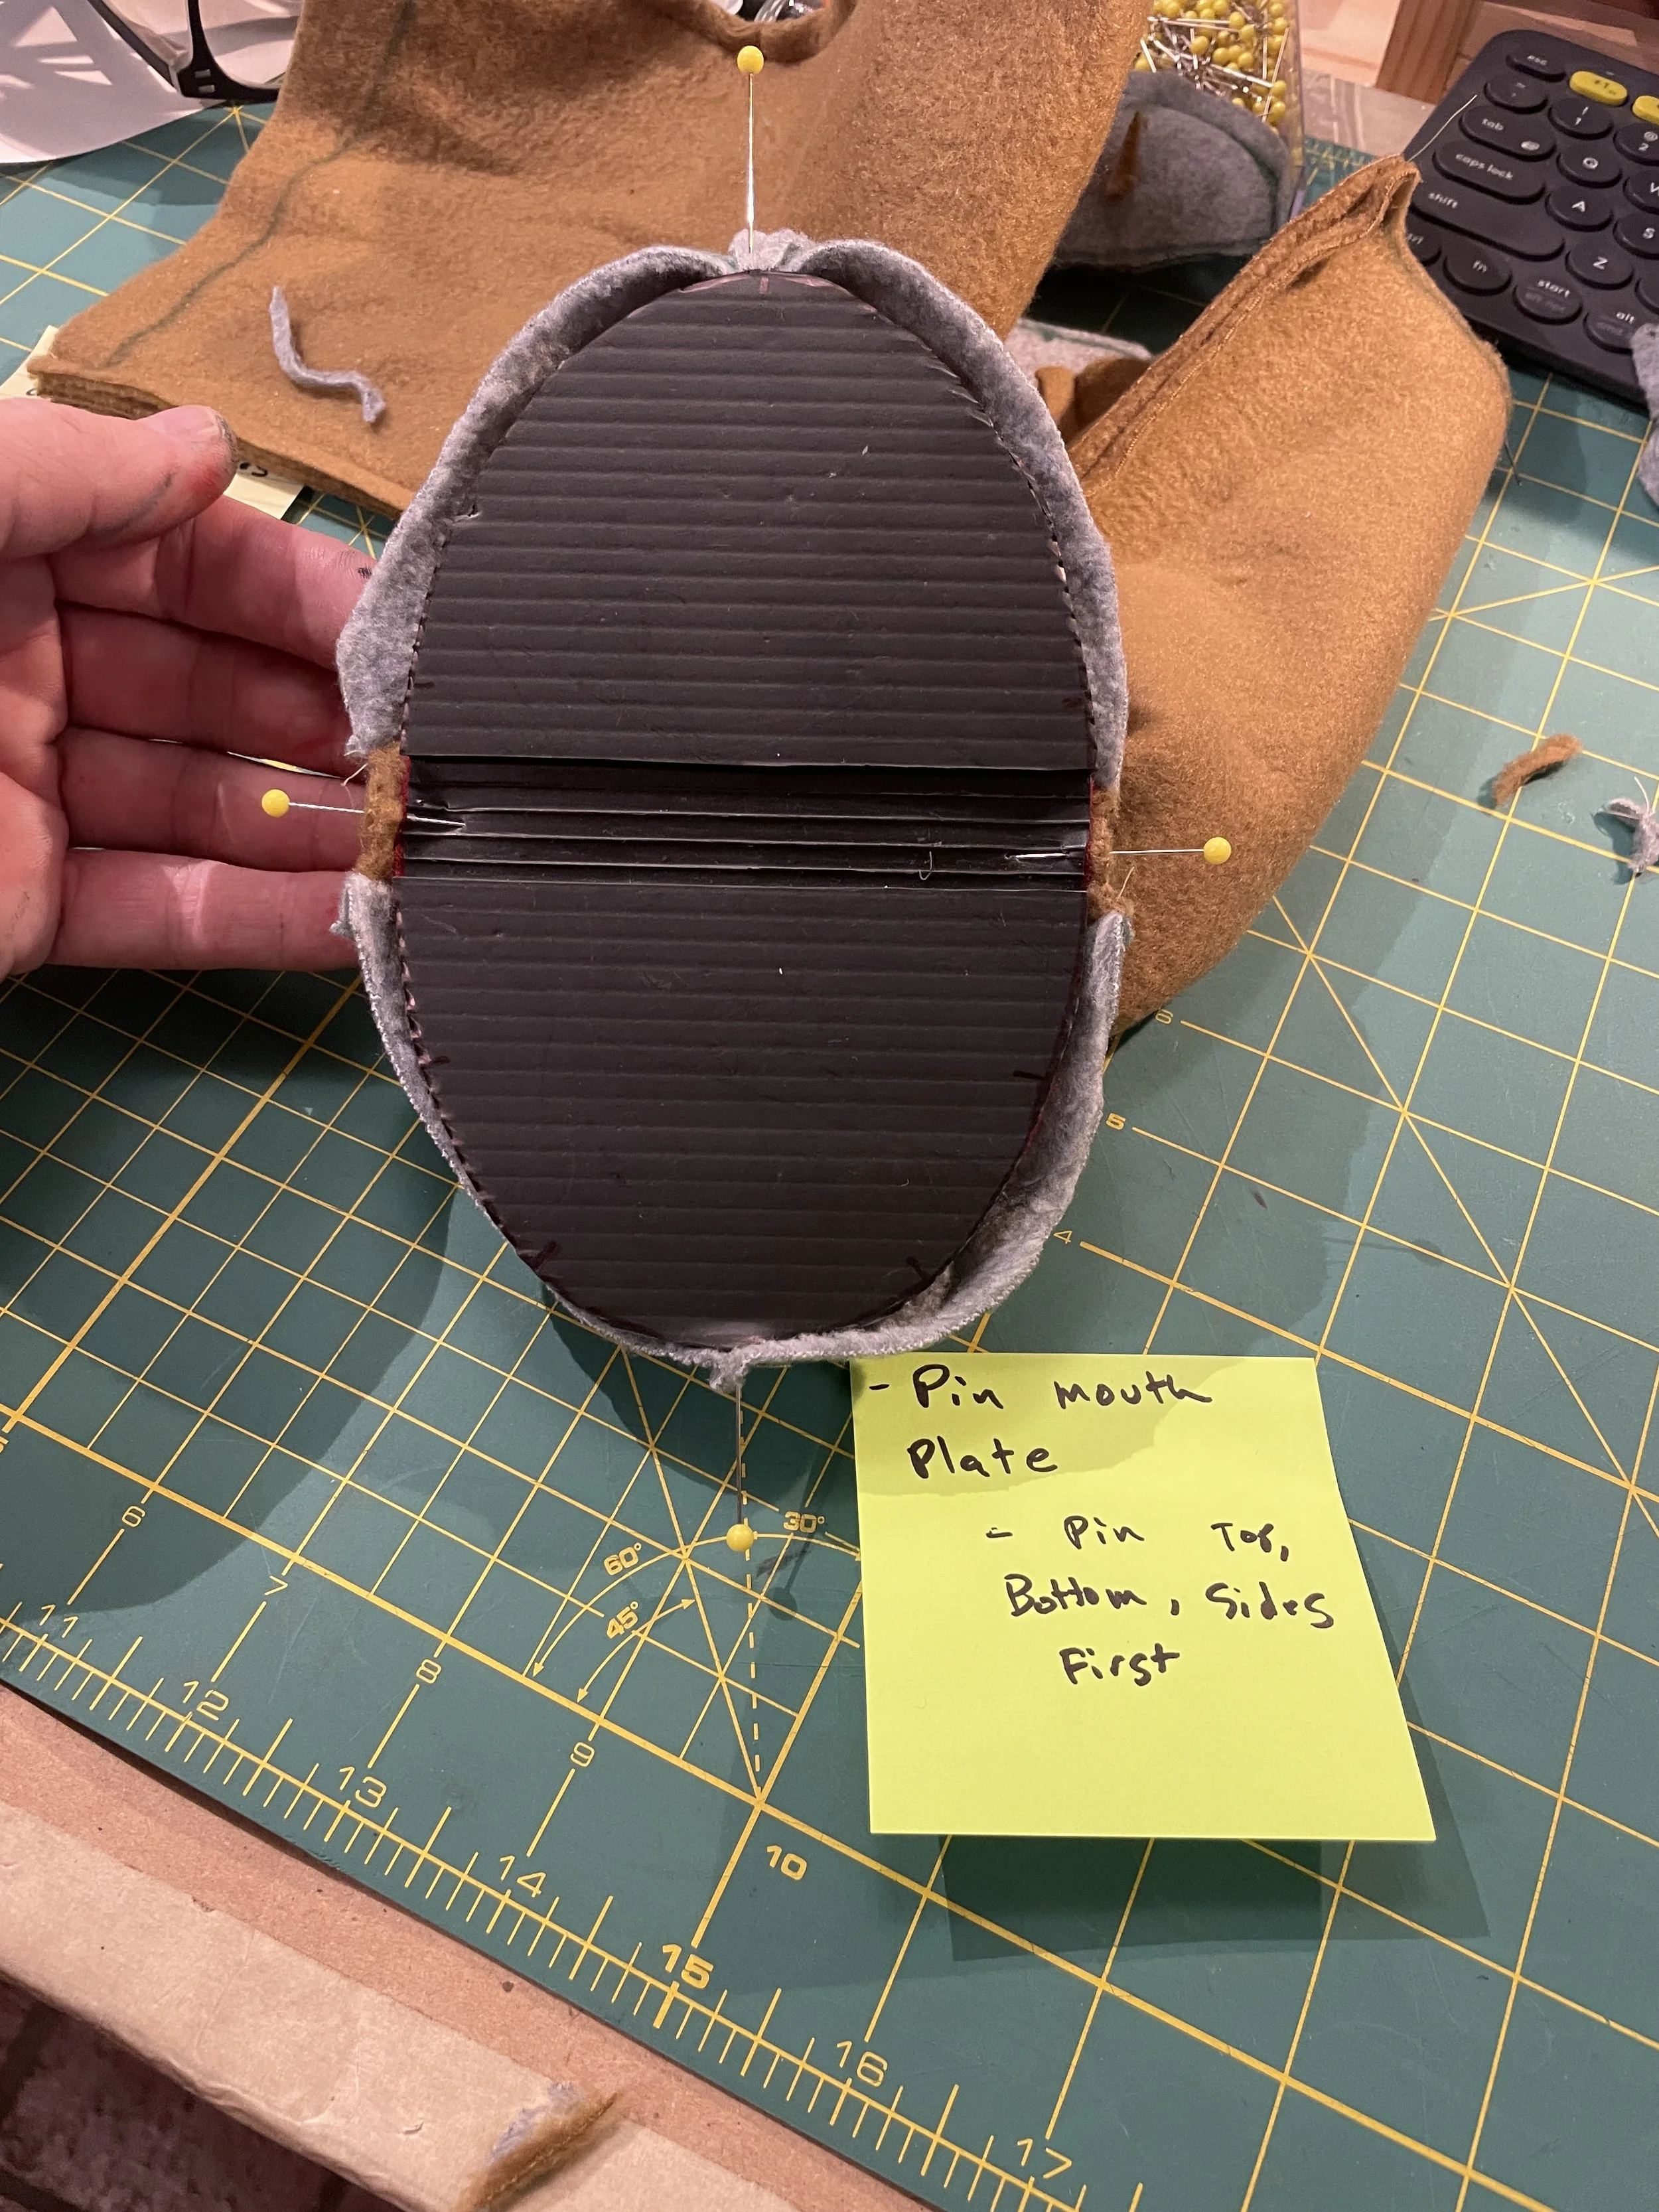
Mark the center lines and notches on the inside of the mouth plate.
Pin the muzzle/body fabric to the mouth plate at four main points:
Top
Bottom
Left corner
Right corner
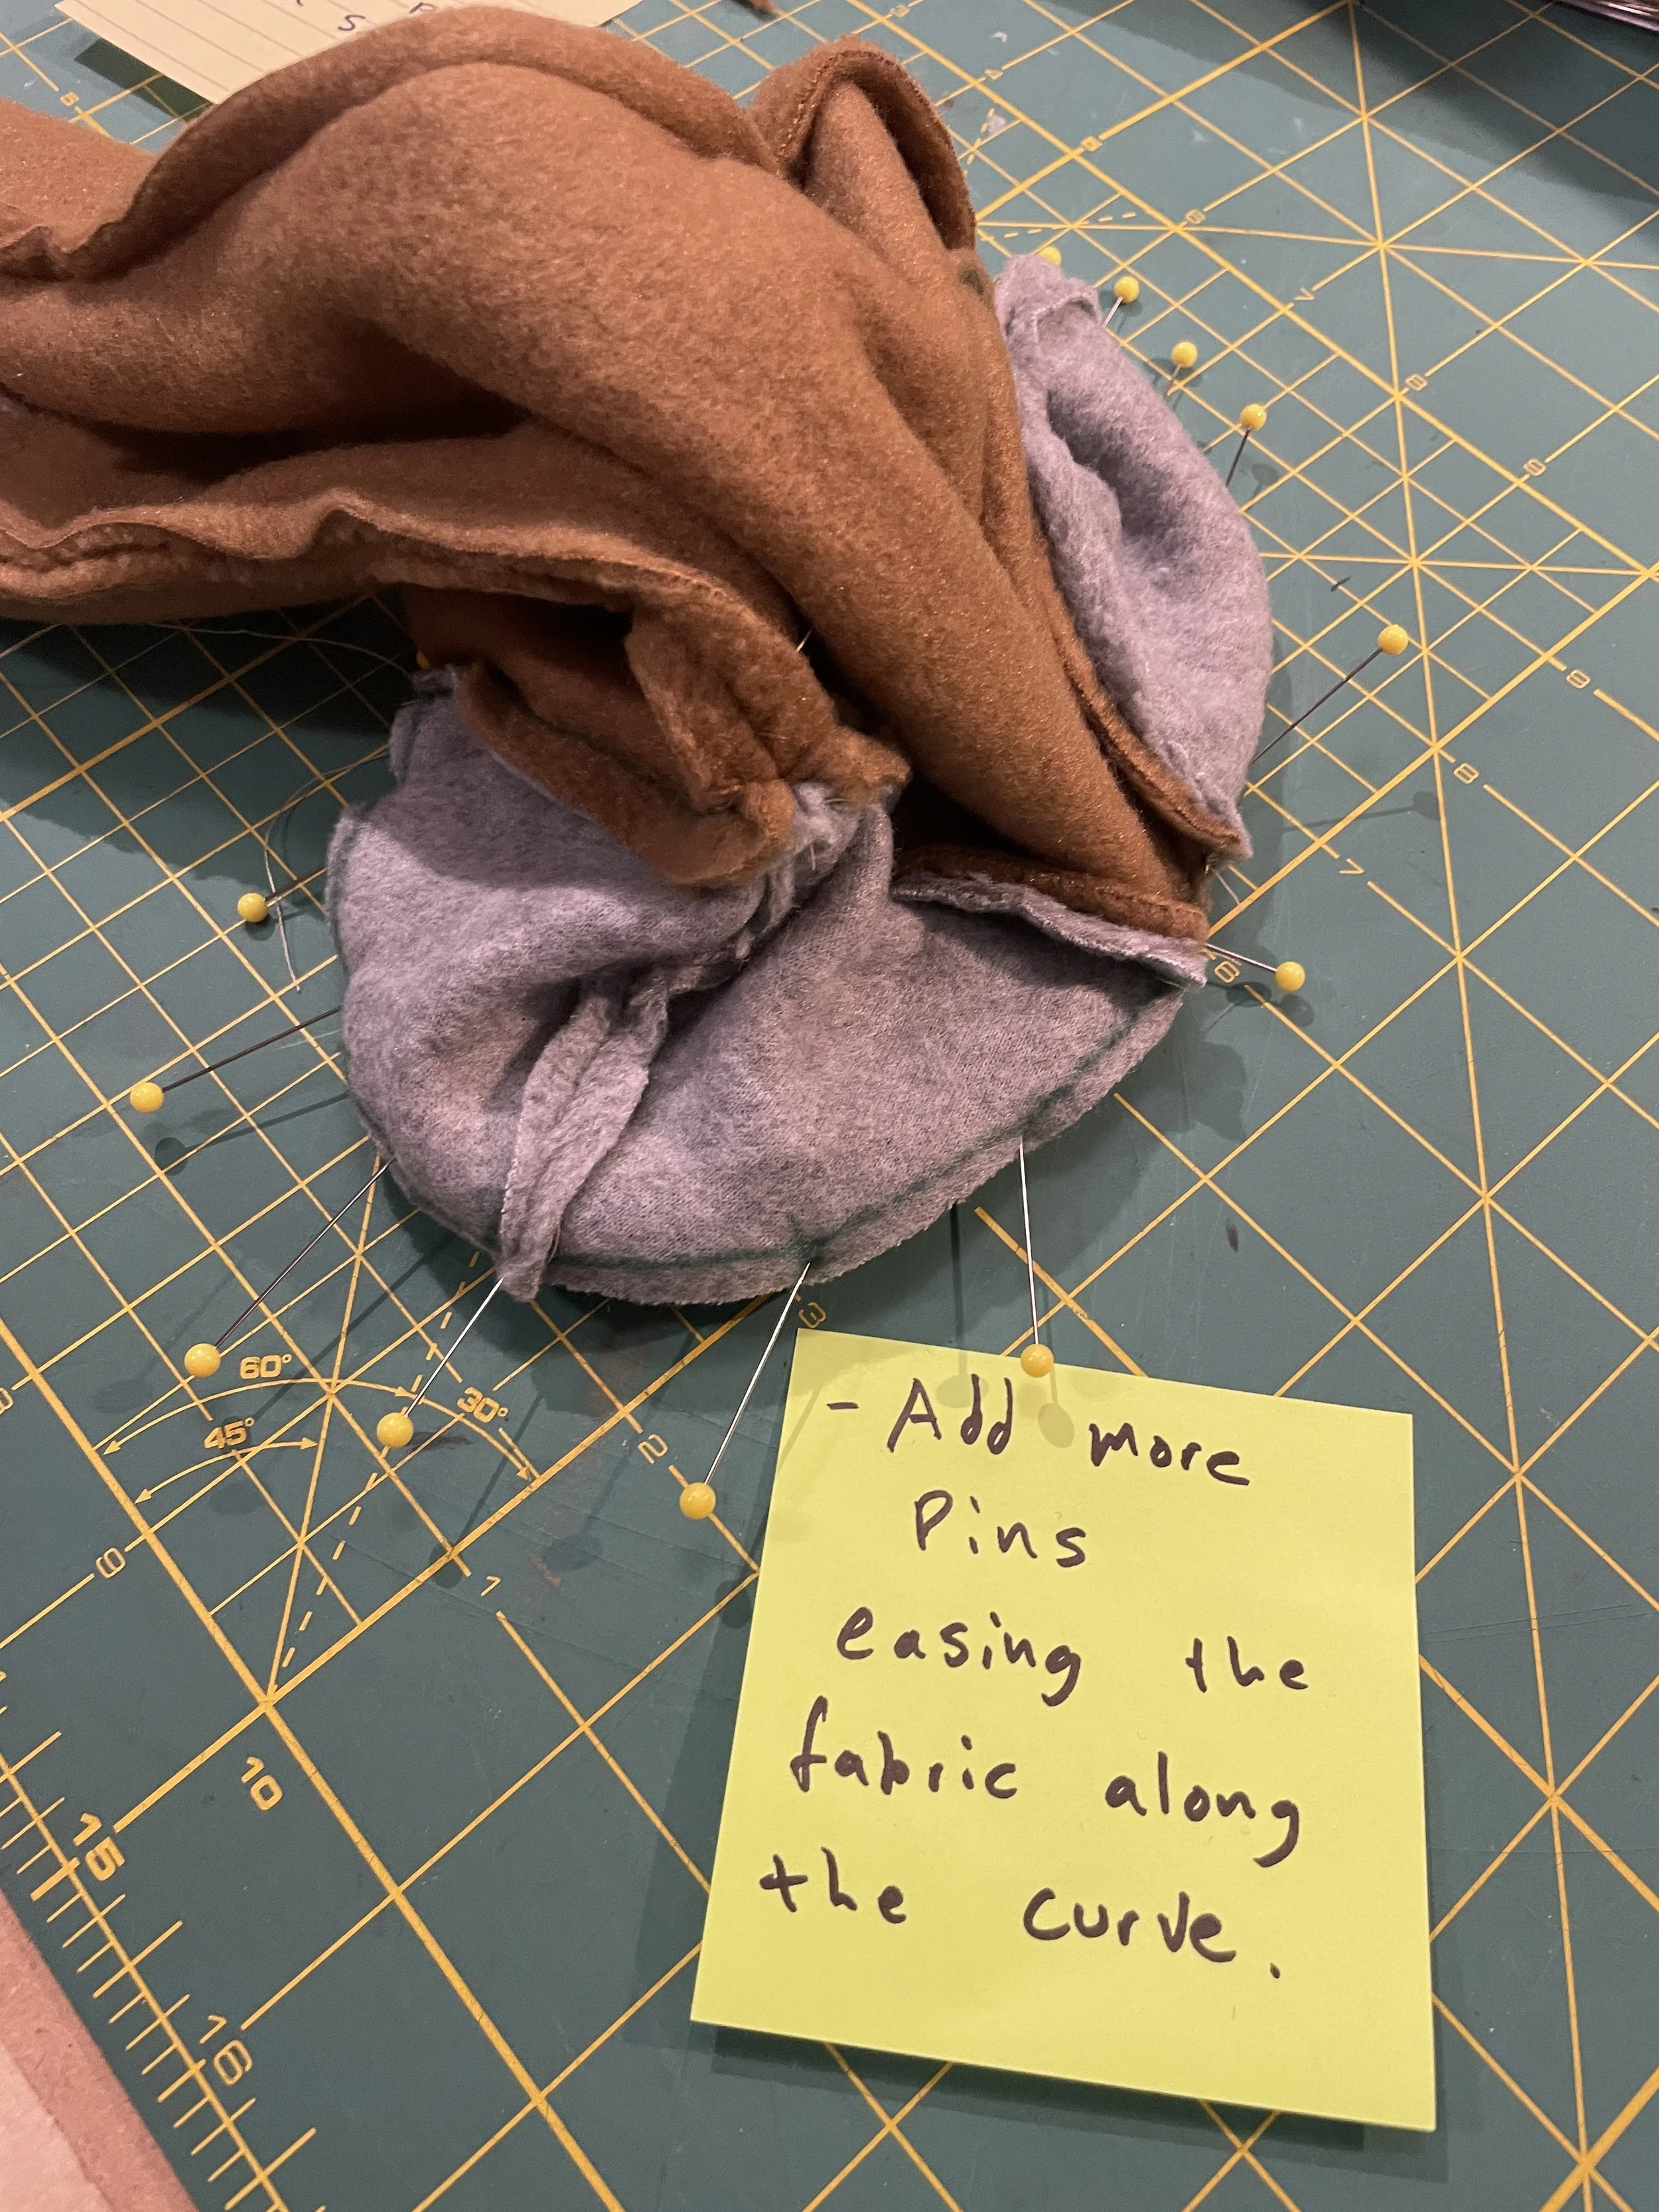
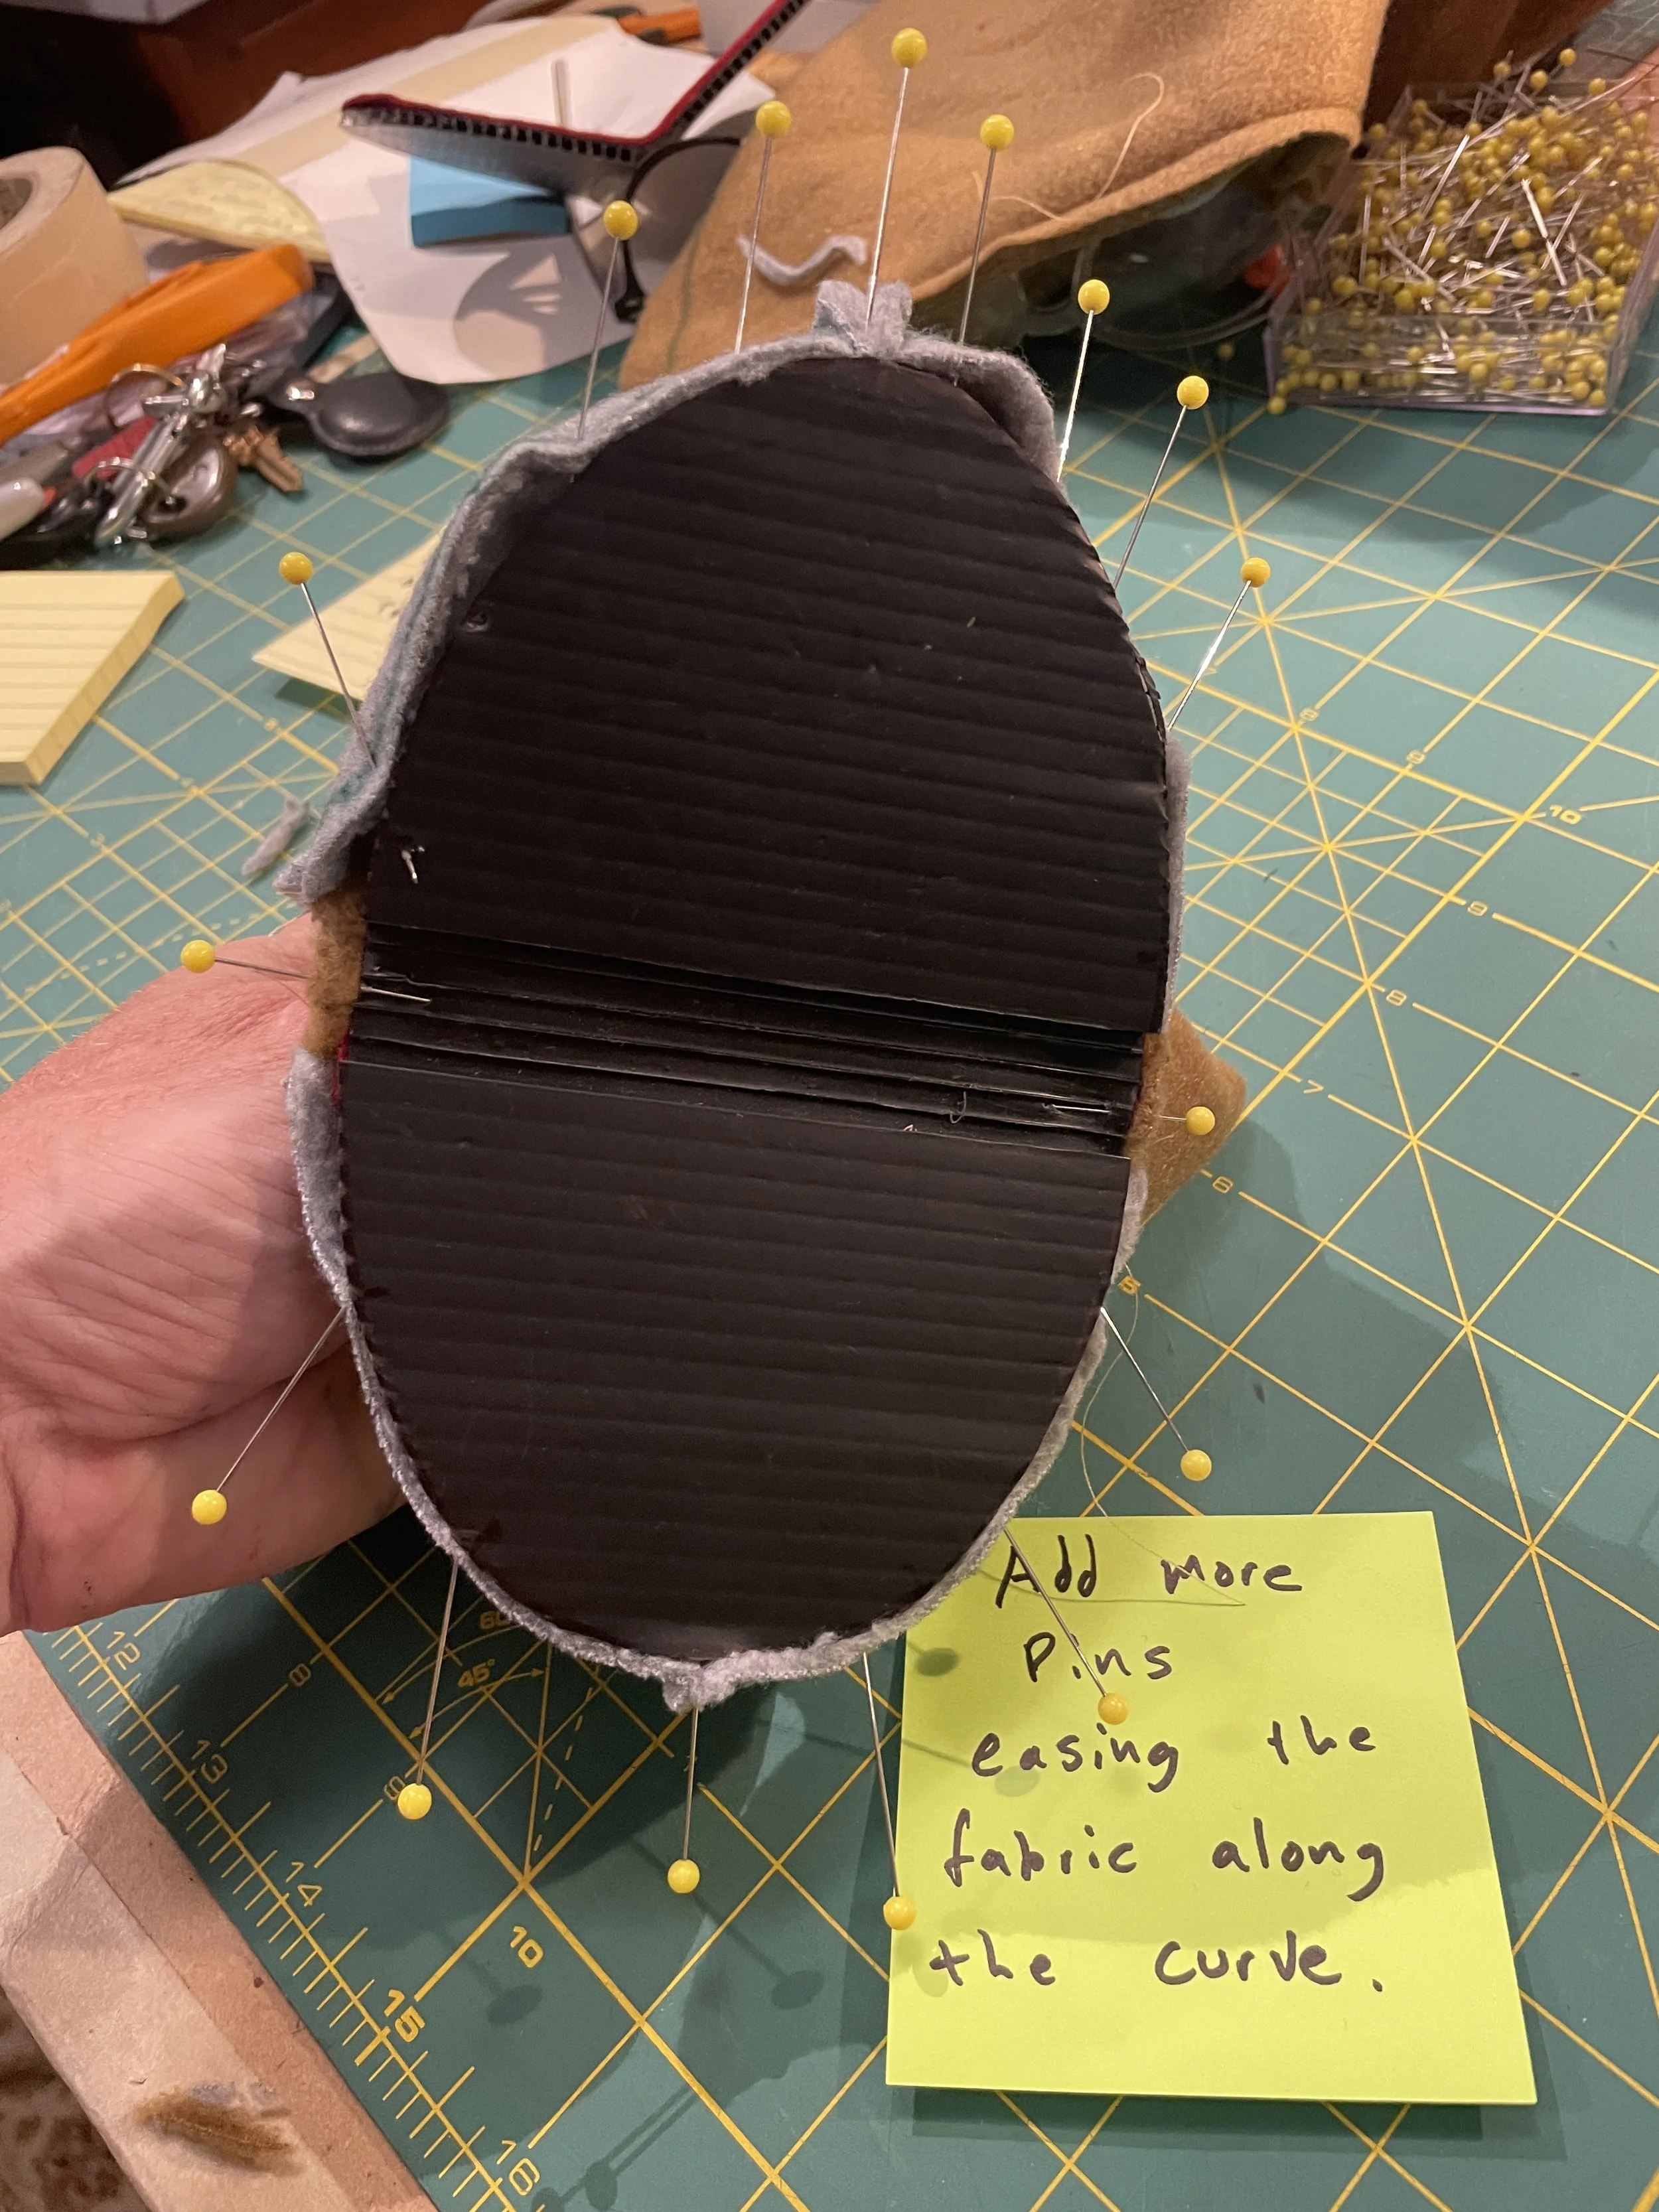
Pin the rest of the edges. Take your time at the corners so the fabric lies flat.
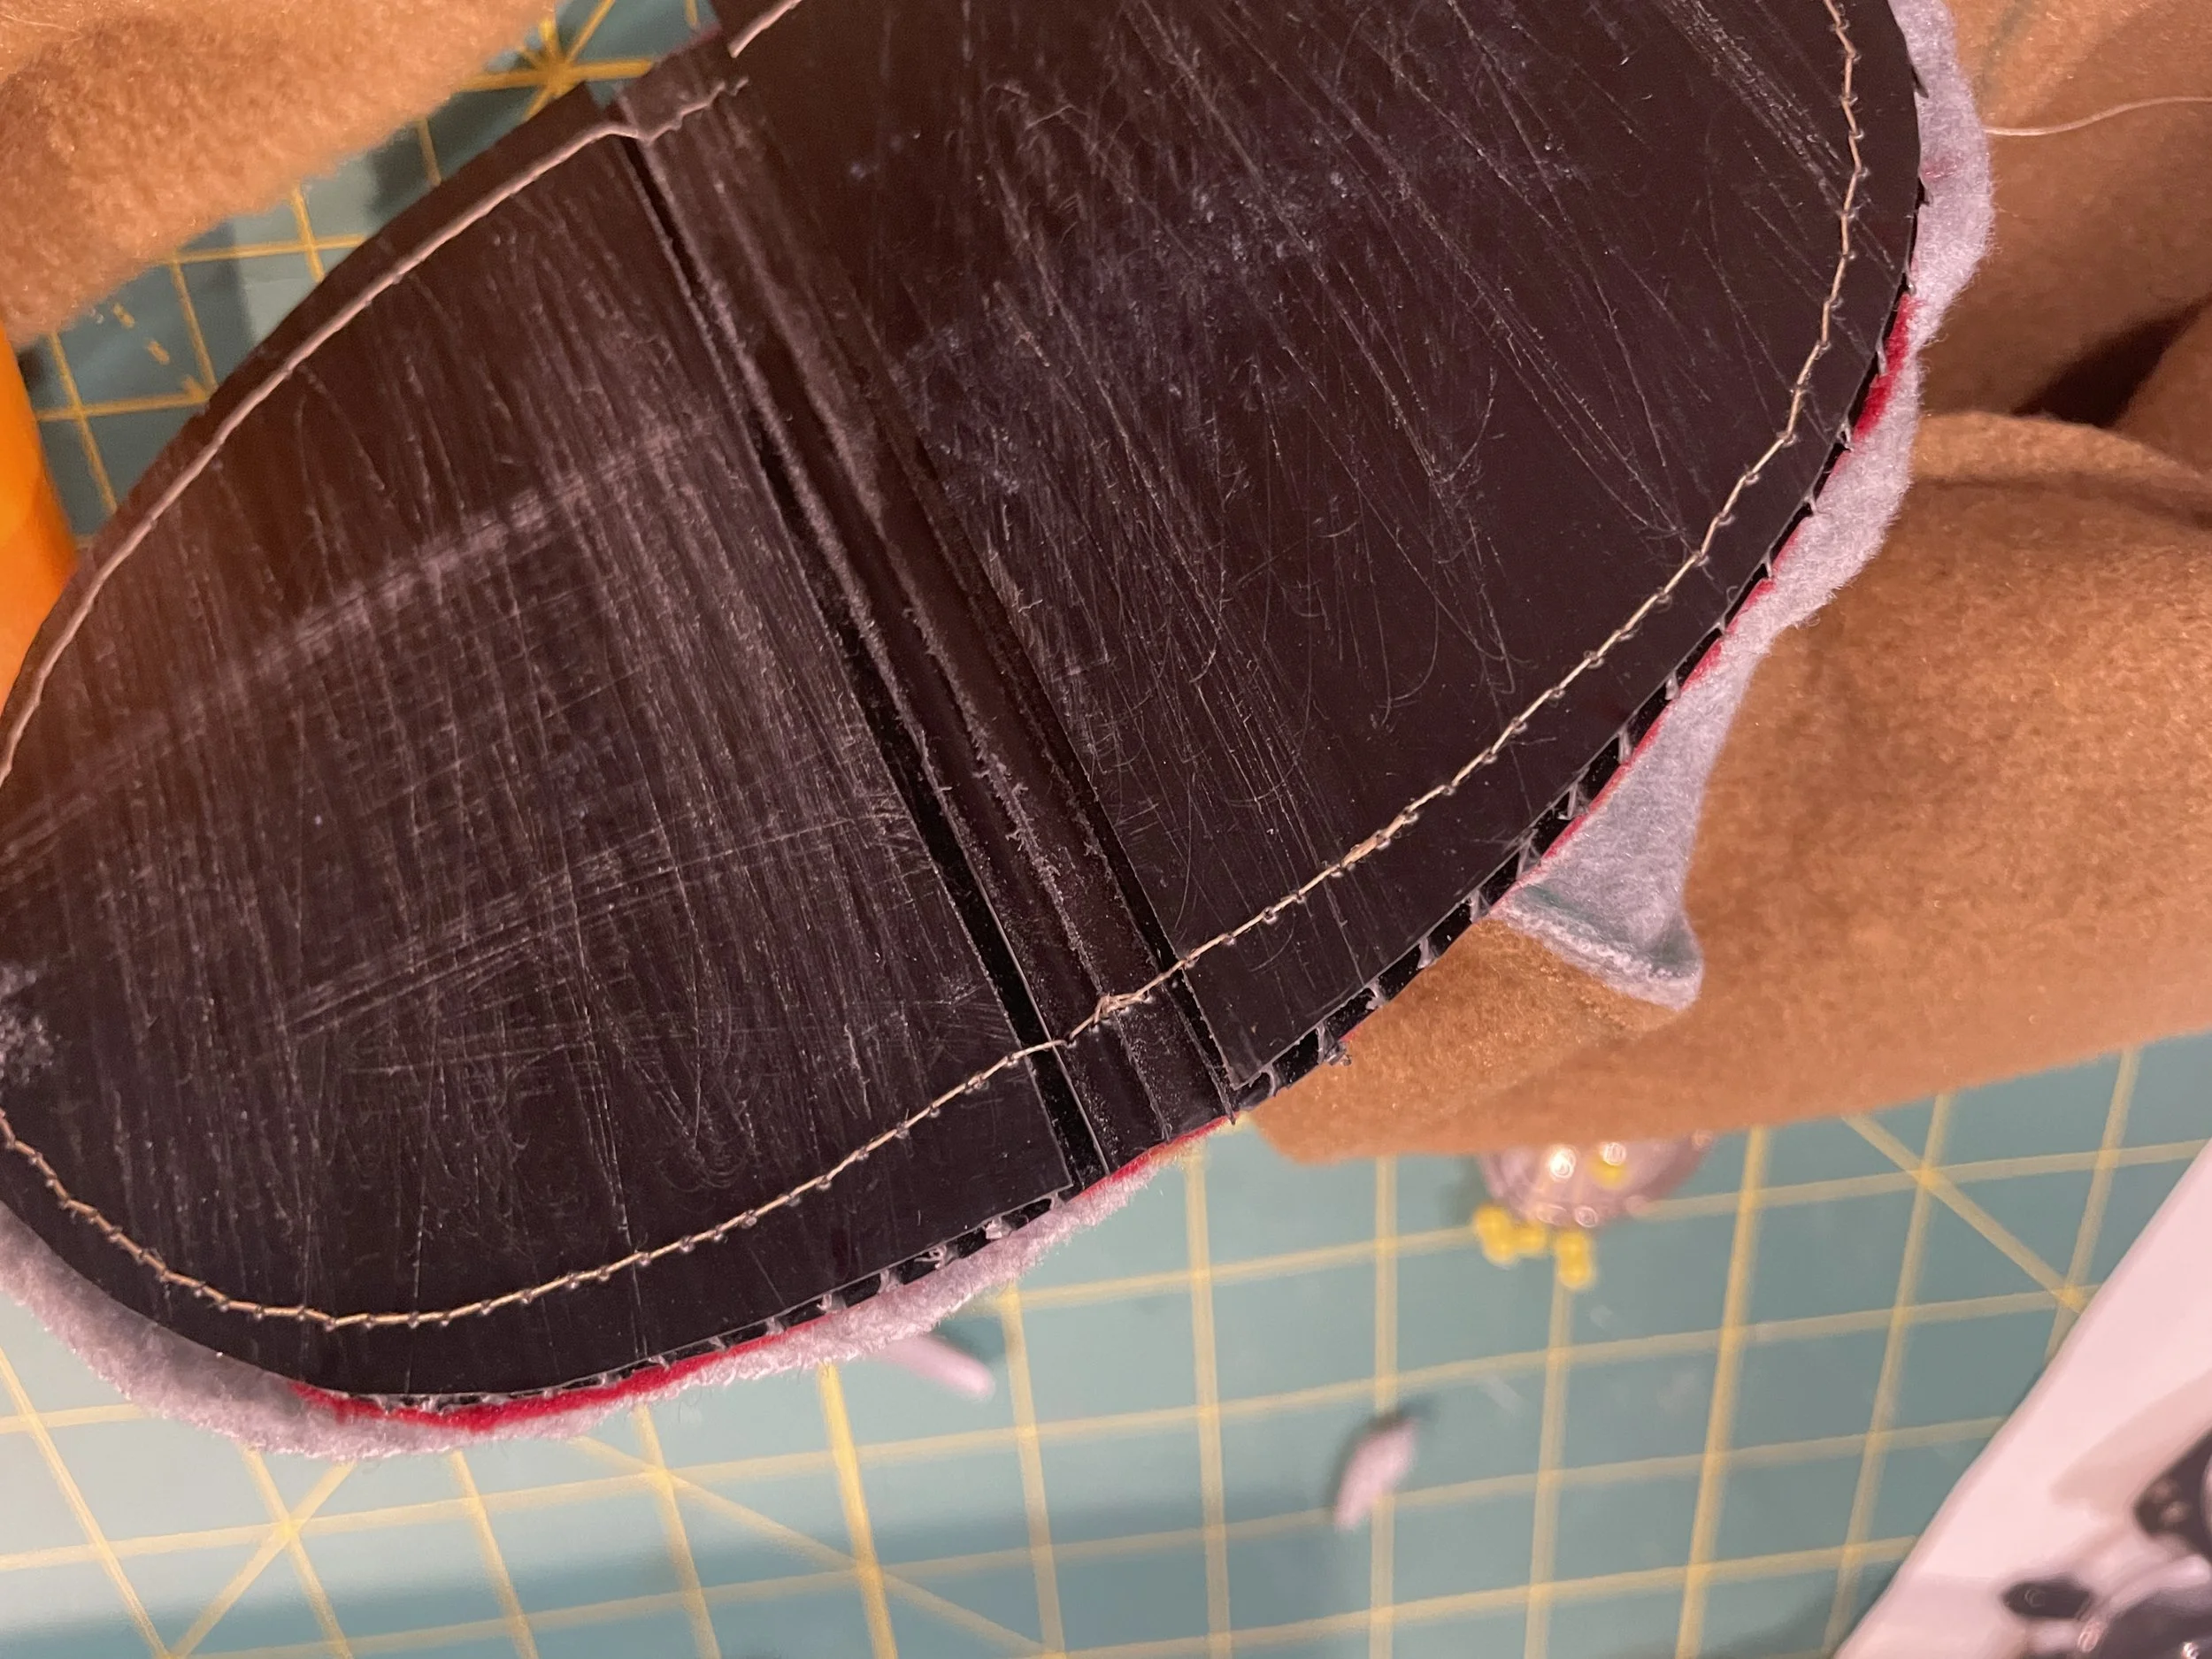
Sew the mouth plate to the fabric:
You may use a sewing machine (slow speed helps).
If it is difficult, use hand stitching.
Remove pins and turn everything right-side out.
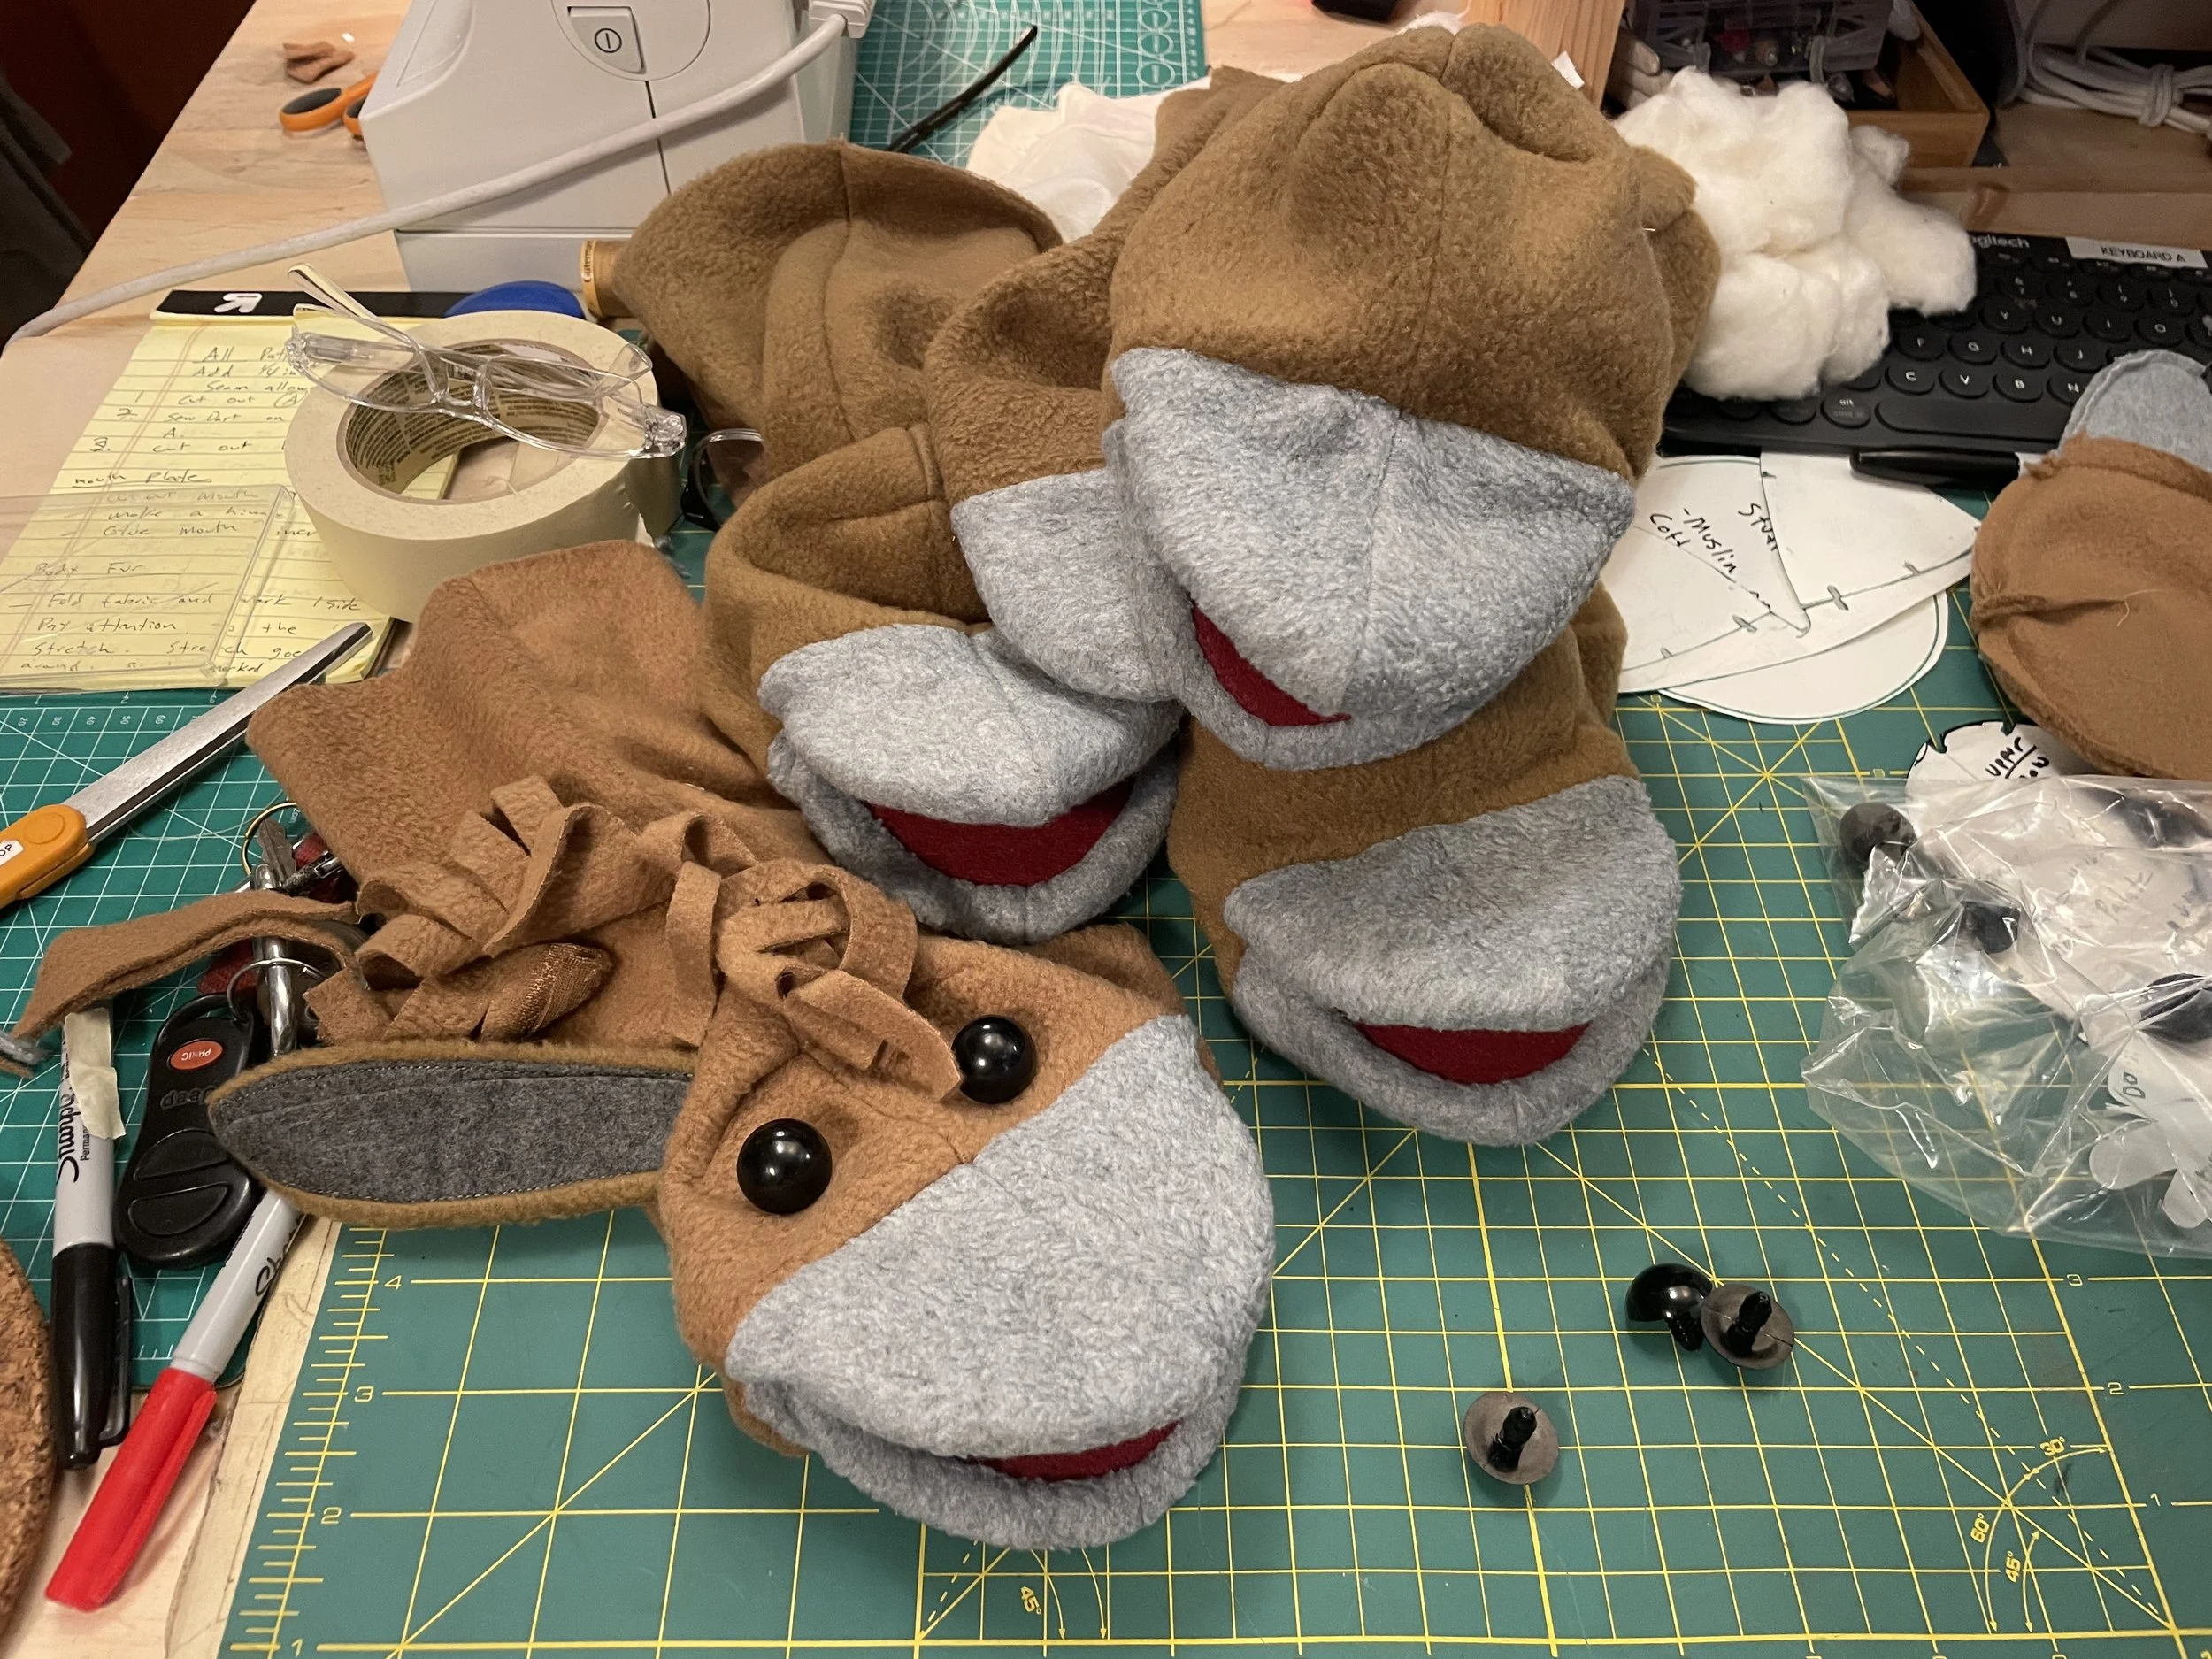
Step 6 – Make and Attach the Ears
Place brown fleece over gray fleece and pin.
Mark one ear pattern.
Sew the curved edge. Leave the bottom edge open.
Turn the ear right-side out.
Position the ears on the head:
Slightly behind the eyes
A few centimeters from the hairline
Exact placement is flexible
Hand-stitch across the bottom of each ear using a tight whipstitch.
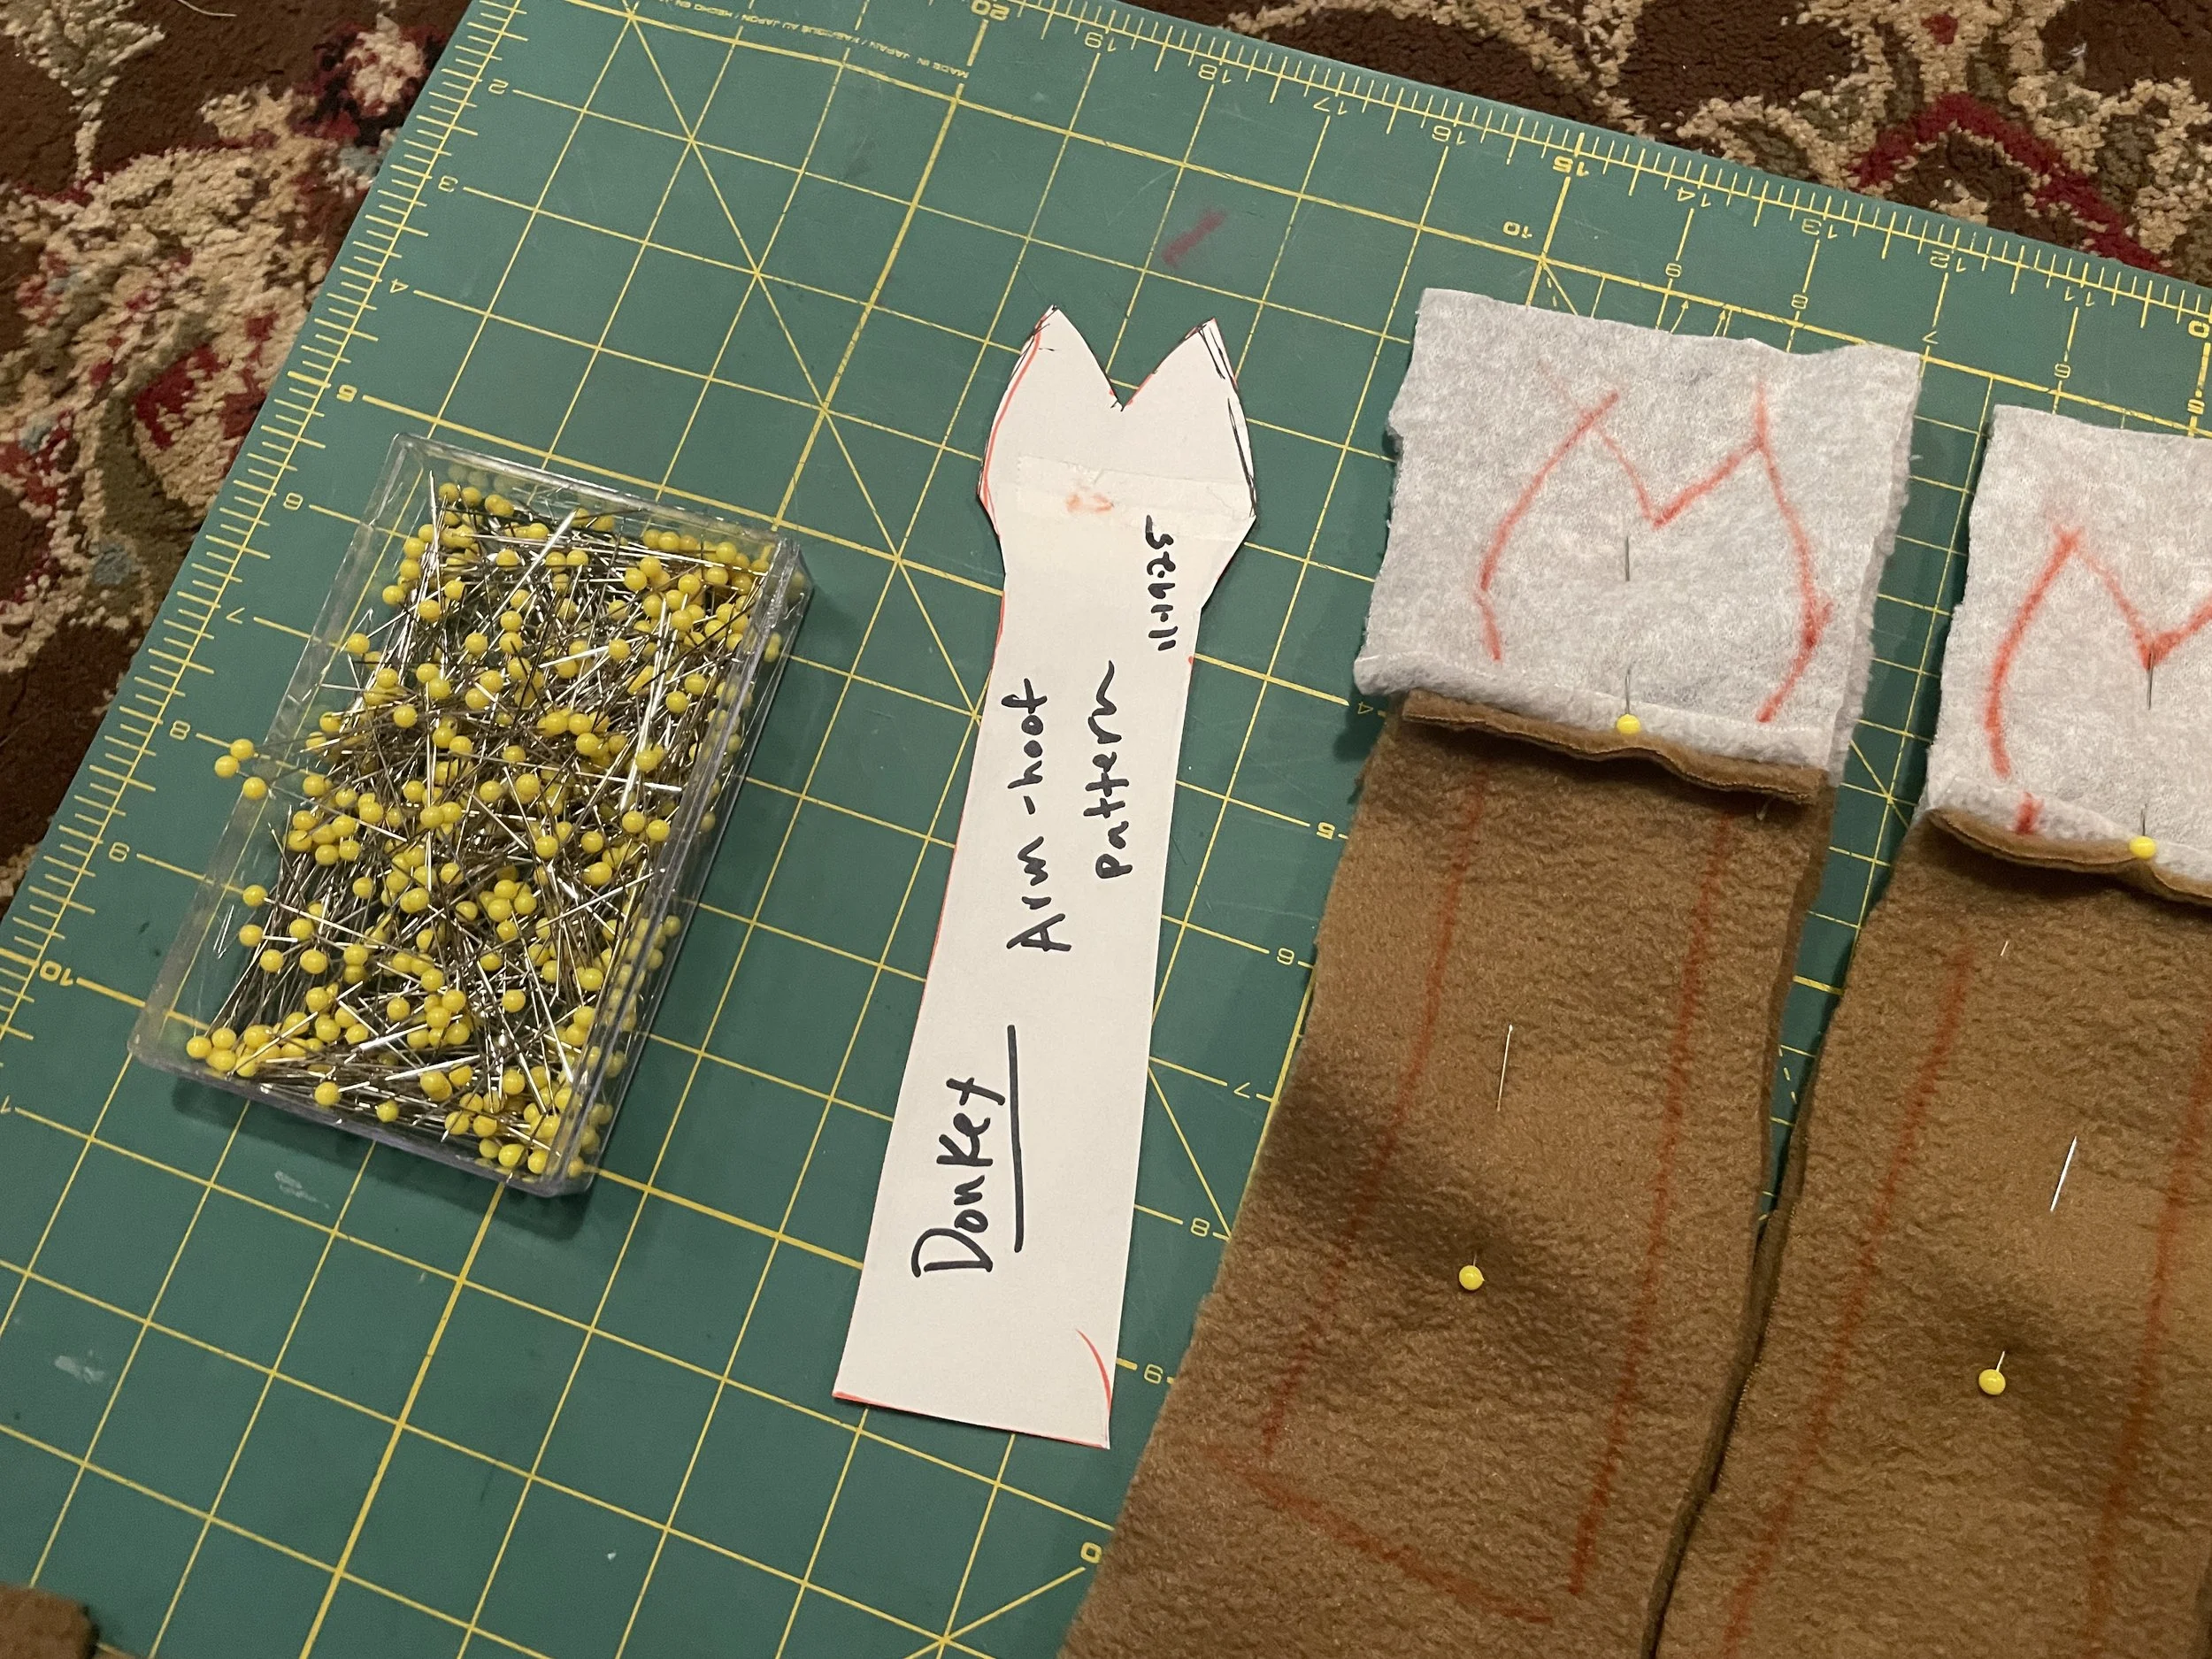
Step 7 – Make and Attach the Arms
Make the Arm Pieces
Place two layers of brown fleece together.
Pin the Arm pattern on top of the fleece.
Mark the outline of the pattern.
Sew around the arm shape, keeping the top (shoulder end) open.
Trim the seam allowance to about 8 mm.
Turn the arm right-side out using a pointed stick.
Attach the Arms to the Body
Try different arm positions and choose a natural placement on each side of the puppet.
Arms should sit just below the neck area.
Both arms should be placed evenly.
Pin each arm in place.
Hand-stitch across the open end of the arm using a strong whipstitch.
Make sure your stitches go through both the arm and the fleece body fabric for a secure attachment.
Optional: Add Arm Rods
Cut two rods (wooden dowels or thin PVC).
Insert the rod into the end of the arm.
Sew or tape the rod securely inside the arm so it does not slip out.
المواد
قماش فليس بني أو رمادي (الجسم الرئيسي)
قماش فليس رمادي (الخطم وبطانة الأذن)
كرتون أو كوروبلاست (لوحة الفم)
غراء حرفي (غراء أبيض أو غراء تماسي أو غراء بخاخ)
شريط لاصق (تيب لاصق ورقي)
خيط خياطة بلون مناسب للقماش
حشوة ألياف
قماش مسلين أو قطن لحشوة الرأس
قماش فيلت لبطانة الفم (أحمر أو أحمر غامق أو أسود)
عيون دمى نصف دائرية (حوالي 20 مم) ويمكن استخدام أزرار سوداء أو دوائر من الفيلت
الأدوات
ماكينة خياطة
دبابيس
قلم تعليم على القماش
مقص للقماش والكرتون
إبر للخياطة اليدوية
عود رفيع لقلب القماش
قطع الباترون
خطوات البناء
الخطوة 1 – صنع لوحة الفم
استخدم الباترون لقص لوحة الفم من الكرتون أو البلاستيك.
حدد خط المفصل واثنِ اللوحة.
الجزء القصير = الفك السفلي
الجزء الطويل = الفك العلوي
أزل شريطًا رفيعًا من الكرتون عند المفصل ليسهل الانحناء. عززه بالشريط اللاصق.
الصق الفيلت داخل الفم وقص الحواف.
الخطوة 2 – قص الشعر
اقطع مستطيلين من قماش الفليس البني باستخدام قالب الشعر.
اقطع شرائط عمودية مع ترك حافة للخياطة.
ضع القطع جانبًا لحين استخدامها.
الخطوة 3 – خياطة الجسم الرئيسي
تحقق من اتجاه تمدد القماش؛ يجب أن يلتف التمدد حول الدمية.
اطوِ القماش ودَبِّس الباترون مع مراعاة اتجاه التمدد.
حدد الباترون على الجهة الداخلية للقماش.
قص الشكل بشكل تقريبي واترك زيادة.
اخطُط خط الوسط الأمامي وخط الوسط الخلفي.
اترك فتحة في الأعلى لتركيب الشعر.
حدد وخِط البنسة في أعلى الرأس لتكوين شكل دائري.
قص قيمة الخياطة إلى حوالي 8 مم.
تركيب الشعر
ضع الشعر بين طبقتي خط الظهر.
اخطُط الشعر في مكانه.
الخطوة 4 – صنع الخطم
اطوِ قماش الفليس الرمادي وراعِ اتجاه التمدد.
دَبِّس القماش وحدد الباترون والعلامات.
قص الشكل بشكل تقريبي.
اخطُط خط الوسط الأمامي والخلفي.
اترك فتحة الفم وفتحة الرقبة دون خياطة.
اقلب الخطم إلى الوجه الصحيح.
أعد تحديد خطوط الخياطة إذا لزم الأمر.
قص قيمة الخياطة إلى حوالي 8 مم.
تركيب الخطم مع الجسم
اقلب الخطم للداخل وضعه داخل الجسم.
طابق خطوط الخياطة والعلامات.
دَبِّس جميع الحواف.
اخطُط الخطم مع الجسم.
الخطوة 5 – تركيب لوحة الفم
(هذه أصعب خطوة. اعمل ببطء.)
تأكد من أن الفيلت الداخلي ملتصق جيدًا.
حدد الخطوط والعلامات داخل لوحة الفم.
ثبّت قماش الخطم والجسم على لوحة الفم في أربع نقاط رئيسية:
الأعلى
الأسفل
الزاوية اليسرى
الزاوية اليمنى
ثبّت بقية الحواف واترك القماش مستويًا.
اخطُط لوحة الفم مع القماش:
يمكن استخدام ماكينة خياطة بسرعة بطيئة.
إذا كان الأمر صعبًا، استخدم الخياطة اليدوية.
أزل الدبابيس واقلب الدمية.
الخطوة 6 – صنع الأذنين وتركيبهما
ضع قماش الفليس البني فوق القماش الرمادي وثبّته.
حدد قالب الأذن.
اخطُط الحافة المنحنية واترك القاعدة مفتوحة.
اقلب الأذن إلى الوجه الصحيح.
ضع الأذن على الرأس:
خلف العينين قليلًا
على بعد بضعة سنتيمترات من الشعر
الموضع مرن ويعتمد على اختيار الصانع
اخطُط قاعدة الأذن بخياطة محكمة.
الخطوة 7 – صنع الذراعين وتركيبهما
صنع الذراعين
ضع طبقتين من قماش الفليس البني.
ثبّت قالب الذراع.
حدد خط الذراع.
اخطُط حول شكل الذراع واترك الفتحة العلوية.
قص قيمة الخياطة إلى 8 مم.
اقلب الذراع إلى الوجه الصحيح باستخدام عود.
تركيب الذراعين في الجسم
جرّب مواضع مختلفة للذراعين واختر موقعًا طبيعيًا.
يجب أن تكون الذراعان أسفل الرقبة.
يجب أن تكون الذراعان متساويتين.
ثبّت كل ذراع في مكانها.
اخطُط القاعدة بخياطة قوية.
تأكد من أن الغرز تثبت الذراع والجسم معًا.
اختياري: إضافة عصا للذراع
اقطع عصوين (خشب أو PVC رفيع).
أدخل العصا في نهاية الذراع.
اخطُط أو الصق العصا جيدًا من الداخل.